Panasonic SA-BX500 Operating Instructions - Page 30
Panasonic SA-BX500 Manual
 |
View all Panasonic SA-BX500 manuals
Add to My Manuals
Save this manual to your list of manuals |
Page 30 highlights
Remote controlling sound effects See pages 28 and 29 for information about each mode. Adjusting Dolby Pro Logic
-
 1
1 -
2
-
3
-
4
-
5
-
6
-
7
-
8
-
9
-
10
-
11
-
12
-
13
-
14
-
15
-
16
-
17
-
18
-
19
-
20
-
21
-
22
-
23
-
24
-
 25
25 -
 26
26 -
 27
27 -
 28
28 -
 29
29 -
 30
30 -
 31
31 -
 32
32 -
 33
33 -
 34
34 -
 35
35 -
36
-
37
-
38
-
39
-
40
-
41
-
42
-
43
-
44
-
45
-
46
-
47
-
48
-
49
-
50
-
51
-
52
-
53
-
54
-
55
-
56
-
57
-
58
-
59
-
60
 |
 |

30
RQT9223
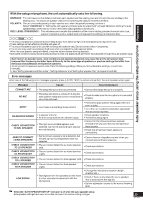
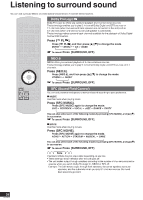
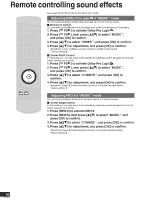
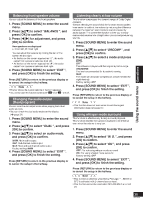
Remote controlling sound effects
See pages 28 and 29 for information about each mode.
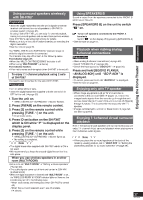
Adjusting Dolby Pro Logic
’s “
MUSIC
” mode
You can use the following modes when the input source is 2-channel stereo.
■
Dimension Control
You can make up for differences in the output level of the front and surround speakers.
1. Press [
PL
] to activate Dolby Pro Logic
.
2.
Press [
PL
], next press [
e
][
r
] to select “
MUSIC
”,
and press [OK] to confirm.
3.
Press [
e
][
r
] to select “
DIMEN
”, and press [OK] to confirm.
4.
Press [
e
][
r
] for adjustment, and press [OK] to confirm.
Adjustment range:
-3
(More surround sound) to
+3
(More front sound)
Factory setting:
0
■
Center Width Control
In this mode, you can play music more naturally by adjusting sounds assigned to front and
center speakers as a whole.
1.
Press [
PL
] to activate Dolby Pro Logic
.
2.
Press [
PL
], next press [
e
][
r
] to select “
MUSIC
”,
and press [OK] to confirm.
3.
Press [
e
][
r
] to select “
C-WIDTH
”, and press [OK] to
confirm.
4.
Press [
e
][
r
] for adjustment, and press [OK] to confirm.
Adjustment range:
0
(Center becomes clearer) to
7
(Center becomes wider)
Factory setting:
3
Adjusting NEO:6’s “
MUSIC
” mode
You can use the following mode when the input source is 2-channel stereo.
■
Center Image Control
In this mode, you can play music more naturally by adjusting sounds assigned to front and
center speakers as a whole.
1.
Press [NEO:6] to activate NEO:6.
2.
Press [NEO:6], next press [
e
][
r
] to select “
MUSIC
”, and
press [OK] to confirm.
3.
Press [
e
][
r
] to select “
C-IMAGE
”, and press [OK] to confirm.
4.
Press [
e
][
r
] for adjustment, and press [OK] to confirm.
Adjustment range:
0
(Center becomes clearer) to
5
(Center becomes wider)
Factory setting:
2
ENTER
SUB MENU
S
TV/VIDEO