Panasonic SA-BX500 Operating Instructions - Page 38
Panasonic SA-BX500 Manual
 |
View all Panasonic SA-BX500 manuals
Add to My Manuals
Save this manual to your list of manuals |
Page 38 highlights
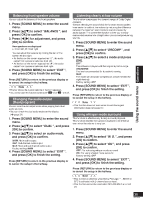
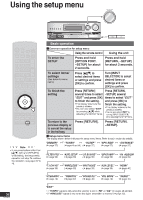
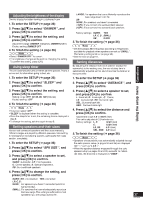
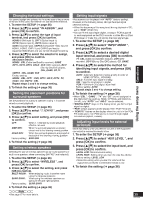
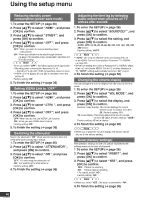
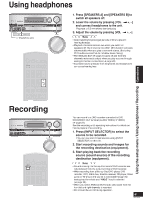
Using the setup menu Setting the lowpass filter If the speaker sizes (➔ page 37) are set to "SMALL ", make this setting. The unit cannot reproduce the entire bass range when speakers are set as "SMALL ". You can arrange the unit to provide missing bass sounds through the subwoofer by setting the lowpass filter frequency according to frequencies available for playback. Adjusting the high-frequency sound quality of the set frequency response You can adjust the high-frequency sound quality set for your preference. 1. To enter the SETUP (➔ page 36) 2. Press [e][r] to select "FILTER FRQ ", and press [OK] to confirm. 3. Press [e][r] to select the lowpass filter frequency, and press [OK] to confirm. Lowpass filter frequency for sending the bass range to the subwoofer: 40, 60, 80, 100, 120, 150, 200 (Hz) Factory setting: 80 (Hz) 1. To enter the SETUP (➔ page 36) 2. Press [e][r] to select "AUTO SETUP ", and press [OK] to confirm. 3. Press [e][r] to select "EQ ADJUST ", and press [OK] to confirm. 4. Press [e][r] to select the setting, and press [OK] to confirm. OFF : For not using a set frequency response. SOFT : High-frequency adjustment is rather small. NORMAL : High-frequency adjustment is medium. HARD : High-frequency adjustment is rather big. Factory setting: NORMAL 4. To finish the setting (➔ page 36) Note 5. To finish the setting (➔ page 36) • The setting made through these steps applies to all speakers set as "SMALL ". Making bi-wire setting Make sure to select "YES " when you connect the unit to biwire speakers. The speakers do not produce adequate sounds unless you make this setting. Changing auto speaker settings To return speakers to factory settings You can return settings made with the setup microphone to factory settings. (The "AUTO SPEAKER SETUP" indicator goes off when you perform this operation.) 1. To enter the SETUP (➔ page 36) 2. Press [e][r] to select "AUTO SETUP ", and press [OK] to confirm. 3. Press [e][r] to select "DEFAULT ", and press [OK] to confirm. 4. Press [e][r] to select "YES ", and press [OK] to confirm. YES : For returning to factory settings NO : For keeping auto settings Factory setting: NO • To cancel, select "NO ". 1. To enter the SETUP (➔ page 36) 2. Press [e][r] to select "LR BI-WIRE ", and press [OK] to confirm. 3. Press [e][r] to select "YES ", and press [OK] to confirm. YES : When bi-wire speakers are connected NO : When bi-wire speakers are not connected Factory setting: NO 4. To finish the setting (➔ page 36) Setting the speaker impedance 1. To enter the SETUP (➔ page 36) 2. Press [e][r] to select "SPKR IMP ", and press [OK] to confirm. 3. Press [e][r] to select "4 OHMS ", and press [OK] to confirm. 6 OHMS : When the speaker impedance is normal 4 OHMS : When the speaker impedance is low (4 Ω) Factory setting: 6 OHMS Make this setting when the speaker impedance is low (4 Ω). 5. To finish the setting (➔ page 36) Setting the unit against automatic polarity adjustment The unit judges polarity of certain properly connected speakers as opposite. When this happens, set the unit against automatic polarity adjustment and prevent polarity reversal. 1. To enter the SETUP (➔ page 36) 2. Press [e][r] to select "AUTO SETUP ", and press [OK] to confirm. 3. Press [e][r] to select "POLARITY ", and press [OK] to confirm. 4. Press [e][r] to select "CHECK NO ", and press [OK] to confirm. CHECK YES : Normal auto speaker setup CHECK NO : No automatic polarity adjustment Factory setting: CHECK YES 4. To finish the setting (➔ page 36) Note • If at least one speaker among connected speakers has the impedance of 4 Ω, set "4 OHMS ". 5. To finish the setting (➔ page 36) 38 RQT9223
-
 1
1 -
2
-
3
-
4
-
5
-
6
-
7
-
8
-
9
-
10
-
11
-
12
-
13
-
14
-
15
-
16
-
17
-
18
-
19
-
20
-
21
-
22
-
23
-
24
-
25
-
26
-
27
-
28
-
29
-
30
-
31
-
32
-
 33
33 -
 34
34 -
 35
35 -
 36
36 -
 37
37 -
 38
38 -
 39
39 -
 40
40 -
 41
41 -
 42
42 -
 43
43 -
44
-
45
-
46
-
47
-
48
-
49
-
50
-
51
-
52
-
53
-
54
-
55
-
56
-
57
-
58
-
59
-
60
 |
 |
