Panasonic SABT330 SABT230 User Guide - Page 10
STEP 1 : Preparing the speakers
 |
View all Panasonic SABT330 manuals
Add to My Manuals
Save this manual to your list of manuals |
Page 10 highlights
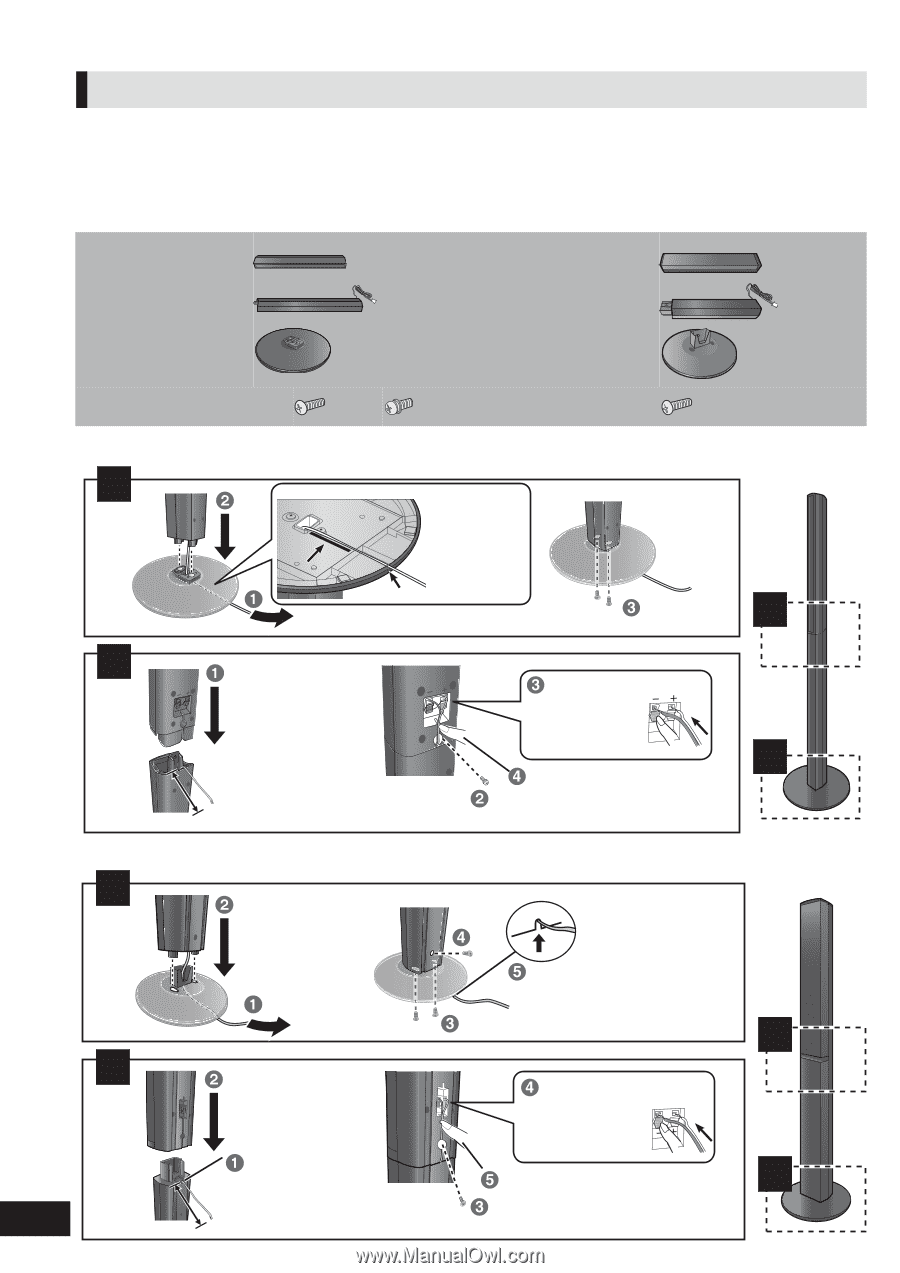
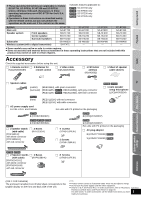
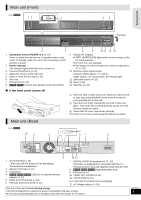
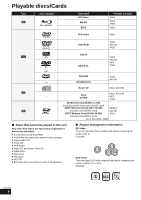
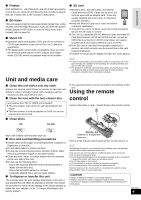
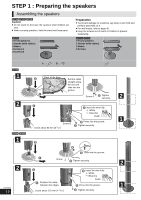
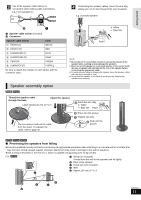
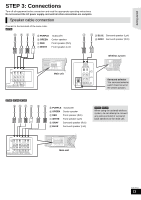
STEP 1 : Preparing the speakers Assembling the speakers [BT730] [BT330] [BT235] Caution ≥ Do not stand on the base. Be cautious when children are near. ≥ When carrying speakers, hold the stand and base parts. [BT730] 2 Front speakers 2 Stands (with cables) 2 Bases 4 Screws A 2 Screws B Preparation ≥ To prevent damage or scratches, lay down a soft cloth and perform assembly on it. ≥ For wall mount, refer to page 40. ≥ Keep the screws out of reach of children to prevent swallowing. [BT330] [BT235] 2 Front speakers 2 Stands (with cables) 2 Bases 8 Screws A B [BT730] 1 Back of the base Pull the cable straight along the line and slide into the groove. Screw A Tighten securely. 2 2 Insert the wire fully. r: White s: Blue line Push! 1 Press into the groove. Screw B Tighten securely. Leave about 80 mm (3 5/32q) [BT330] [BT235] 1 Slide into the groove. Screw Tighten securely. 2 2 Insert the wire fully. r: White s: Blue line Push! VQT2M13 10 Position the cable between the ridges. Press into the groove. 1 Leave about 120 mm (4 23/32q) Tighten securely.
-
 1
1 -
2
-
3
-
4
-
 5
5 -
 6
6 -
 7
7 -
 8
8 -
 9
9 -
 10
10 -
 11
11 -
 12
12 -
 13
13 -
 14
14 -
 15
15 -
16
-
17
-
18
-
19
-
20
-
21
-
22
-
23
-
24
-
25
-
26
-
27
-
28
-
29
-
30
-
31
-
32
-
33
-
34
-
35
-
36
-
37
-
38
-
39
-
40
-
41
-
42
-
43
-
44
-
45
-
46
-
47
-
48
-
49
-
50
-
51
-
52
 |
 |