Panasonic SABT330 SABT230 User Guide - Page 11
Speaker assembly option, Preventing the speakers from falling
 |
View all Panasonic SABT330 manuals
Add to My Manuals
Save this manual to your list of manuals |
Page 11 highlights
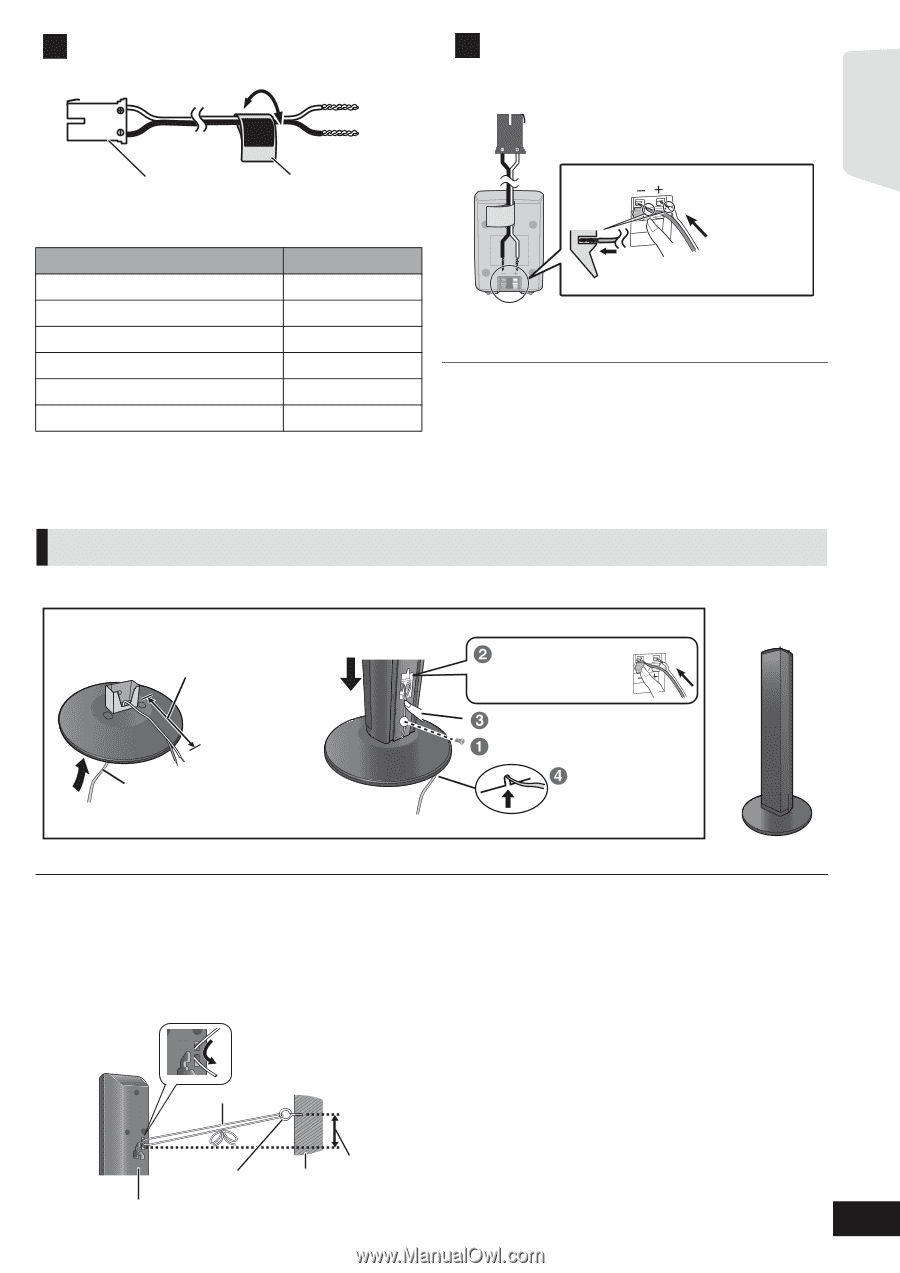
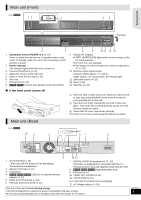
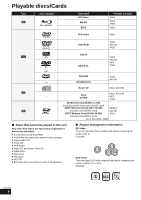
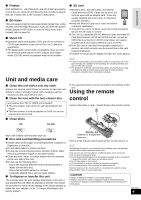
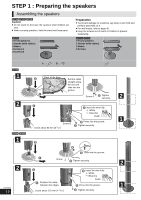
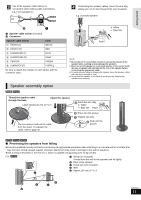
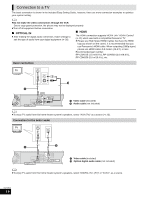
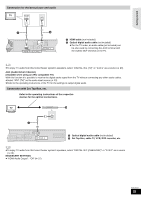
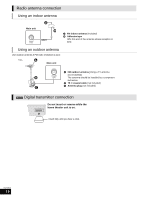
Getting started 3 Use of the speaker cable stickers is convenient when making cable connections. e.g. Front speaker (L) FRONT Lch A Speaker cable sticker (included) B Connector Speaker cable sticker Color 1 FRONT (L) WHITE 2 FRONT (R) RED 3 SURROUND (L) BLUE 4 SURROUND (R) GRAY 5 CENTER 6 SUBWOOFER GREEN PURPLE Be sure to match the number on each sticker with the connector color. 4 Connecting the speaker cables. Insert the wire fully, taking care not to insert beyond the wire insulation. e.g. Surround speaker r: White s: Blue line Push! ≥ Be careful not to cross (short-circuit) or reverse the polarity of the speaker wires as doing so may damage the speakers. ≥ Don't use a front speaker as a surround speaker or vice versa. Verify the type of speaker with the label on the rear of the speaker before connecting the appropriate cable. ≥ To avoid injury by falling or dropping the speaker, place the speaker cables with care not to stumble or hook. ≥ Do not hold the speaker in one hand to avoid injury by dropping the speaker when carrying. Speaker assembly option [BT330] [BT235] Thread the speaker cable through the base. Attach the speaker. Leave about 120 mm (4 23/32q) You can remove and use the cable from the stand. To reattach the cable, refer to page 40. Insert the wire fully. r: White s: Blue line Push! Press into the groove. Tighten securely. Slide into the groove. [BT730] [BT330] [BT235] ∫ Preventing the speakers from falling ≥Consult a qualified housing contractor concerning the appropriate procedure when attaching to a concrete wall or a surface that may not have strong enough support. Improper attachment may result in damage to the wall or speakers. ≥Use a string of less than ‰ 2.0 mm (3/32q), which is capable of supporting over 10 kg (22 lbs). e.g., [BT730] A String (not included) Thread from the wall to the speaker and tie tightly. B Rear of the speaker C Screw eye (not included) D Wall E Approx.150 mm (5 29/32q) VQT2M13 11
-
 1
1 -
2
-
3
-
4
-
5
-
 6
6 -
 7
7 -
 8
8 -
 9
9 -
 10
10 -
 11
11 -
 12
12 -
 13
13 -
 14
14 -
 15
15 -
 16
16 -
17
-
18
-
19
-
20
-
21
-
22
-
23
-
24
-
25
-
26
-
27
-
28
-
29
-
30
-
31
-
32
-
33
-
34
-
35
-
36
-
37
-
38
-
39
-
40
-
41
-
42
-
43
-
44
-
45
-
46
-
47
-
48
-
49
-
50
-
51
-
52
 |
 |