Pfaff Tiptronic 1151 Owner's Manual - Page 45
Knopflochnähen, Sewing, buttonholes, Achtung, Important - tipmatic
 |
View all Pfaff Tiptronic 1151 manuals
Add to My Manuals
Save this manual to your list of manuals |
Page 45 highlights
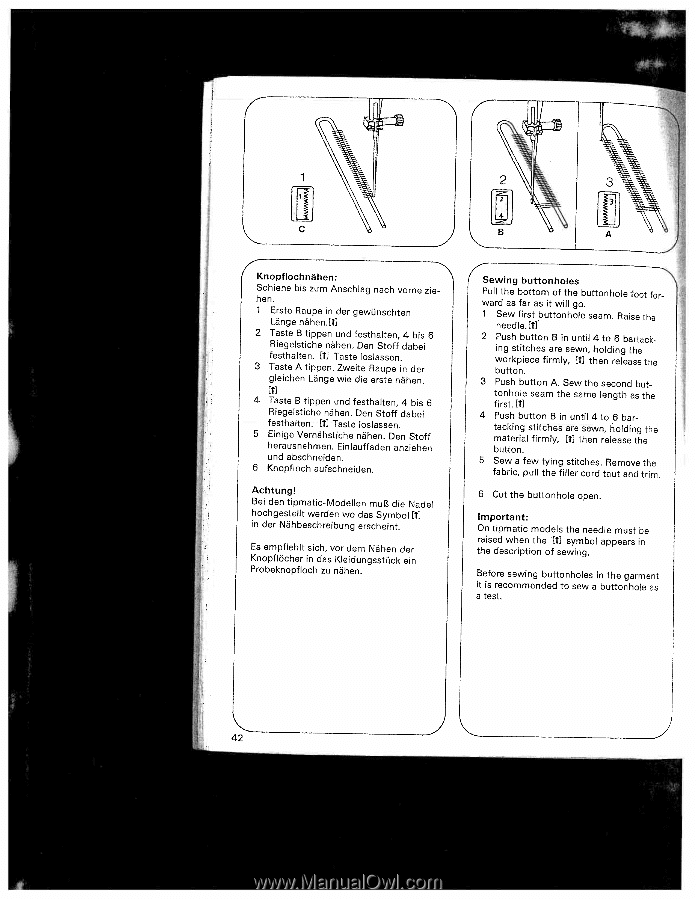
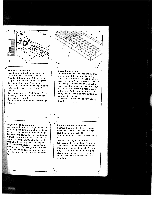
Knopflochnähen: Schiene bis zum Anschlag nach vorne zie hen. Erste Raupe in der gewünschten Lange nähen.W 2 Taste B tippen und festhalten, 4 bis 6 Riegeistiche nahen. Den Stoff dabel festhalten. Ct] Taste loslassen. 3 Taste A tippen. Zweite Raupe in der gleichen Lange wie die erste nähen. Ct] 4 Taste B tippen und festhalten, 4 bis 6 Riegeistiche nahen. Den Stoff dabei festhalten. Ct] Taste loslassen. 5 Elnige Vernahstiche nähen. Den Stoff herausnehmen. Einlauffaden anziehen und abschneiden. 6 Knopfloch aufschneiden. Achtung! Bel den tipmatic-Modellen muB die Nadel hochgestellt werden wo das Symbol Ct] in der Nâhbeschreibung erscheint. Es empfiehlt sich, vor dem Nahen der Knopflöcher in das Kleidungsstück em Probeknopfloch zu nahen. 4 Sewing buttonholes Pull the bottom of the buttonhole foot for ward as far as it will go. 1 Sew first buttonhole seam. Raise the needle. 1] 2 Push button B in until 4 to 6 bartack ng stitches are sewn, holding the workpiece firmly, [1] then release the button. 3 Push button A. Sew the second but tonhole seam the same length as the first. [1] 4 Push button B in until 4 to 6 bartacking stitches are sewn, holding the material firmly, [1] then release the button. 5 Sew a few tying stitches. Remove the fabric, pull the filler cord taut and trim. 6 Cut the buttonhole open. Important: On tipmatic models the needle must be raised when the Ct] symbol appears in the description of sewing. Before sewing buttonholes in the garment it is recommended to sew a buttonhole as a test. 42
-
 1
1 -
2
-
3
-
4
-
5
-
6
-
7
-
8
-
9
-
10
-
11
-
12
-
13
-
14
-
15
-
16
-
17
-
18
-
19
-
20
-
21
-
22
-
23
-
24
-
25
-
26
-
27
-
28
-
29
-
30
-
31
-
32
-
33
-
34
-
35
-
36
-
37
-
38
-
39
-
 40
40 -
 41
41 -
 42
42 -
 43
43 -
 44
44 -
 45
45 -
 46
46 -
 47
47 -
 48
48 -
 49
49 -
 50
50 -
51
-
52
-
53
-
54
-
55
-
56
-
57
-
58
-
59
-
60
-
61
-
62
-
63
-
64
-
65
-
66
-
67
-
68
-
69
-
70
-
71
-
72
-
73
-
74
-
75
-
76
-
77
-
78
-
79
-
80
-
81
-
82
-
83
-
84
-
85
-
86
-
87
-
88
-
89
-
90
 |
 |