Philips 42PFL7562D User Guide - Page 31
EXT1, EXT2, EXT3
 |
View all Philips 42PFL7562D manuals
Add to My Manuals
Save this manual to your list of manuals |
Page 31 highlights
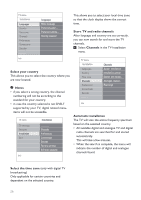
ENGLISH 6.7 Select your connections This allows you to select the peripheral equipment you have connected to the audio and video connectors. 1 Select Connections. 2 Press the π key. 3 Select the input to which the peripheral equipment is connected. • When you select Ext1, Ext2, Ext3, HDMI 1, HDMI 2, Side or Digital Audio In, a list appears which allows you to identify which type of peripheral equipment is attached to this input. 4 Press the π key again to enter the list of types of peripherals connected to the selected input. 5 Select the peripheral equipment with the o or œ key. TV menu Installation Time zone Channels Preferences Connections Decoder Factory reset Software upgrade Connections EXT1 EXT2 EXT3 HDMI 1 HDMI 2 Side Digital Audio In Info Digital Audio In If a peripheral equipment has a digital audio output, you can connect this with a single cable to the TV's digital audio in connector. In the Connections menu, assign the Digital Audio In to the corresponding external input to which your peripheral equipment is connected. In addition to accepting audio input via Digital Audio In, the TV can output encoded Dolby Digital audio via the DIGITAL AUDIO OUT connector to an external amplifier or receiver. If your amplifier or receiver has a matching connector for Digital Audio In, you can connect it with a single cable to the TV's DIGITAL AUDIO OUT. See 'To make video and audio connections', Connect a Home Cinema amplifier, p. 50. 6.8 Select a Decoder channel number This allows you to define one or more channel numbers as decoder channel numbers when a decoder or a descrambler is connected to ext1 or ext2. 1 Select the channel number under which you have stored the programme that comes from your decoder or descrambler. 2 Select Status. 3 Select the input used to connect your decoder: None, EXT1 or EXT2. • Select None if you do not want the selected channel number being activated as a decoder channel number. TV menu Installation Time zone Channels Preferences Connections Decoder Factory settings Software upgrade Info Decoder Channel Status 31
-
 1
1 -
2
-
3
-
4
-
5
-
6
-
7
-
8
-
9
-
10
-
11
-
12
-
13
-
14
-
15
-
16
-
17
-
18
-
19
-
20
-
21
-
22
-
23
-
24
-
25
-
 26
26 -
 27
27 -
 28
28 -
 29
29 -
 30
30 -
 31
31 -
 32
32 -
 33
33 -
 34
34 -
 35
35 -
 36
36 -
37
-
38
-
39
-
40
-
41
-
42
-
43
-
44
-
45
-
46
-
47
-
48
-
49
-
50
-
51
-
52
-
53
-
54
-
55
-
56
-
57
-
58
-
59
-
60
-
61
-
62
-
63
-
64
 |
 |
