Philips BDP5506/F7 User Manual - Page 26
How to Insert a Disc, 7. Basic Playback, 7.1. Playing Back a Disc
 |
View all Philips BDP5506/F7 manuals
Add to My Manuals
Save this manual to your list of manuals |
Page 26 highlights
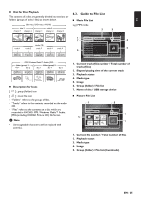
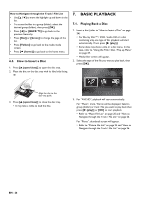
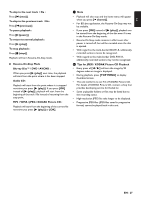
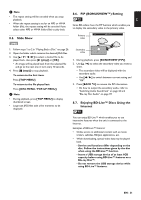
How to Navigate through the Track / File List • Use [K / L] to move the highlight up and down in the list. • To access the files in a group (folder), select the desired group (folder), then press [OK]. • Press [s] or [BACK U] to go back to the previous hierarchy. • Press [Red] or [Green] to change the page of the list. • Press [Yellow] to go back to the media mode screen. • Press [ (home)] to go back to the home menu. 6.3. How to Insert a Disc 1. Press [A (open/close)] to open the disc tray. 2. Place the disc on the disc tray with its label side facing up. 7. BASIC PLAYBACK 7.1. Playing Back a Disc 1. Insert a disc (refer to "How to Insert a Disc" on page 26). • For Blu-ray Disc™ / DVD / audio CD or a disc containing only one type of file, playback will start automatically. If not, press [B (play)]. • Some discs may show a title or a disc menu. In this case, refer to "Using the Title / Disc / Pop-up Menu" on page 29. • Media filter screen will appear. 2. Select the type of the file you want to play back, then press [OK]. Align the disc to the disc tray guide. 3. Press [A (open/close)] to close the disc tray. • It may take a while to load the disc. Music Photo AVCHD 3. For "AVCHD", playback will start automatically. For "Music", track / file list will be displayed. Select a group (folder) or track / file you want to play back then press [B (play)] or [OK] to start playback. • Refer to "Music File List" on page 25 and "How to Navigate through the Track / File List" on page 26. For "Photo", thumbnail screen will appear. • Refer to "Picture File List" on page 25 and "How to Navigate through the Track / File List" on page 26. EN - 26
-
 1
1 -
2
-
3
-
4
-
5
-
6
-
7
-
8
-
9
-
10
-
11
-
12
-
13
-
14
-
15
-
16
-
17
-
18
-
19
-
20
-
 21
21 -
 22
22 -
 23
23 -
 24
24 -
 25
25 -
 26
26 -
 27
27 -
 28
28 -
 29
29 -
 30
30 -
 31
31 -
32
-
33
-
34
-
35
-
36
-
37
-
38
-
39
-
40
-
41
-
42
-
43
-
44
-
45
-
46
-
47
-
48
-
49
-
50
-
51
-
52
-
53
-
54
-
55
-
56
-
57
-
58
-
59
-
60
-
61
-
62
-
63
-
64
-
65
-
66
-
67
-
68
 |
 |
