Pioneer PDP-503CMX Operating Instructions - Page 6
日本語 - new
 |
View all Pioneer PDP-503CMX manuals
Add to My Manuals
Save this manual to your list of manuals |
Page 6 highlights
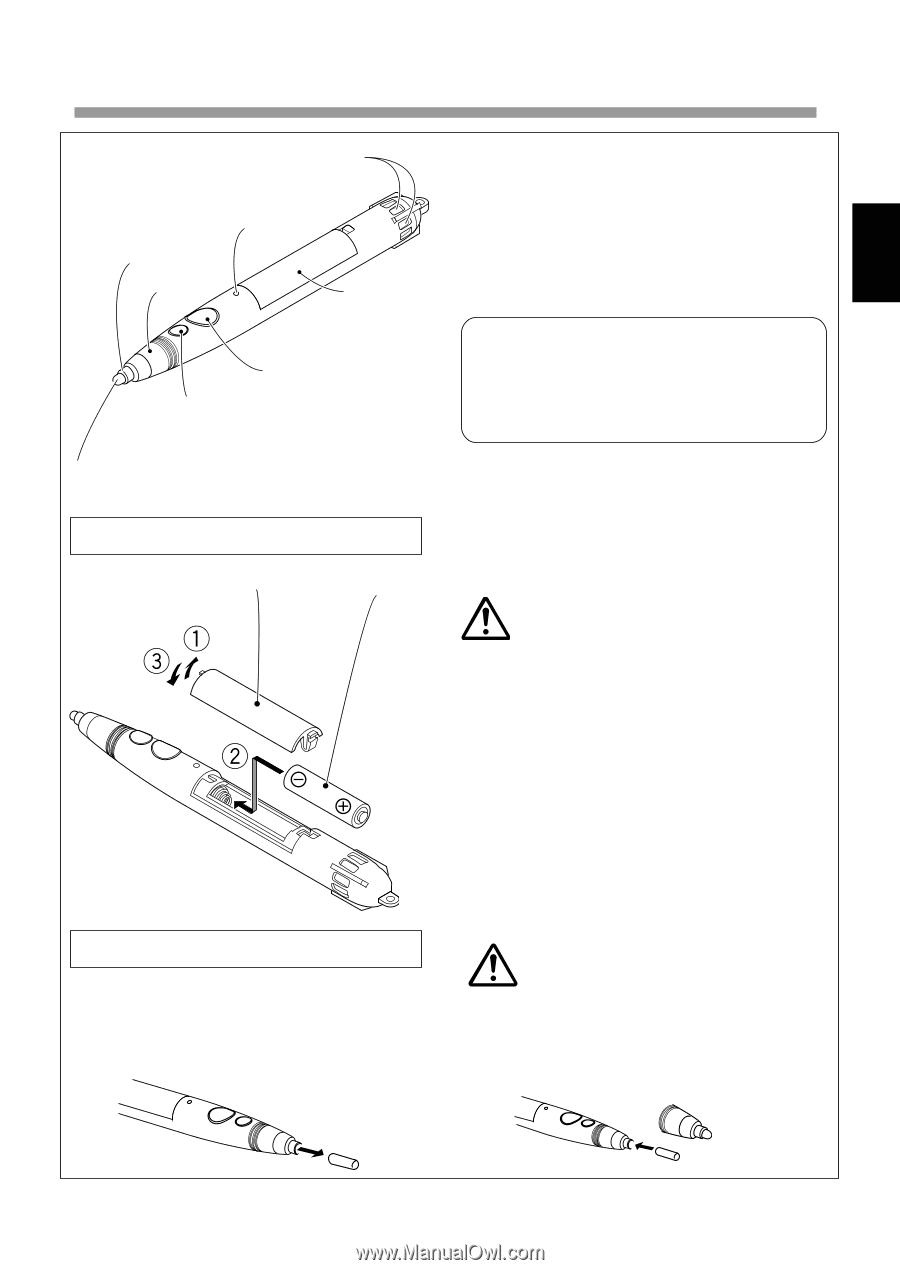
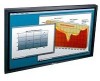
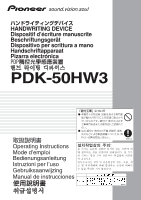
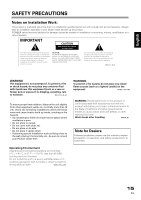
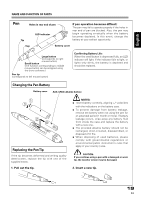
Chinese Español Nederlands Italiano Deutsch Français English NAME AND FUNCTION OF PARTS Pen Holes in rear end of pen LED indicator Tip If pen operation becomes difficult: The pen may fail to operate properly if the holes in rear end of pen are blocked. Also, the pen may begin operating erratically when the battery becomes depleted. In this event, change the battery at your earliest opportunity. Cap Battery cover Large button (corresponds to right mouse button) Small button (The function corresponding to middle mouse button can be assigned using the driver software.) Pen tip (corresponds to left mouse button) Confirming Battery Life: When the small button is depressed fully, an LED indicator will light. If the indicator fails to light, or lights only dimly, the battery is depleted and should be replaced. Changing the Pen Battery Battery cover AAA (LR03) alkaline battery Replacing the Pen Tip If the tip becomes deformed and writing quality deteriorates, replace the tip with one of the supplied extras. 1. Pull out the tip. NOTES: ÷ Insert battery correctly, aligning +/- polarities with the indications on the battery case. ÷ To prevent damage from battery leakage, remove the battery when not using the pen for an extended period (1 month or more). If battery leakage occurs, wipe away any battery fluid from inside the case and replace the battery with a new one. ÷ The provided alkaline battery should not be recharged, short-circuited, disassembled, or disposed of in fire. ÷ When disposing of used batteries, please comply with governmental regulations or environmental public instruction's rules that apply in your country / area. CAUTION: If you continue using a pen with a damaged or worn tip, the monitor screen may be damaged. 2. Insert a new tip. 19 En
-
 1
1 -
 2
2 -
 3
3 -
 4
4 -
 5
5 -
 6
6 -
 7
7 -
 8
8 -
 9
9 -
 10
10 -
 11
11 -
 12
12 -
13
-
14
-
15
-
16
-
17
-
18
-
19
-
20
-
21
-
22
-
23
-
24
-
25
-
26
-
27
-
28
-
29
-
30
-
31
-
32
-
33
-
34
-
35
-
36
-
37
-
38
-
39
-
40
-
41
-
42
-
43
-
44
-
45
-
46
-
47
-
48
-
49
-
50
-
51
-
52
-
53
-
54
-
55
-
56
-
57
-
58
-
59
-
60
-
61
-
62
-
63
-
64
-
65
-
66
-
67
-
68
-
69
-
70
-
71
-
72
-
73
-
74
-
75
-
76
-
77
-
78
-
79
-
80
-
81
-
82
-
83
-
84
-
85
-
86
-
87
-
88
-
89
-
90
-
91
-
92
-
93
-
94
-
95
-
96
-
97
-
98
-
99
 |
 |