Pioneer VSX-D814-K Installation Manual
Pioneer VSX-D814-K Manual
 |
View all Pioneer VSX-D814-K manuals
Add to My Manuals
Save this manual to your list of manuals |
Pioneer VSX-D814-K manual content summary:
- Pioneer VSX-D814-K | Installation Manual - Page 1
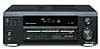
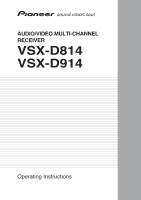
AUDIO/VIDEO MULTI-CHANNEL RECEIVER VSX-D814 VSX-D914 Operating Instructions - Pioneer VSX-D814-K | Installation Manual - Page 2
Thank you for buying this Pioneer product. Please read through these operating instructions so you will know how to operate your model properly. After you have finished reading the instructions, put them away in a safe place for future reference. If the socket outlets on the associated equipment - Pioneer VSX-D814-K | Installation Manual - Page 3
user to the presence of important operating and maintenance (servicing) instructions in the literature accompanying the appliance. D1-4-2-3_En READ INSTRUCTIONS - All the safety and operating instructions regard to proper grounding of the mast and supporting structure, grounding of the lead-in wire - Pioneer VSX-D814-K | Installation Manual - Page 4
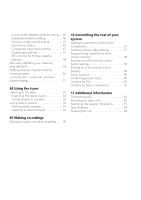
Operating range of remote control unit. . . . 7 02 5 minute guide Introduction to home theater 8 Listening to Surround Sound 9 Using the Quick Setup 12 03 Quick surround sound setup Automatically calibrating your listening area (MCACC 14 04 Connecting up Audio/Video cords 16 S-video cables 16 - Pioneer VSX-D814-K | Installation Manual - Page 5
Subwoofer distance setting 46 Dynamic range control setting 47 Dual mono setting 47 Component video input settings 47 Digital input settings 47 SR+ control for Pioneer plasma displays 48 Manually calibrating your listening area (MCACC 49 Setting separate channel levels for listening modes 50 - Pioneer VSX-D814-K | Installation Manual - Page 6
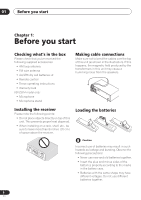
's in the box Please check that you've received the following supplied accessories: • AM loop antenna • FM wire antenna • AA/LR6 dry cell batteries x2 • Remote control • These operating instructions • Warranty Card VSX-D914 model only: • Microphone • Microphone stand Making cable connections Make - Pioneer VSX-D814-K | Installation Manual - Page 7
with governmental regulations or environmental public instruction's rules that apply in your country or area. Operating range of remote control unit The remote control may not work properly if: • There are obstacles between the remote control and the receiver's remote sensor. • Direct sunlight or - Pioneer VSX-D814-K | Installation Manual - Page 8
there'. This receiver will automatically decode Dolby Digital, DTS, or Dolby Surround DVD-Video discs, according to your speaker setup. In most cases, you won't have to make changes for realistic surround sound, but other possibilities (like listening to a CD with multi-channel surround sound) are - Pioneer VSX-D814-K | Installation Manual - Page 9
guide, you should have your system hooked up for surround sound in no time at all. In most cases, you can simply leave the receiver IN SUB WOOFER DVD PREOUT / LD IN S-VIDEO E A KA E IN R OUT SINGLE SEE INSTRUCTION MANUAL MONITOR A B IN PLAY S OUT R AUDIO L DVD IN / LD FRONT D V D - Pioneer VSX-D814-K | Installation Manual - Page 10
SUB WOOFER DVD PREOUT /LD IN S-VIDEO Y PB PR Y PB PR R R CENTER (T V / SAT)IN ø FRONT SURROUND PREOUT S R FRONT L P E A K A E R CENTER R SURROUND BACK L R SURROUND L SINGLE SEE INSTRUCTION MANUAL R FRONT L B IN PLAY S R AUDIO L AC OUTLET Powered Passive subwoofer - Pioneer VSX-D814-K | Installation Manual - Page 11
set the video input on your TV to this receiver. Check the manual that came with the TV if you don't know how to do this. Also make sure that DVD/LD is showing in the receiver's display, indicating that the DVD input is selected. If it isn't, press DVD on the remote control to set - Pioneer VSX-D814-K | Installation Manual - Page 12
controls for the steps below. VSX-D914 model only - Note that you don't have to make these settings if you use the automatic MCACC setup instead (in this case, go straight to the Quick surround sound setup on page 14). SPEAKERS SB CH MODE MULTI JOG TONE QUICK SETUP VIDEO INPUT S-VIDEO VIDEO - Pioneer VSX-D814-K | Installation Manual - Page 13
5 minute guide 02 6 Press ENTER. 7 Use the MULTI JOG dial to choose your listening position. You can cycle between the following choices: FWD MID BACK FWD - If you are nearer to the front - Pioneer VSX-D814-K | Installation Manual - Page 14
VSX-D914 model only Automatically calibrating your listening area (MCACC) The Multi-Channel Acoustic Calibration (MCACC) system measures the acoustic characteristics of your listening area, taking into account ambient noise, speaker size and distance, and tests for both channel delay and channel - Pioneer VSX-D814-K | Installation Manual - Page 15
in the display, there may be a problem with your mic or the speaker connections. Turn off the power, and check the problem indicated by the ERR message (see below MCACC by using CH SELECT (to check channel levels) or by going through the steps in Choosing your receiver setup on page 42 to check other - Pioneer VSX-D814-K | Installation Manual - Page 16
) to get clearer picture reproduction than regular video cords. Connect from an S-video jack on the rear of the receiver to an S-video jack on the video component you are hooking up. Be sure to insert completely. S VIDEO Digital audio coaxial cords/ Optical cables Commercially available digital - Pioneer VSX-D814-K | Installation Manual - Page 17
receiver). This receiver IN PLAY R AUDIO L VIDEO CENTER SUB WOOFER AM LOOP ANTENNA MONITOR OUT OUT CONTROL R L audio jacks as well. Make sure the RF demodulator digital in switch is set correctly (optical or coaxial depending on the connection). See the component's instruction manual - Pioneer VSX-D814-K | Installation Manual - Page 18
L SINGLE SEE INSTRUCTION MANUAL Connecting DVD 5.1 channel components If you prefer to use a seperate component for decoding DVDs, you can connect a decoder or a DVD player with multi-channel analog outputs to the multi-channel inputs of this receiver. Note that the multi-channel input can only - Pioneer VSX-D814-K | Installation Manual - Page 19
SURROUND BACK L R SURROUND L INPUT VIDEO SINGLE SEE INSTRUCTION MANUAL TV (monitor) Connecting to the front panel video terminal Front video connections are accessed via the front panel using the VIDEO button. There are standard audio/video jacks as well as an S-video jack and an optical input - Pioneer VSX-D814-K | Installation Manual - Page 20
/ TAPE / MD D V D 5.1CH INPUT IN IN PLAY R AUDIO L VIDEO AM LOOP ANTENNA MONITOR OUT OUT CONTROL IN OUT OUT DVR/ VCR IN MONITOR TV/ OUT SAT IN SUB WOOFER DVD PREOUT / AM loop antenna Assemble the antenna and connect to the receiver. Attach (if necessary) and face in the direction that - Pioneer VSX-D814-K | Installation Manual - Page 21
receiver / MD VIDEO CONTROL DVD 5.1CH INPUT IN OUT DVR/ VCR OUT VIDEO Y PB PR Y PB PR R R CENTER (T V / SAT)IN ø FRONT SURROUND PREOUT S R FRONT L P E A K A E R CENTER R SURROUND BACK L R SURROUND L SINGLE SEE INSTRUCTION MANUAL R FRONT L B IN PLAY S R AUDIO - Pioneer VSX-D814-K | Installation Manual - Page 22
A and B. A is the main system supporting the full speaker setup. If you switch on both A and B speaker systems, only the front speakers and the (active) subwoofer will be audible. No sound will come from the center, surround, or surround back speakers, but multi-channel sources will be down-mixed to - Pioneer VSX-D814-K | Installation Manual - Page 23
• Place the center speaker above or below the TV so that the sound of the center channel is localized at the TV screen. • If possible, place the surround speakers slightly above ear rear panel, this may cause the receiver to turn off automatically. 3-D view of 7.1 channel speaker setup 23 En - Pioneer VSX-D814-K | Installation Manual - Page 24
IN / TAPE / MD IN PLAY R AUDIO L VIDEO CONTROL IN OUT PB PR OSUATT) IN ø R R FRONT SURROUND CENTER PREOUT DVCRVRRR/OUND BACK L R SURROUND L IN R FRONT L MONITOR TV/ OUT SAT SINI N G L E SEE INSTRUCTION B SUB MANUAL WOOFER DVD PREOUT / LD IN S-VIDEO AC OUTLET ANALOG IN - Pioneer VSX-D814-K | Installation Manual - Page 25
point the remote controls of other Pioneer components at the receiver's remote sensor. The remote control signals are received by the remote sensor of this unit, and sent to the other devices via the CONTROL OUT terminal on the receiver. OUT CONTROL IN Receiver CONTROL IN OUT Remote control unit - Pioneer VSX-D814-K | Installation Manual - Page 26
be able to to control the receiver using the remote control if you switch the plasma display off. VIDEO INPUT 1 Pioneer plasma display VIDEO INPUT 2 DVD player Satellite receiver, etc DVD AUDIO IN STANDBY/ PHONES MULTI JOG TV/SAT AUDIO IN AUDIO/VIDEO MULTI-CHANNEL RECEIVER VSX-D914 TUNING - Pioneer VSX-D814-K | Installation Manual - Page 27
and displays 05 Chapter 5: Controls and displays Front panel 12 DVD/LD TV/SAT DVR/VCR VIDEO CD-R/ CD TAPE/MD TUNER AUX STANDBY/ON PHONES 34 5 6 AUDIO/VIDEO MULTI-CHANNEL RECEIVER VSX-D914 ENTER MULTI JOG MASTER VOLUME DOWN UP 8 7 9 10 11 12 13 14 15 16 17 STATION TUNING - Pioneer VSX-D814-K | Installation Manual - Page 28
controls, which you can then adjust with the MULTI JOG dial. 17 QUICK SETUP See Using the Quick Setup on page 12. 18 VIDEO INPUT See Connecting to the front panel video terminal on page 19. 19 DIGITAL IN See Connecting to the front panel video terminal on page 19. 20 MCACC SETUP MIC (VSX-D914 model - Pioneer VSX-D814-K | Installation Manual - Page 29
lights when a signal with surround back channel encoding is detected. DIGITAL Lights when a digital audio signal is detected. 2 DIGITAL Lights when controls and channel levels for the most accurate reproduction of a source. 7 MIDNIGHT Lights during Midnight listening. 8 SLEEP Lights when the receiver - Pioneer VSX-D814-K | Installation Manual - Page 30
Controls and displays 11 Character display 12 Neo:6 When the (STANDARD) NEO:6 mode of the receiver when a stereo FM broadcast is being received in auto stereo mode. MONO Lights when the button. TUNED Lights when a broadcast is being received. 16 Master volume level Shows the overall volume level - Pioneer VSX-D814-K | Installation Manual - Page 31
CH RETURN AUDIO SUBTITLE HDD DVD CH CH RECEIVER CONTROL STANDRAD ADV. SURR STEREO SLEEP MIDNIGHT/ LOUDNESS TEST TONE SHIFT CHSELECT LEVEL EFFECT RECEIVER 1 RECEIVER This switches between standby and on for this receiver. 2 INPUT SELECT Use to select the input source. 3 MULTI CONTROL buttons - Pioneer VSX-D814-K | Installation Manual - Page 32
menu of DVD-Video discs. It also displays TV and DTV menus. MCACC SETUP (Press RECEIVER first to access) Use to setup your speaker system using Multi-Channel Acoustic Calibration (MCACC) (page 49, VSX-D914 model only - page 14). TV CH +/- Use to select channels. 8 Component control buttons The main - Pioneer VSX-D814-K | Installation Manual - Page 33
See Selecting preset codes directly on page 57. LEARN (VSX-D914 model only) See Programming signals from other remote controls on page 58. DIRECT F See Direct function on page 60. ERASE (VSX-D914 model only) See Erasing one of the remote control button settings on page 59. RESET See Erasing all of - Pioneer VSX-D814-K | Installation Manual - Page 34
05 Controls and displays 13 RECEIVER Switches the remote to control the receiver (used to select the features above the number buttons (INPUT ATT, etc). Also use this button to set up surround sound (page 42, page 49, page 50). 14 MASTER VOLUME +/- Use to set the listening volume. 34 En - Pioneer VSX-D814-K | Installation Manual - Page 35
and the type of source you're listening to. If you connected surround back speakers, see also Using the Surround Back Channel (SB CH) on page 38. MPX CHRETURN AUDIO SUBTITLE HDD DVD CH CH RECEIVER CONTROL STANDRAD ADV.SURR STEREO SLEEP MIDNIGHT/ LOUDNESS TESTTONE SHIFT CHSELECT LEVEL EFFECT - Pioneer VSX-D814-K | Installation Manual - Page 36
• GAME - Useful when playing video games. It works especially well with - This can be selected to give multi-channel sound to a stereo source, using all AUDIO SUBTITLE HDD DVD CH CH RECEIVER CONTROL STANDRAD ADV.SURR STEREO SLEEP MIDNIGHT/ LOUDNESS TESTTONE SHIFT CHSELECT LEVEL EFFECT RECEIVER - Pioneer VSX-D814-K | Installation Manual - Page 37
, Loudness, or the Tone controls when DIRECT is selected, the receiver automatically switches to STEREO. Choosing For more details, refer to the instruction manual supplied with your DVD player. STATION SETUP MIC DIGITAL IN VIDEO INPUT S-VIDEO VIDEO L AUDIO R MULTI JOG • Press SIGNAL SELECT - Pioneer VSX-D814-K | Installation Manual - Page 38
the Surround Back Channel (SB CH) • Default setting: SB ON You can have the receiver automatically switch channel with DTS 96kHz/24 bit sources. Type of source SB CH MODE DTS-ES/Dolby Digital Matrix encoded multi-channel sources with 6.1 surround ON AUTO Dolby Digital/DTS encoded multi-channel - Pioneer VSX-D814-K | Installation Manual - Page 39
for which it was originally encoded. In this case you can have the receiver only apply this effect to 6.1 encoded sources like Dolby Digital EX or DTSES channel level when you're listening to the virtual surround back channel. Type of source DTS-ES/Dolby Digital Matrix encoded multi-channel - Pioneer VSX-D814-K | Installation Manual - Page 40
JOG TONE QUICK SETUP CACC UP MIC DIGITAL IN VIDEO INPUT S-VIDEO VIDEO L AUDIO R ENTER MULTI JOG MASTER VOLUME DOWN UP RECEIVER INPUT SELECT SOURCE DVD/LD TV/SAT DVR/VCR TVCONT MULTI CONTROL CD CD-R/TAPE TUNER RECEIVER 1 Turn on the power of the playback component. 2 Turn on the power - Pioneer VSX-D814-K | Installation Manual - Page 41
multi-channel inputs, use the SIGNAL SELECT button to select a different input signal. Using the sleep timer The sleep timer switches the receiver into standby after a specified amount of time so you can fall asleep without worrying about the receiver being left on all night. Use the remote control - Pioneer VSX-D814-K | Installation Manual - Page 42
MULTI CONTROL CD CD-R/TAPE TUNER RECEIVER INPUT ATT FL DIMMER +10 D.ACCESS TOP MENU SETUP SR DISC ENTER CLASS MENU DTV MENU T.EDIT ENTER MCACC SETUP BAND GUIDE TV CONTROL (page 45) Choose the attenuator level for the LFE channel. Front left speaker distance setting (page 45) Specify the - Pioneer VSX-D814-K | Installation Manual - Page 43
control your Pioneer plasma display. • Control mode setting • Volume control setting • Function setting for DVD input • Function setting for TV input • Function setting for DVR input • Function setting for VIDEO determines how much bass is sent from the receiver to the speakers. In the display, F, - Pioneer VSX-D814-K | Installation Manual - Page 44
subwoofer. • PLUS - The LFE channel and bass frequencies from all speakers are sent to the subwoofer (L speakers will also output bass). • NO - No bass frequencies are sent to the subwoofer. Surround back speaker setting • Default setting: S You must let the receiver know if surround back speaker - Pioneer VSX-D814-K | Installation Manual - Page 45
Setting up the receiver 07 We recommend setting this to 200 Hz if your S speakers speakers ( display). appears in the LFE attenuator setting • Default setting: 0 dB Dolby Digital and DTS audio sources include ultra-low bass tones. Set the LFE attenuator as necessary to prevent the ultra-low bass - Pioneer VSX-D814-K | Installation Manual - Page 46
07 Setting up the receiver • Use or to set the distance of the center speaker from the main listening position (within the range of 0.5 ft. to 45 ft.). • When C is - Pioneer VSX-D814-K | Installation Manual - Page 47
• Use or to set the dynamic range control (OFF, MAX, or MID). • When listening at low volumes, channel 1 and the right front speaker will play channel 2. • Use or to cycle through the possible dual mono settings. Lch1.Rch2 ch2 ch1 Component video input settings Here you tell the receiver - Pioneer VSX-D814-K | Installation Manual - Page 48
receiver with a Pioneer plasma display on page 26 and Using the SR+ mode with a Pioneer plasma display on page 51. Control mode DVD/LD function of the receiver with a numbered video input on the plasma display. For example, DVD:3 matches the DVD/LD input with video input 3 on the plasma display - Pioneer VSX-D814-K | Installation Manual - Page 49
. • VSX-D914 model only - The microphone provided with your system must be disconnected from the front panel to to use the MCACC manual setup. DVD/LD TV/SAT DVR/VCR TVCONT MULTI CONTROL CD CD-R/TAPE TUNER RECEIVER Manually calibrating your listening area (MCACC) You can also use the Multi-Channel - Pioneer VSX-D814-K | Installation Manual - Page 50
below. Using CH SELECT (see tip below), it is also possible to set separate channel levels for each of the listening modes. DVD/LD TV/SAT DVR/VCR TVCONT MULTI CONTROL CD CD-R/TAPE TUNER RECEIVER The test tone for channel delay is output in the same order as step 5: R C LS SW SB RS After - Pioneer VSX-D814-K | Installation Manual - Page 51
from each speaker when seated in the main listening position. The channel level range is ± 10 dB. 6 When you're done, press TEST TONE to turn off the test tone. The receiver returns to the Standard mode. Using the SR+ mode with a Pioneer plasma display When connected using an SR+ cable, a number of - Pioneer VSX-D814-K | Installation Manual - Page 52
is enabled separately; see SR+ control for Pioneer plasma displays on page 48. (You can also use the System Setup menu to switch the SR+ mode of the receiver.) • If you disconnect the SR+ cable or switch the plasma display off while SR+ is on, the receiver will automatically revert to SR+ OFF - Pioneer VSX-D814-K | Installation Manual - Page 53
search) and manual (step) MULTI CONTROL CD CD-R/TAPE TUNER RECEIVER Automatic tuning GUIDE TUNE TV CONTROL RETURN TV VOL INPUT SELECT TV CH VOL DTVON/OFF REC DTVINFO MUTE TUNER DISPLAY REC STOP MPX CHRETURN AUDIO SUBTITLE HDD DVD CH CH RECEIVER CONTROL buttons on the remote control. 1 Press - Pioneer VSX-D814-K | Installation Manual - Page 54
SETUP VIDEO INPUT S-VIDEO VIDEO L AUDIO R ENTER MULTI JOG MASTER VOLUME DOWN UP DVD/LD TV/SAT DVR/VCR TVCONT MULTI CONTROL CD CD-R/TAPE TUNER RECEIVER INPUT ATT FL DIMMER +10 D.ACCESS TOP MENU SETUP TUNE SR DISC ENTER CLASS MENU DTVMENU ST T.EDIT ENTER ST MCACC SETUP BAND GUIDE TUNE - Pioneer VSX-D814-K | Installation Manual - Page 55
can be up to four characters long. • Use the MULTI JOG dial (front panel) or the ST +/- buttons (remote) to select characters. • Press ENTER to confirm a switch the display between the name and the frequency. • If the receiver is left disconnected from the AC power outlet for an extended period, - Pioneer VSX-D814-K | Installation Manual - Page 56
how to do this. Most video recorders set the audio recording level automatically-check the component's instruction manual if you're unsure. 5 Start recording, then start playback of the source component. RECEIVER INPUT SELECT SOURCE DVD/LD TV/SAT DVR/VCR TVCONT MULTI CONTROL CD CD-R/TAPE TUNER - Pioneer VSX-D814-K | Installation Manual - Page 57
MCACC SETUP BAND GUIDE TV CONTROL RETURN TV VOL INPUT SELECT TV CH VOL 1 While pressing the RECEIVER button, press and hold the 1 button. The remote LCD display shows SETUP. 2 Press the MULTI CONTROL button for the component you want to control. The LCD on the remote displays the component - Pioneer VSX-D814-K | Installation Manual - Page 58
the LCD will display ERROR briefly and then display PRES KEY again. If this happens, keep pressing the (teaching) button as you vary the distance between the two remotes, until the LCD display shows OK. RECEIVER INPUT SELECT SOURCE DVD/LD TV/SAT DVR/VCR TVCONT MULTI CONTROL CD CD-R/TAPE TUNER - Pioneer VSX-D814-K | Installation Manual - Page 59
one of the remote control button settings VSX-D914 model only This erases one of the buttons you have programmed and restores the button to the factory default. 1 While pressing the RECEIVER button, press and hold the 1 button. The remote LCD display shows SETUP. 2 Press the the MULTI CONTROL button - Pioneer VSX-D814-K | Installation Manual - Page 60
done. Erasing all of the remote control presets This will erase all preset remote control preset codes and (VSX-D914 model only) programmed buttons. 1 While pressing the RECEIVER button, press and hold the 1 button. The remote LCD display shows SETUP. 2 Press any MULTI CONTROL button. 3 Use and to - Pioneer VSX-D814-K | Installation Manual - Page 61
the rest of your system 10 Controls for TVs This remote control can control components after entering the proper codes or teaching the receiver the commands (see Setting the remote to control other components on page 57 for more on this). Use the MULTI CONTROL buttons to select the component - Pioneer VSX-D814-K | Installation Manual - Page 62
Controls for other components This remote control can control these components after entering the proper codes or teaching the receiver the commands (see Setting the remote to control other components on page 57 for more on this). Use the MULTI CONTROL tracks. Go forward channels (channel +). CD/MD/ - Pioneer VSX-D814-K | Installation Manual - Page 63
. Cassette deck & Navigates DVD menu/options. ENTER DVD/DVR Player GUIDE Press to access the DVD player setup screen. DVD/DVR Player CH +/- Selects channels. VCR/DVD/DVR Player Selects tracks. CD/MD/CD-R/Cassette deck AUDIO Changes the audio language or channel. DVD/DVR Player 63 En - Pioneer VSX-D814-K | Installation Manual - Page 64
(s) Function SUBTITLE Displays/changes the subtitles on multilingual DVDs. HDD (SHIFT + CH-) Switches to the hard disk controls when using a DVD/HDD recorder. DVD (SHIFT + CH+) Switches to the DVD controls when using a DVD/ HDD recorder. Components DVD/DVR Player DVR Player DVR Player 64 En - Pioneer VSX-D814-K | Installation Manual - Page 65
the other components and electrical appliances being used. If the trouble cannot be rectified even after exercising the checks listed below, ask your nearest Pioneer authorized service center or your dealer to carry out repair work. Problem Remedy The power does not turn on. • Connect the power - Pioneer VSX-D814-K | Installation Manual - Page 66
Manually calibrating your listening area (MCACC) on page 49 or the (VSX-D914 model only) Quick surround sound setup on page 14 to check the speaker levels. • Refer to Using the Surround Back Channel (refer to page 37). • Refer to the instruction manual supplied with the DVD player. No sound is - Pioneer VSX-D814-K | Installation Manual - Page 67
Problem Can't operate the remote control. The display is dark or off. Remedy • Replace the batteries (refer to page 6). • Operate within 23 feet ( 7 m), 30° of the remote to use speakers with a 6Ω impedance rating. • With the receiver in standby, press STANDBY/ON while holding down the SPEAKERS - Pioneer VSX-D814-K | Installation Manual - Page 68
VSX-D914) / 100 watts (VSX-D814)* per channel, min., at 8 ohms, from 20 Hz to 20,000 Hz with no more than 0.2 %** total harmonic distortion (front). Continuous power output (stereo) VSX-D914 (Front 110 W (20-20,000 Hz, THD 0.2 %, 8 Ω) VSX-D814 TV/SAT 79 dB Video Section Input (Sensitivity/Impedance - Pioneer VSX-D814-K | Installation Manual - Page 69
: 70 dB (at 85 dBf) Distortion Stereo: 0.5 % (1 kHz) Alternate Channel Selectivity 60 dB (400 kHz) Stereo Separation 40 dB (1 kHz) Frequency Response Remote control 1 Warranty Card 1 Microphone (VSX-D914 model only 1 Microphone stand (VSX-D914 model only) . 1 These operating instructions - Pioneer VSX-D814-K | Installation Manual - Page 70
11 Additional information 70 En - Pioneer VSX-D814-K | Installation Manual - Page 71
ELECTRONICS OF CANADA, INC. 300 Allstate Parkway, Markham, Ontario L3R OP2, Canada TEL: (905) 479-4411 PIONEER EUROPE NV Haven 1087, Keetberglaan 1, B-9120 Melsele, Belgium TEL: 03/570.05.11 PIONEER ELECTRONICS ASIACENTRE PTE. LTD. 253 Alexandra Road, #04-01, Singapore 159936 TEL: 656-472-1111
-
 1
1 -
 2
2 -
 3
3 -
 4
4 -
 5
5 -
 6
6 -
 7
7 -
8
-
9
-
10
-
11
-
12
-
13
-
14
-
15
-
16
-
17
-
18
-
19
-
20
-
21
-
22
-
23
-
24
-
25
-
26
-
27
-
28
-
29
-
30
-
31
-
32
-
33
-
34
-
35
-
36
-
37
-
38
-
39
-
40
-
41
-
42
-
43
-
44
-
45
-
46
-
47
-
48
-
49
-
50
-
51
-
52
-
53
-
54
-
55
-
56
-
57
-
58
-
59
-
60
-
61
-
62
-
63
-
64
-
65
-
66
-
67
-
68
-
69
-
70
-
71
 |
 |
AUDIO/VIDEO MULTI-CHANNEL
RECEIVER
VSX-D814
VSX-D914
Operating Instructions