Pioneer VSX-D814-K Installation Manual - Page 51
Setting up the receiver, Using the SR+ mode with a, Pioneer plasma display
 |
View all Pioneer VSX-D814-K manuals
Add to My Manuals
Save this manual to your list of manuals |
Page 51 highlights
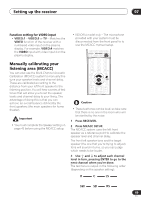
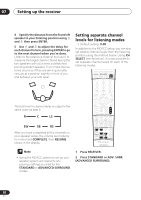
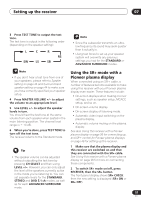
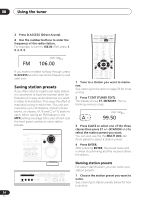
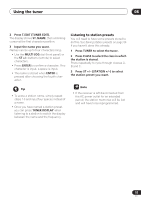
Setting up the receiver 07 3 Press TEST TONE to output the test tone. The test tone is output in the following order (depending on the speaker setting): L C SW LS R RS SB • Since the subwoofer transmits an ultralow frequency its sound may seem quieter than it actually is. • Using test tones to set up your speaker system will overwrite any previous settings you had for the STANDARD or ADVANCED SURROUND modes. • If you don't hear a test tone from one of your speakers, please refer to Speaker setting on page 43 and Surround back speaker setting on page 44 to make sure you have correctly specified your speaker setup. 4 Press MASTER VOLUME +/- to adjust the volume to an appropriate level. 5 Use LEVEL +/- to adjust the speaker levels in turn. You should hear the test tone at the same volume from each speaker when seated in the main listening position. The channel level range is ± 10 dB. 6 When you're done, press TEST TONE to turn off the test tone. The receiver returns to the Standard mode. Using the SR+ mode with a Pioneer plasma display When connected using an SR+ cable, a number of features become available to make using this receiver with your Pioneer plasma display even easier. These features include: • On-screen displays when making receiver settings, such as speaker setup, MCACC setup, and so on. • On-screen volume display. • On-screen display of listening mode. • Automatic video input switching on the plasma display. • Automatic volume muting on the plasma display. See also Using this receiver with a Pioneer plasma display on page 26 for connecting up, and SR+ control for Pioneer plasma displays on page 48 for setting up the receiver. • The speaker volume can be adjusted without outputting the test tone by pressing CH SELECT and then using LEVEL +/-. However, you can only adjust the level of the speakers currently active in the mode you're listening to. You can set separate levels for the STANDARD, STEREO and DVD 5.1 ch modes, as well as for each ADVANCED SURROUND mode. 1 Make sure that the plasma display and this receiver are switched on and that they are connected with the SR+ cable. See Using this receiver with a Pioneer plasma display on page 26 for more on connecting these components. 2 To switch SR+ mode on/off, press RECEIVER, then the SR+ button. The front panel display shows SR+ CHECK, then the new setting is displayed (SR+ ON or SR+ OFF). 51 En
-
 1
1 -
2
-
3
-
4
-
5
-
6
-
7
-
8
-
9
-
10
-
11
-
12
-
13
-
14
-
15
-
16
-
17
-
18
-
19
-
20
-
21
-
22
-
23
-
24
-
25
-
26
-
27
-
28
-
29
-
30
-
31
-
32
-
33
-
34
-
35
-
36
-
37
-
38
-
39
-
40
-
41
-
42
-
43
-
44
-
45
-
 46
46 -
 47
47 -
 48
48 -
 49
49 -
 50
50 -
 51
51 -
 52
52 -
 53
53 -
 54
54 -
 55
55 -
 56
56 -
57
-
58
-
59
-
60
-
61
-
62
-
63
-
64
-
65
-
66
-
67
-
68
-
69
-
70
-
71
 |
 |
