Pioneer XW-NAC3-K Operating Instructions - Page 29
Home Media Gallery - firmware
 |
View all Pioneer XW-NAC3-K manuals
Add to My Manuals
Save this manual to your list of manuals |
Page 29 highlights
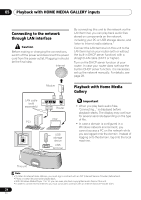
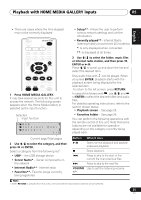
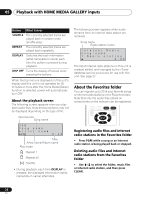
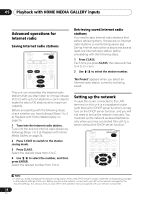
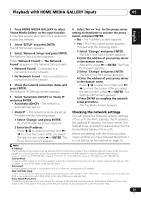
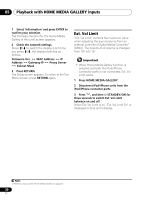
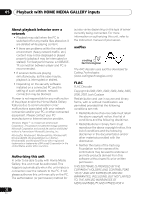
Playback with HOME MEDIA GALLERY inputs 05 English Français Español 1 Press HOME MEDIA GALLERY to select 'Home Media Gallery' as the input function. It may take several seconds for this receiver to access the network. 2 Select 'SETUP' and press ENTER. The SETUP screen appears. 3 Select 'Network Setup' and press ENTER. The Network Setup screen appears. Either 'Network Found' or 'No Network Found' appears on the Network Setup screen. • Network Found - Connected to a component on the network. • No Network Found - Not connected to a component on the network. 4 Check the network connection status and press ENTER. The Network IP Settings screen appears. 5 Select 'Automatic (DHCP) 'or 'Static IP' and press ENTER. • Automatic (DHCP) - The network is automatically set up. • Static IP1 - The network is manually set up. Proceed with the following steps. 1 Select 'Change' and press ENTER. The Edit IP address screen appears. 2 Enter the IP address. Press / to select a number and / to move the cursor. After you select the last number, press or ENTER. The Proxy Server screen appears. 6 Select 'No' or 'Yes' for the proxy server setting to deactivate or activate the proxy server, and press ENTER. • No - The Top Menu screen appears. • Yes - The Proxy Name screen appears. Proceed with the following steps. 1 Select 'Change' and press ENTER. The Edit Proxy Name screen appears. 2 Enter the address of your proxy server or the domain name. After entry, press or ENTER. The Proxy Port screen appears. 3 Select 'Change' and press ENTER. The Edit Proxy Port screen appears. 4 Enter the address of your proxy server or the domain name. Press / to select a number and / to move the cursor. After you select the last number, press or ENTER. The Settings OK? screen appears. 5 Press ENTER to complete the network setup procedure. The Top Menu screen appears. Checking the network settings You can check the following network settings of this unit: the MAC address, the IP address, the gateway IP address, the proxy server, the Subnet mask, and the firmware version (for the Home Media Gallery of this unit). Before proceeding with the following steps, check whether you have followed Steps from 1 to 2 at Setting up the network on page 28. Note 1 IP Address The IP address to be entered must be defined within the following ranges. If the IP address defined is beyond the following ranges, you cannot play back audio files stored on components on the network or listen to Internet radio stations. Class A: 10.0.0.1 to 10.255.255.254 / Class B: 172.16.0.1 to 172.31.255.254 / Class C: 192.168.0.1 to 192.168.255.254 Subnet Mask In case an xDSL modem or a terminal adapter is directly connected to this unit, enter the subnet mask provided by your ISP on paper. In most of the cases, enter 255.255.255.0. Gateway IP In case a gateway (router) is connected to this unit, enter the corresponding IP address. DNS (1st)/DNS (2nd) In case there is only one DNS server address provided by your ISP on paper, enter 'DNS (1st)'. In case there are more than two DNS server addresses, enter 'DNS (2nd)' in the other DNS server address field. Proxy Name/Proxy Port This setting is required when you connect this receiver to the Internet via a proxy server. Enter the IP address of your proxy server in the 'Proxy Name' field. Also, enter the port number of your proxy server in the 'Proxy Port' field. 29 En
-
 1
1 -
2
-
3
-
4
-
5
-
6
-
7
-
8
-
9
-
10
-
11
-
12
-
13
-
14
-
15
-
16
-
17
-
18
-
19
-
20
-
21
-
22
-
23
-
 24
24 -
 25
25 -
 26
26 -
 27
27 -
 28
28 -
 29
29 -
 30
30 -
 31
31 -
 32
32 -
 33
33 -
 34
34 -
35
-
36
-
37
-
38
-
39
-
40
-
41
-
42
-
43
-
44
-
45
-
46
-
47
-
48
-
49
-
50
-
51
-
52
-
53
-
54
-
55
-
56
-
57
-
58
-
59
-
60
-
61
-
62
-
63
-
64
-
65
-
66
-
67
-
68
-
69
-
70
-
71
-
72
-
73
-
74
-
75
-
76
-
77
-
78
-
79
-
80
-
81
-
82
-
83
-
84
-
85
-
86
-
87
-
88
-
89
 |
 |