ProForm 1000 Lt Treadmill English Manual - Page 12
Slide the Right Upright
 |
View all ProForm 1000 Lt Treadmill manuals
Add to My Manuals
Save this manual to your list of manuals |
Page 12 highlights
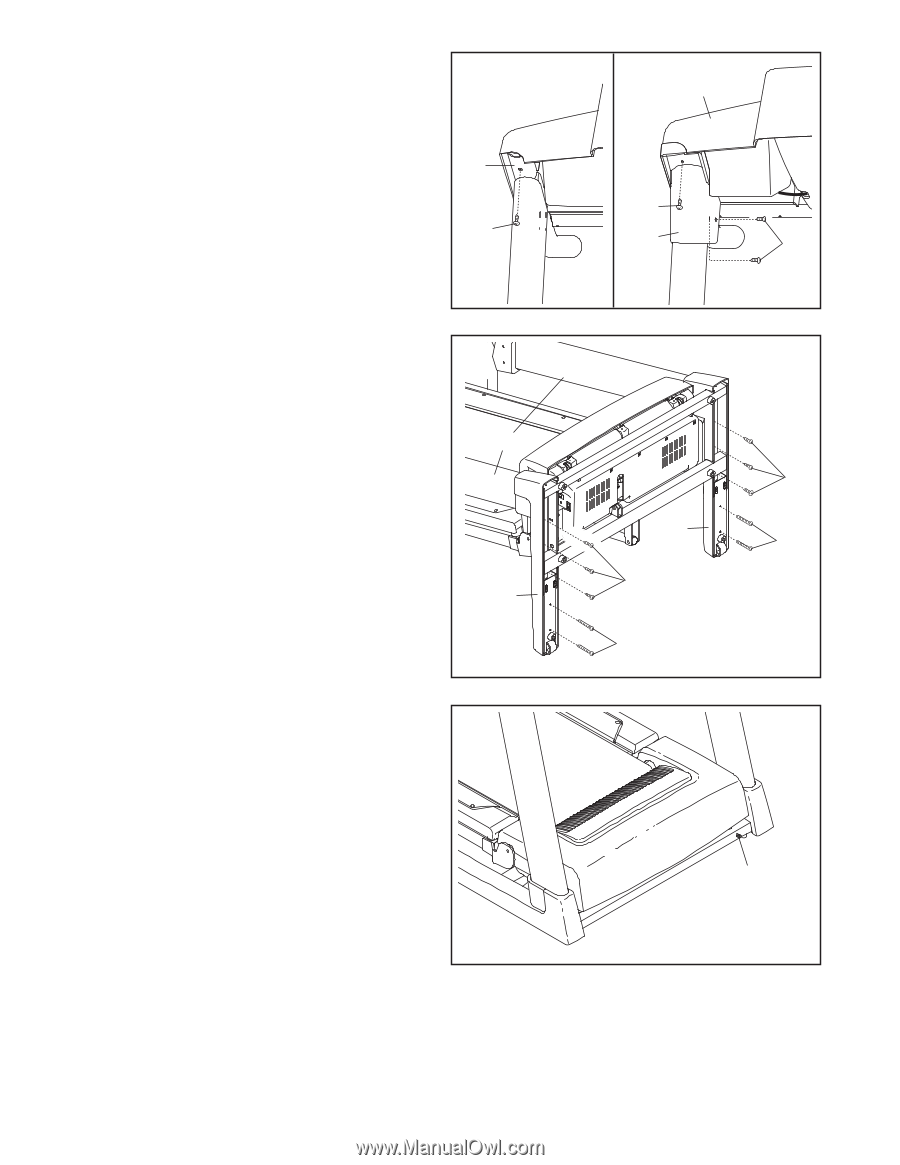
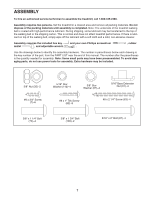
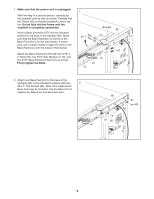
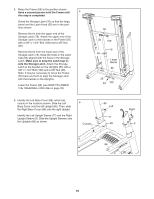
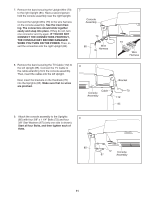
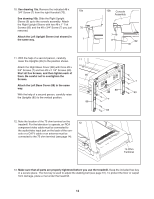
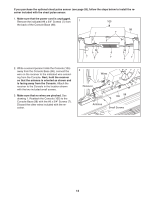
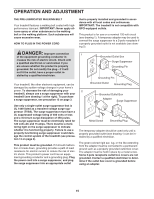
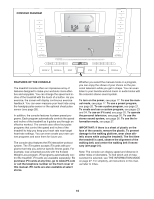
10. See drawing 10a. Remove the indicated #8 x 3/4" Screw (7) from the right Handrail (70). See drawing 10b. Slide the Right Upright Sleeve (9) up to the console assembly. Attach the Right Upright Sleeve with two #8 x 1" Tek Screws (82) and the #8 x 3/4" Screw (7) you just removed. Attach the Left Upright Sleeve (not shown) in the same way. 10a 70 7 11. With the help of a second person, carefully lower the Uprights (85) to the position shown. Attach the Right Base Cover (86) with three #8 x 3/4" Screws (7) and two #8 x 2 1/4" Screws (63). Start all five Screws, and then tighten each of them. Be careful not to overtighten the Screws. Attach the Left Base Cover (88) in the same way. With the help of a second person, carefully raise the Uprights (85) to the vertical position. 11 85 86 12. Note the location of the 75 ohm terminal on the treadmill. For the television to operate, an RCA 12 component video cable must be connected to the audio/video input jack on the back of the con- sole or a CATV cable or an antenna must be connected to the 75 ohm terminal (see page 14). 10b Console Assembly 7 9 82 7 88 63 7 63 75 Ohm Terminal 13. Make sure that all parts are properly tightened before you use the treadmill. Keep the included hex key in a secure place. The hex key is used to adjust the walking belt (see page 31). To protect the floor or carpet from damage, place a mat under the treadmill. 12
-
 1
1 -
2
-
3
-
4
-
5
-
6
-
 7
7 -
 8
8 -
 9
9 -
 10
10 -
 11
11 -
 12
12 -
 13
13 -
 14
14 -
 15
15 -
 16
16 -
 17
17 -
18
-
19
-
20
-
21
-
22
-
23
-
24
-
25
-
26
-
27
-
28
-
29
-
30
-
31
-
32
-
33
-
34
-
35
-
36
-
37
-
38
-
39
-
40
 |
 |