RCA DRC8052N User Guide - Page 17
Connection: DVD recorder + TV + Basic Cable Box +Audio, Receiver
 |
UPC - 840356939995
View all RCA DRC8052N manuals
Add to My Manuals
Save this manual to your list of manuals |
Page 17 highlights
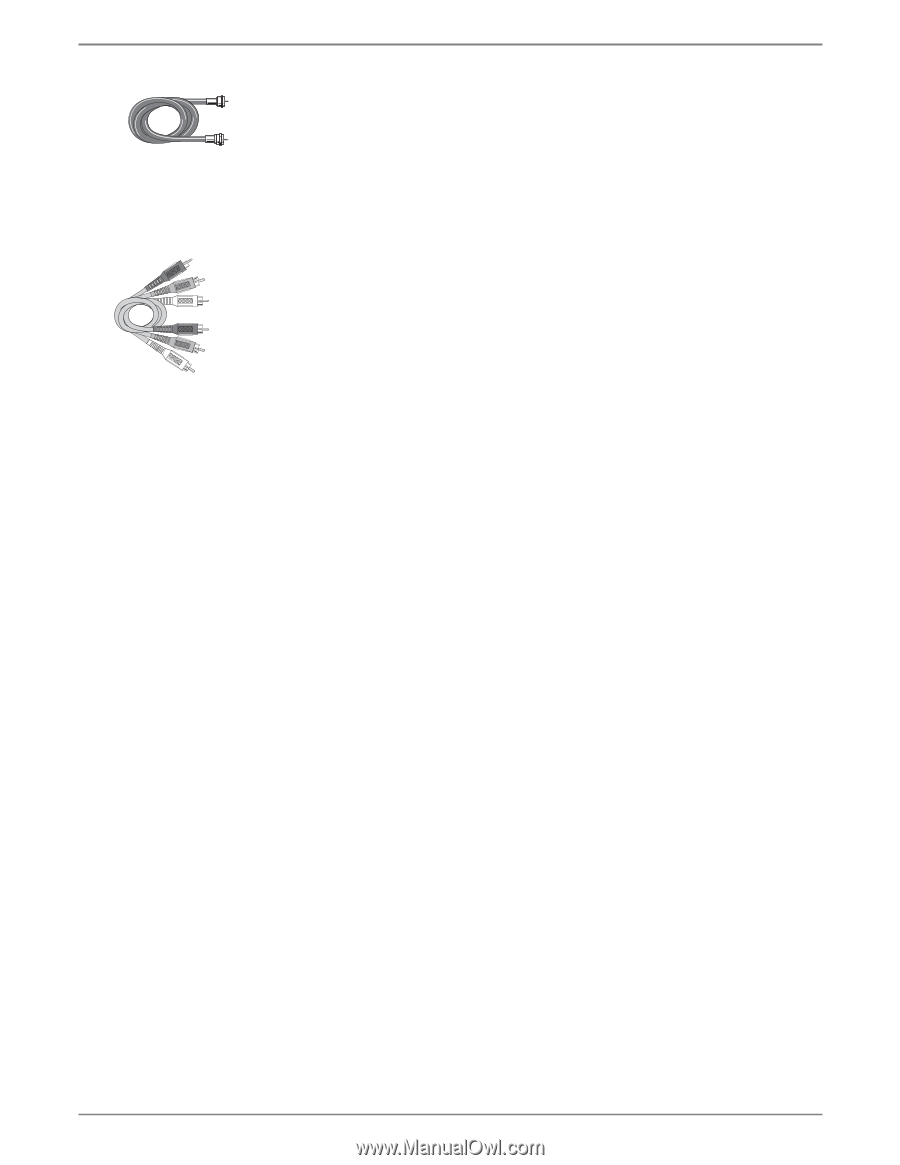
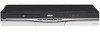
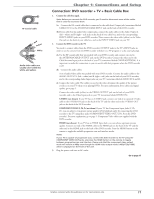
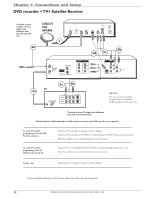
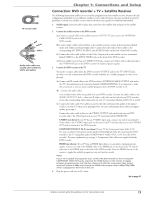
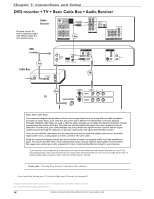
RF Coaxial cable Red Yellow White Audio video cables are usually color-coded red, white, and yellow. Chapter 1: Connections and Setup Connection: DVD recorder + TV + Basic Cable Box +Audio Receiver You'll need to consult instructions that came with your audio video receiver in order to connect it properly. The information below provides general guidelines for the DVD recorder's Audio Output Jacks. Both Dolby* Digital® and DTS® are audio formats used to record 5.1-channel audio signals onto the digital track of film (while the film is being made). Both of these formats provide up to six separate channels: left, right, center, left rear, right rear, and common subwoofer. The disc will play 5.1-channel sound only if you've connected a DTS or Dolby Digital receiver or decoder, and if the disc is encoded in the Dolby Digital or DTS format. Please Read This Before Using the DIGITAL AUDIO Jack! This unit's digital audio output jack is designed for a connection to a Dolby Digital or DTS receiver or decoder. Older digital equipment may not be compatible with the Dolby Digital bitstream. Such a connection can create a high level of noise that may be harmful to your ears, and could damage headphones or speakers. It is important to choose the correct Audio setting in the AV Output menu of the Setup menu. For more information, go to page 34. Additionally, the digital coaxial audio output jack can transfer either PCM or RAW bit stream to the audio receiver for decoding. If you're using DTS signal with PCM selected in the Audio menu, there won't be any analog or digital output. 1. Connect the cable box signal. Note: Before you connect the DVD recorder, you'll need to disconnect some of the cables first in order to reconnect them. 1a. Connect the RF coaxial cable that is connected to the cable box's Output jack (sometimes labeled CABLE OUT) to the ANTENNA/CABLE INPUT jack on the back of the DVD recorder. 1b.If your cable box has audio/video output jacks, connect the audio cables to the Audio Output L (left - white) and R (right - red) jacks on the back of your cable box, and to the corresponding AV IN L/R jacks on your DVD recorder. Then connect the video cable (yellow) to the Video Out jack on the back of your cable box, and to the AV IN VIDEO jack on your DVD recorder. 2. Connect the DVD recorder to the TV You need to connect cables from the DVD recorder's OUTPUT jacks to the TV's INPUT jacks in order to see the content from the DVD recorder (whether it's a TV program or a disc you're playing). 2a. Use the RF coaxial cable that was packed with your DVD recorder, and connect one end to the ANTENNA/CABLE OUTPUT jack on the DVD recorder. Connect the other end to the Cable/ Antenna Input jack on the back of your TV (sometimes labeled CABLE/ANTENNA). 2b. Connect the video cable. The cables you use for the video determine the quality of the picture you'll see on your TV when you're playing DVDs. For more information about cables and signal quality, go to page 5. Connect the video cable (yellow) to the VIDEO OUTPUT jack on the back of your DVD recorder, and to the Video Input jack on your TV (sometimes labeled VIDEO IN). S-VIDEO (not shown) If your TV has an S-VIDEO jack, connect one end of an optional S-Video cable to the S-VIDEO IN jack on the back of the TV and the other end to the S-VIDEO OUT jack on the back of the DVD recorder. COMPONENT VIDEO Y, Pb, Pr (not shown) If your TV has Component Input Jacks (Y, Pb, Pr), you can achieve even greater picture quality (DVD playback only) by connecting the DVD recorder to the TV using these jacks (COMPONENT VIDEO OUT, Y, Pb, Pr on the DVD recorder). For more explanation, go to page 5. Component Video cables not supplied with the DVD recorder. HDMI (not shown) If you TV has an HDMI Input Jack, you can achieve optimum picture quality. Connect one end of the HDMI cable to the HDMI jack on the back of the TV and the other end to the HDMI jack on the back of the DVD recorder. Press the HDMI button on the remote to toggle the available progressive scan and interlace modes. 3. Connect the DVD recorder to the Audio/Video Receiver. 3a. A set of audio/video cables was packed with your DVD recorder. Connect the audio cables to the AUDIO OUTPUT L (left - white) and R (right - red) jacks on the back of your DVD recorder, and to the corresponding Audio Input jacks on your audio/video receiver (sometimes labeled DVD, AUX, SAT or VCR IN L and R). continued on next page Graphics contained within this publication are for representation only. 15
-
 1
1 -
2
-
3
-
4
-
5
-
6
-
7
-
8
-
9
-
10
-
11
-
 12
12 -
 13
13 -
 14
14 -
 15
15 -
 16
16 -
 17
17 -
 18
18 -
 19
19 -
 20
20 -
 21
21 -
 22
22 -
23
-
24
-
25
-
26
-
27
-
28
-
29
-
30
-
31
-
32
-
33
-
34
-
35
-
36
-
37
-
38
-
39
-
40
-
41
-
42
-
43
-
44
-
45
-
46
 |
 |