RCA DRC8052N User Guide - Page 36
Schedule Menu Timer Recording
 |
UPC - 840356939995
View all RCA DRC8052N manuals
Add to My Manuals
Save this manual to your list of manuals |
Page 36 highlights
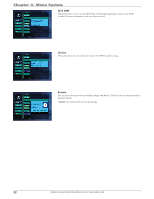
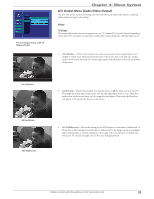
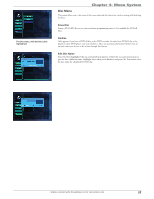
Chapter 4: Menu System Audio Digital Output Mode If you connected your DVD recorder to a receiver via the DIGITAL AUDIO OUT jack on the back of the player, choose the type of receiver (or decoder) signal you have. • PCM Provides converted CD-quality stereo. You would use this setting if you didn't have a DTS or Dolby Digital compatible receiver. • RAW Provides the original multi-channel digital audio signal for use with DTS or Dolby Digital compatible receivers. Note: If you're using a DTS or Dolby Digital receiver with the digital audio coaxial connection, make sure you set the Digital Output Mode to RAW, otherwise you won't hear any sound. Dynamic Range Control This feature allows you to even out the volume during playback. • On This setting cuts down the volume dynamics when you want to watch a program or movie at night without disturbing anyone. • Off Dynamic Range Control is off and the volume dynamics are set to normal. The TV Channel menu, with Auto Scan selected. TV Channel Menu You can scan all available channels and edit them in the TV Channel menu. Auto Scan Highlight the Auto Scan icon and press OK. Choose the type of signal you have (antenna or cable) and press OK. The unit searches for all available channels. • To add or remove channels from the channel list, highlight the Skip Item icon at the bottom of the screen and press OK. The Skip icon is added or removed from the channel in the channel list. If you remove a channel from the channel list, you can still access it by using the number buttons on the remote. • To exit at any time, highlight the Exit icon and press OK. Schedule Menu (Timer Recording) Timer recordings are explained in detail on page 23. The Schedule menu, with a timer recording schedule set up. 34 Graphics contained within this publication are for representation only.
-
 1
1 -
2
-
3
-
4
-
5
-
6
-
7
-
8
-
9
-
10
-
11
-
12
-
13
-
14
-
15
-
16
-
17
-
18
-
19
-
20
-
21
-
22
-
23
-
24
-
25
-
26
-
27
-
28
-
29
-
30
-
 31
31 -
 32
32 -
 33
33 -
 34
34 -
 35
35 -
 36
36 -
 37
37 -
 38
38 -
 39
39 -
 40
40 -
 41
41 -
42
-
43
-
44
-
45
-
46
 |
 |
