Reebok 1000 X Elliptical English Manual - Page 6
mm Patch Screws. - wheel
 |
View all Reebok 1000 X Elliptical manuals
Add to My Manuals
Save this manual to your list of manuals |
Page 6 highlights
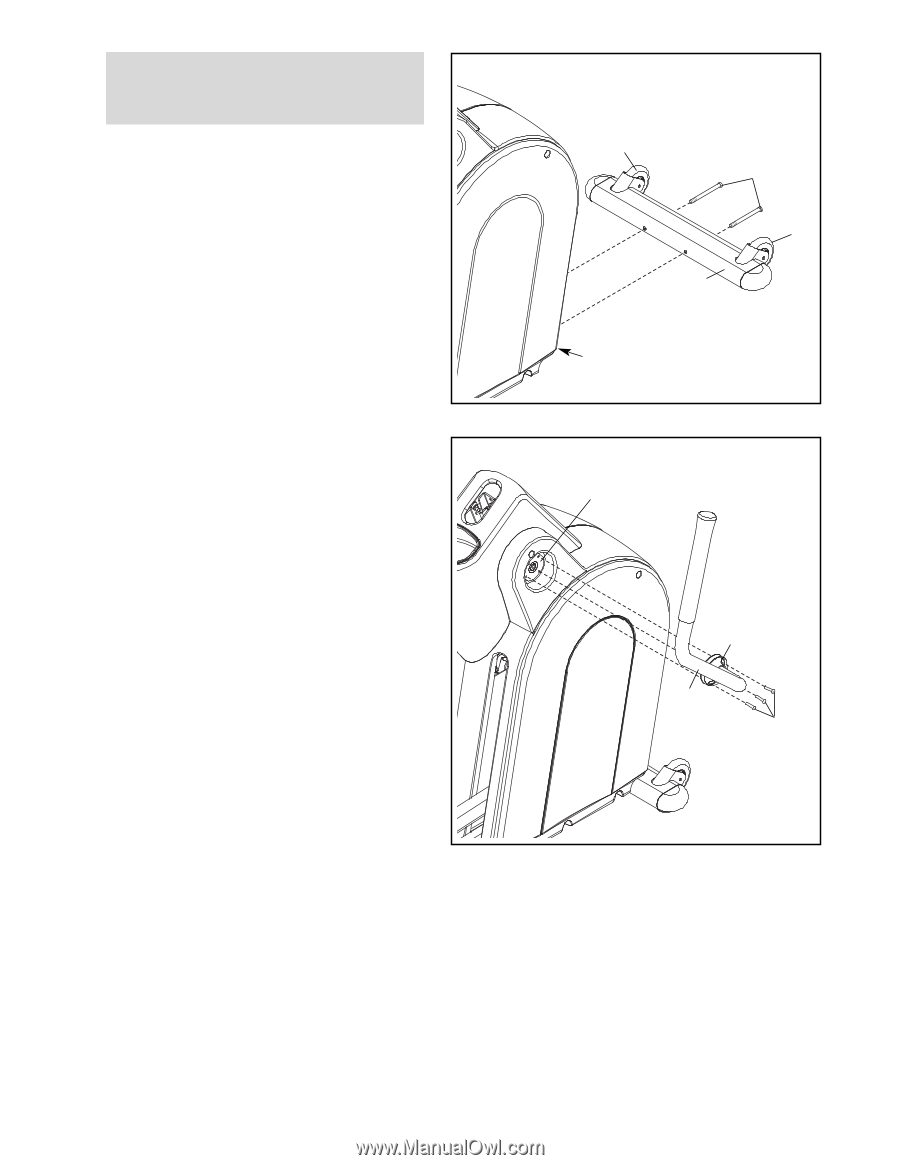
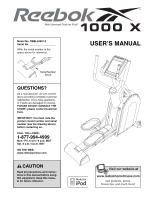
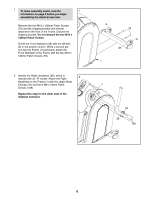
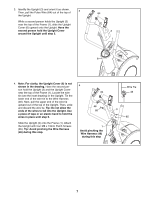
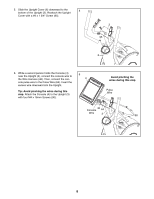
1. To make assembly easier, read the 1 information on page 5 before you begin assembling the elliptical exerciser. Remove the two M10 x 120mm Patch Screws (78) and the shipping bracket (not shown) attached to the front of the Frame. Discard the shipping bracket. Do not discard the two M10 x 120mm Patch Screws. Orient the Front Stabilizer (49) with the Wheels (8) in the position shown. While a second person tips the Frame (1) backward, attach the Front Stabilizer to the Frame with the two M10 x 120mm Patch Screws (78). 2. Identify the Right Handlebar (36), which is 2 marked with an "R" sticker. Attach the Right Handlebar to the Frame (1) with the Upper Body Endcap (34) and three M6 x 18mm Patch Screws (108). Repeat this step for the other side of the elliptical exerciser. 8 78 8 49 1 1 34 36 108 6
-
 1
1 -
 2
2 -
 3
3 -
 4
4 -
 5
5 -
 6
6 -
 7
7 -
 8
8 -
 9
9 -
 10
10 -
 11
11 -
 12
12 -
13
-
14
-
15
-
16
-
17
-
18
-
19
-
20
-
21
-
22
-
23
-
24
-
25
-
26
-
27
-
28
-
29
-
30
-
31
-
32
 |
 |