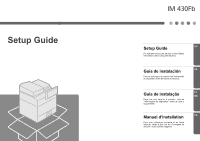
Ricoh IM 430F Setup Guide - Page 5
Retire a fita puxando-a na sua direção.
 |
View all Ricoh IM 430F manuals
Add to My Manuals
Save this manual to your list of manuals |
Page 5 highlights
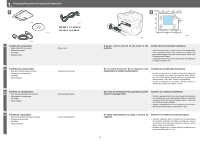
4 1 5 6 2 DVK254 DVK249 Press the front cover open button on the right side of the machine, and then open the front cover. Pull out the tape straight towards you. Toner adheres to the edge of the tape. Be careful not to touch it. Close the front cover. • An error occurs if you do not pull out the tape. Presione el botón de apertura de la tapa delantera situado en el lado derecho de la máquina y, a continuación, abra la tapa delantera. Tire de la cinta hacia usted. El tóner se adhiere al borde de la cinta. No lo toque. • Si no tira de la cinta para sacarla, se producirá un error. Cierre la tapa frontal. Pressione o botão de abertura da tampa frontal no lado direito do equipamento e, em seguida, abra a tampa frontal. Retire a fita puxando-a na sua direção. O toner adere à borda da fita. Tenha cuidado para não tocá-la. Feche a tampa frontal. • Se você não retirar a fita, ocorrerá um erro. Appuyez sur le bouton d'ouverture du capot avant situé sur la droite de l'appareil, puis ouvrez le capot avant. Tirez la bande adhésive vers vous. Du toner adhère sur le bord de la bande. Veillez à ne pas le toucher. Refermez le capot avant. • Si vous ne retirez pas la bande adhésive, une erreur se produira. 5 Setup/Configuración/Instalar/Configuration 7 1 1 DVK217 2 DVK210 Lift the exposure glass cover to remove the inner EN adhesive tapes (1) and the protective sheet (2). Levante la tapa del cristal de exposición para ES retirar las cintas adhesivas interiores (1) y la lámina de protección (2). Levante a tampa do vidro de exposição para PT remover as fitas adesivas internas (1) e a folha BR de proteção (2). Soulevez le capot de la vitre d'exposition pour FR retirer les bandes adhésives intérieures (1) et le film de protection (2).
-
 1
1 -
 2
2 -
 3
3 -
 4
4 -
 5
5 -
 6
6 -
 7
7 -
 8
8 -
 9
9 -
 10
10 -
 11
11 -
12
-
13
-
14
-
15
-
16
-
17
-
18
-
19
-
20
-
21
-
22
-
23
-
24
-
25
-
26
-
27
-
28
 |
 |
