Ridgid CA-100 Owners Manual - Page 10
Operating Instructions - form instructions
 |
View all Ridgid CA-100 manuals
Add to My Manuals
Save this manual to your list of manuals |
Page 10 highlights
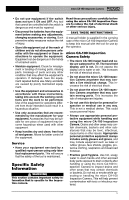
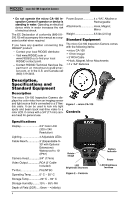
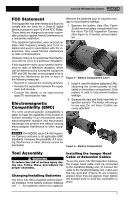
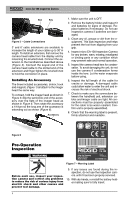
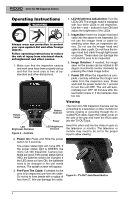
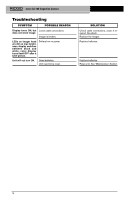
micro CA-100 Inspection Camera Operating Instructions WARNING Always wear eye protection to protect your eyes against dirt and other foreign objects. Follow operating instructions to reduce the risk of injury from electrical shock, entanglement and other causes. 1. Make sure that the inspection camera and work area have been properly set up and that the work area is free of bystanders and other distractions. 4. LED Brightness Adjustment: Turn the LEDs ON. The imager head is equipped with four white LEDs to aid inspection. Use the + and - buttons to turn ON and adjust the brightness of the LEDs. 5. Inspection: Insert the imager head and cable into the space to be inspected. Do not use the imager head or cable for anything other than an inspection device. Do not use the imager head and cable to clear a path. Do not force the imager head and cable through tight bends or spaces. These uses can damage the unit and the area to be inspected. 6. Image Rotation: If needed, the image seen on the screen can be rotated in 90 degree increments counter clockwise by pressing the rotate image button. 7. Power Off: When the inspection is complete, carefully withdraw the imager and cable from the inspection area. Press and Hold the power button for 1 second to turn the unit OFF. The unit will automatically turn OFF 30 minutes after the last button press or if the batteries drop too low. Viewing Rotate Image Battery Indicator Power The micro CA-100 Inspection Camera can be connected to a television or other monitor for remote viewing or recording through the included RCA cable. Open the rubber cover on the side of the grip and insert the RCA cable into the TV-OUT jack. LED Brightness Decrease Figure 8 - Controls LED Brightness Increase Insert the other end into the Video In jack on the television or monitor. The television or monitor may need to be set to the proper input to allow viewing. 2. Power On: Press and Hold the power button for 3 seconds. The power status light will come ON. If the power status light is GREEN, the micro CA-100 Inspection Camera batteries are good. If the power status light is RED, the batteries need to be changed. If the LED does not turn ON, the batteries need to be changed or the unit needs service. The splash screen will appear. 3. Pre-Form The Cable: If needed for the area to be inspected, pre-form the cable. Do not try to form bends with a radius of less than 2", this can damage the cable. Figure 9 - TV-OUT Jack/Reset Button 8
-
 1
1 -
2
-
3
-
4
-
 5
5 -
 6
6 -
 7
7 -
 8
8 -
 9
9 -
 10
10 -
 11
11 -
 12
12 -
 13
13 -
 14
14 -
 15
15 -
16
-
17
-
18
-
19
-
20
-
21
-
22
-
23
-
24
-
25
-
26
-
27
-
28
-
29
-
30
-
31
-
32
-
33
-
34
-
35
-
36
-
37
-
38
-
39
-
40
-
41
-
42
-
43
-
44
-
45
-
46
-
47
-
48
-
49
-
50
-
51
-
52
-
53
-
54
-
55
-
56
-
57
-
58
-
59
-
60
-
61
-
62
-
63
-
64
 |
 |