Ridgid KJ-3100 Owners Manual - Page 14
Jetting the Drain
 |
View all Ridgid KJ-3100 manuals
Add to My Manuals
Save this manual to your list of manuals |
Page 14 highlights
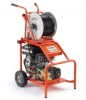
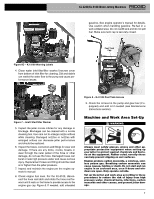
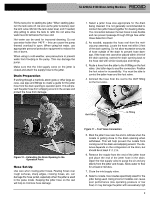
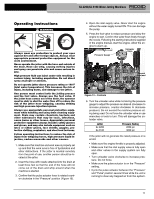
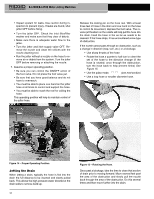
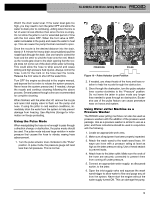
KJ-2200/KJ-3100 Water Jetting Machines • Inspect system for leaks. Use caution during inspection to prevent injury. If leaks are found, shut jetter OFF before fixing. • Turn the jetter OFF. Check the inlet filter/filter washer and make sure that they clear of debris. • Make sure there is adequate water flow to the jetter. • Turn the jetter and inlet supply valve OFF. Remove the nozzle and clean the orifices with the nozzle cleaning tool. • Run the jetter without a nozzle on the hose to remove air or debris from the system. Turn the jetter OFF before removing or attaching the nozzle. 7. Assume a proper operating position. • Be sure you can control the ON/OFF action of the foot valve. Do not press the foot valve yet. • Be sure that you have good balance and do not have to overreach. • You must be able to place one hand on the jetter hose at all times to control and support the hose. • You must be able to reach the reel for coiling the hose. This operating position will help to maintain control of the jetter hose. Release the locking pin on the hose reel. With at least three feet of hose in the drain and one hand on the hose to control its movement, depress the foot valve. The reverse jet thrusters on the nozzle will help pull the hose into the drain. Feed the hose in the as far as needs to be cleaned. If the hose stops, it has encountered some type of obstruction. If the nozzle cannot pass through an obstruction, such as a change in direction (trap, turn, etc.) or a blockage. • Use sharp thrusts of the hose • Rotate the hose a quarter to half turn to orient the set of the hose to the direction change (If the hose is rotated, once through the obstruction, turn the hose back to help prevent kinks) See Figure 15. • Use the pulse mode. (see next section) • Use a trap hose or smaller diameter hose. Figure 14 - Proper Operating Position Jetting the Drain When jetting a drain, typically the hose is fed into the drain the full distance to be cleaned and slowly pulled back. This allows the high pressure water directed at the drain walls to remove build-up. 12 Figure 15 - Rotating the Hose. Once past a blockage, take the time to clean that section of drain prior to moving forward. Move several feet past the area of the obstruction and slowly pull the nozzle back through the area of the obstruction. Do this several times and then move further into the drain.
-
 1
1 -
2
-
3
-
4
-
5
-
6
-
7
-
8
-
 9
9 -
 10
10 -
 11
11 -
 12
12 -
 13
13 -
 14
14 -
 15
15 -
 16
16 -
 17
17 -
 18
18 -
 19
19 -
20
-
21
-
22
-
23
-
24
-
25
-
26
-
27
-
28
-
29
-
30
-
31
-
32
-
33
-
34
-
35
-
36
-
37
-
38
-
39
-
40
-
41
-
42
-
43
-
44
-
45
-
46
-
47
-
48
-
49
-
50
-
51
-
52
-
53
-
54
-
55
-
56
-
57
-
58
-
59
-
60
 |
 |