Ridgid R4331 Operation Manual - Page 15
Adjusting Planing Depth, Ind-i-cut, Depth Gauge, Planing, Warning, Replaning Using Repeat-a-cut - planer
 |
View all Ridgid R4331 manuals
Add to My Manuals
Save this manual to your list of manuals |
Page 15 highlights
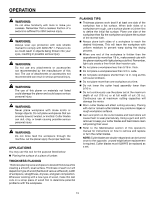
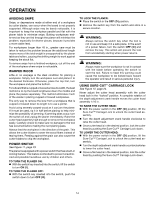
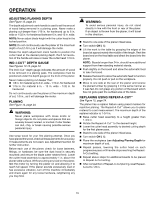
OPERATION adjusting planing depth See Figure 12, page 24. The depth adjustment crank handle is used to set the amount of wood being removed in a planing pass. Never make a planing cut deeper than 1/16 in. for hardwood up to 6 in. wide or 1/32 in. for hardwood between 6 in. and 13 in. wide. NOTE: Never adjust blade height with the cutter head in the locked position. NOTE: Do not continuously use the planer at the maximum depth of cut (1/8 in.) as it will damage the motor. Rotate the depth adjustment crank handle to position the cutter head at the desired planing depth. Each full revolution of the handle will raise or lower the cutter head 1/16 in. IND-I-CUT™ DEPTH Gauge See Figures 12-13, page 24. The Ind-I-Cut™ depth gauge indicates the amount of wood to be removed in a planing pass. The workpiece must be positioned under the depth gauge on the front of the planer. Never make a planing cut deeper than: 1/8 in. for material up to 6 in. wide - 1/16 in. for hardwood 1/16 in. for material 6 in. - 13 in. wide - 1/32 in. for hardwood Do not continuously use the planer at the maximum depth of cut, 1/8 in., as it will damage the motor. planing See Figure 14, page 24. WARNING: Never plane workpiece with loose knots or foreign objects. Do not plane workpieces that are severely bowed, twisted, or knotted. Cutter blades can dull, chip, or break causing possible serious personal injury. Use scrap wood for your first planing attempt. Once you have planed the wood, check all measurements for accuracy. If measurements are not exact, see Adjustment section for further instruction. Before each use of the planer, check for loose fasteners, fittings, or hardware; be sure the dust hood is securely mounted; and ensure the blade cutter rotates freely. Lower the cutter head assembly to approximately 1 in. above the planer table surface. Without putting any load on the planer, test the motor by turning the planer on and allowing it to reach full speed. If the planer sounds excessively loud or has excessive vibration, turn off the machine immediately and check again for any loose hardware, retightening any you may find. WARNING: To avoid serious personal injury, do not stand directly in line with the front or rear of the planer. If an object is thrown from the planer, it will travel in this direction. Stand to one side of the planer infeed area. Turn switch ON ( l ). Lift the work to the table by grasping the edges of the board at approximately the middle of the length. Rest the board end on the feed table and direct the board into the planer. NOTE: Boards longer than 24 in. should have additional support from free-standing material stands. Push slightly on the board and allow the automatic feed to take the board. Release the board to allow the automatic feed to function properly. Do not push or pull on the workpiece. Move to one side at the rear of the planer and receive the planed lumber by grasping it in the same manner as it was fed. Do not grasp any portion of the board which has not gone past the outfeed area of the table. REPLANING using repeat-a-cut™ See Figure 15, page 24. The planer has a replane feature using preset markers for repetitive planing. The Repeat-A-Cut™ allows you to plane material to a set measurement. The maximum depth of the replane indicator is 1-3/4 in. Raise cutter head assembly to a height greater than 1-3/4 in. Rotate the Repeat-A-Cut™ to the desired height. Lower the cutter head assembly to desired cutting depth for the first planer pass. Stand to one side of the planer infeed area. Turn switch ON ( l ). Plane the workpiece (see Adjusting Planing Depth for maximum depth of cut). Repeat passes, lowering the cutter head on each progressive pass until handle stops reaching the RepeatA-Cut setting. Repeat above steps for additional boards to be planed to Repeat-A-Cut setting. After competition of Repeat-A-Cut planing, reset RepeatA-Cut to 1/8 in. 15
-
 1
1 -
2
-
3
-
4
-
5
-
6
-
7
-
8
-
9
-
 10
10 -
 11
11 -
 12
12 -
 13
13 -
 14
14 -
 15
15 -
 16
16 -
 17
17 -
 18
18 -
 19
19 -
 20
20 -
21
-
22
-
23
-
24
-
25
-
26
-
27
-
28
-
29
-
30
-
31
-
32
-
33
-
34
-
35
-
36
-
37
-
38
-
39
-
40
-
41
-
42
-
43
-
44
-
45
-
46
-
47
-
48
-
49
-
50
-
51
-
52
-
53
-
54
-
55
-
56
-
57
-
58
-
59
-
60
-
61
-
62
-
63
-
64
 |
 |