Ryobi RTS23 User Manual 5 - Page 21
To Store The Table Saw Accessories, To Install Dust Bag
 |
View all Ryobi RTS23 manuals
Add to My Manuals
Save this manual to your list of manuals |
Page 21 highlights
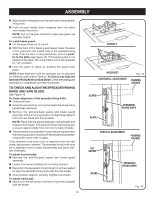
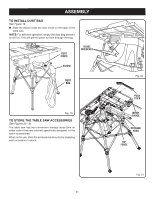
ASSEMBLY TO INSTALL DUST BAG See Figure 19. Slide the elbow inside the dust chute on the back of the table saw. NOTE: For efficient operation, empty the dust bag before it is half full. This will permit better air flow through the bag. DUST CHUTE BLADE WRENCHES ELBOW DUST BAG Fig. 19 TO STORE THE TABLE SAW ACCESSORIES See Figures 20 - 21. The table saw has two convenient storage areas (one on either side of the saw cabinet) specifically designed for the saw's accessories. When not in use, store the accessories securely by snapping each accessory in place. Fig. 20 PUSH STICK MITER GAUGE STORAGE HOOK RIP FENCE Fig. 21 21
-
 1
1 -
2
-
3
-
4
-
5
-
6
-
7
-
8
-
9
-
10
-
11
-
12
-
13
-
14
-
15
-
 16
16 -
 17
17 -
 18
18 -
 19
19 -
 20
20 -
 21
21 -
 22
22 -
 23
23 -
 24
24 -
 25
25 -
 26
26 -
27
-
28
-
29
-
30
-
31
-
32
-
33
-
34
-
35
-
36
-
37
-
38
-
39
-
40
-
41
-
42
 |
 |
21
ASSEMBLY
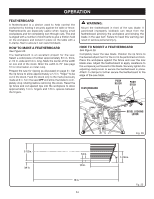
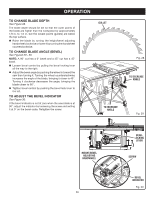
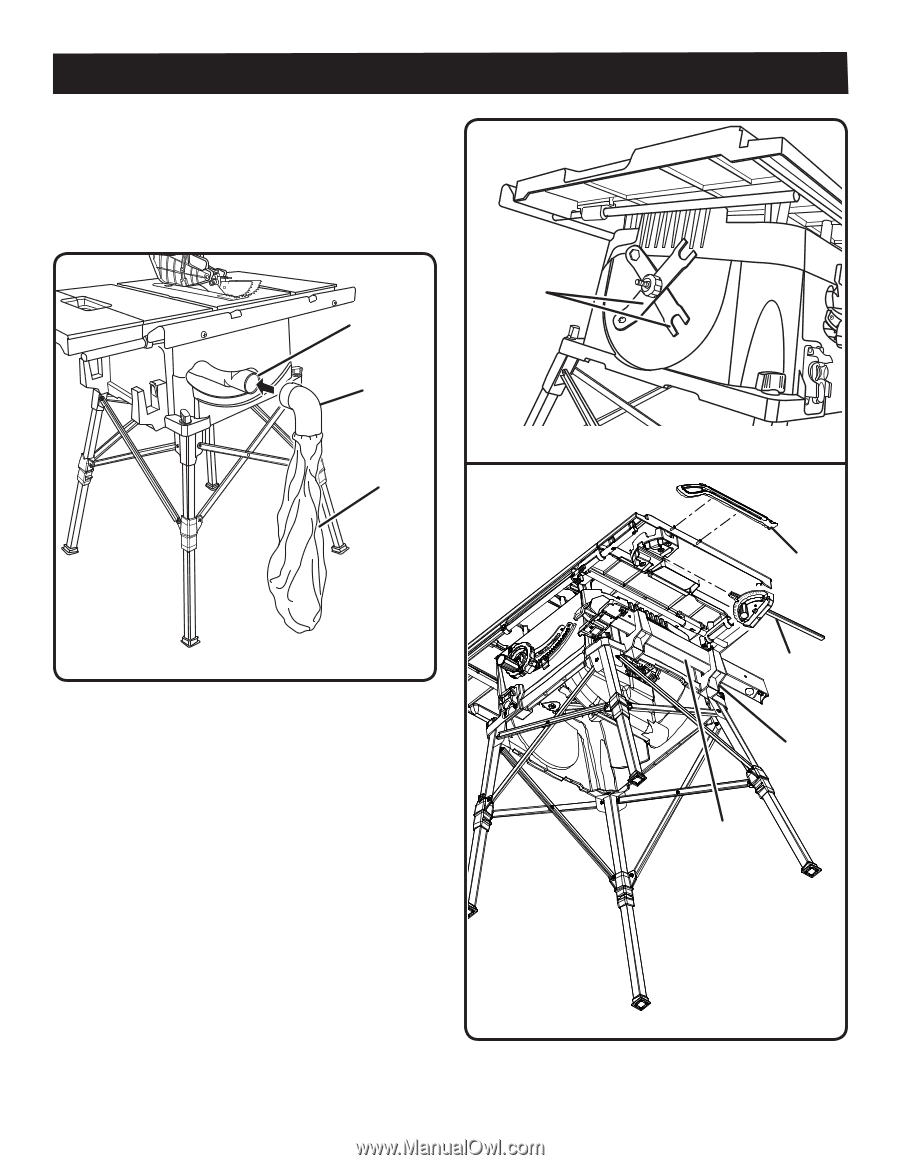
MITER
GAUGE
BLADE
WRENCHES
STORAGE
HOOK
TO STORE THE TABLE SAW ACCESSORIES
See Figures 20 - 21.
The table saw has two convenient storage areas (one on
either side of the saw cabinet) specifically designed for the
saw’s accessories.
When not in use, store the accessories securely by snapping
each accessory in place.
Fig. 21
RIP
FENCE
Fig. 20
PUSH
STICK
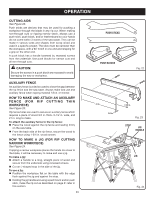
Fig. 19
DUST
BAG
DUST
CHUTE
ELBOW
TO INSTALL DUST BAG
See Figure 19.
Slide the elbow inside the dust chute on the back of the
table saw.
NOTE:
For efficient operation, empty the dust bag before it
is half full. This will permit better air flow through the bag.