Ryobi RTS23 User Manual 5 - Page 30
Making Cuts
 |
View all Ryobi RTS23 manuals
Add to My Manuals
Save this manual to your list of manuals |
Page 30 highlights
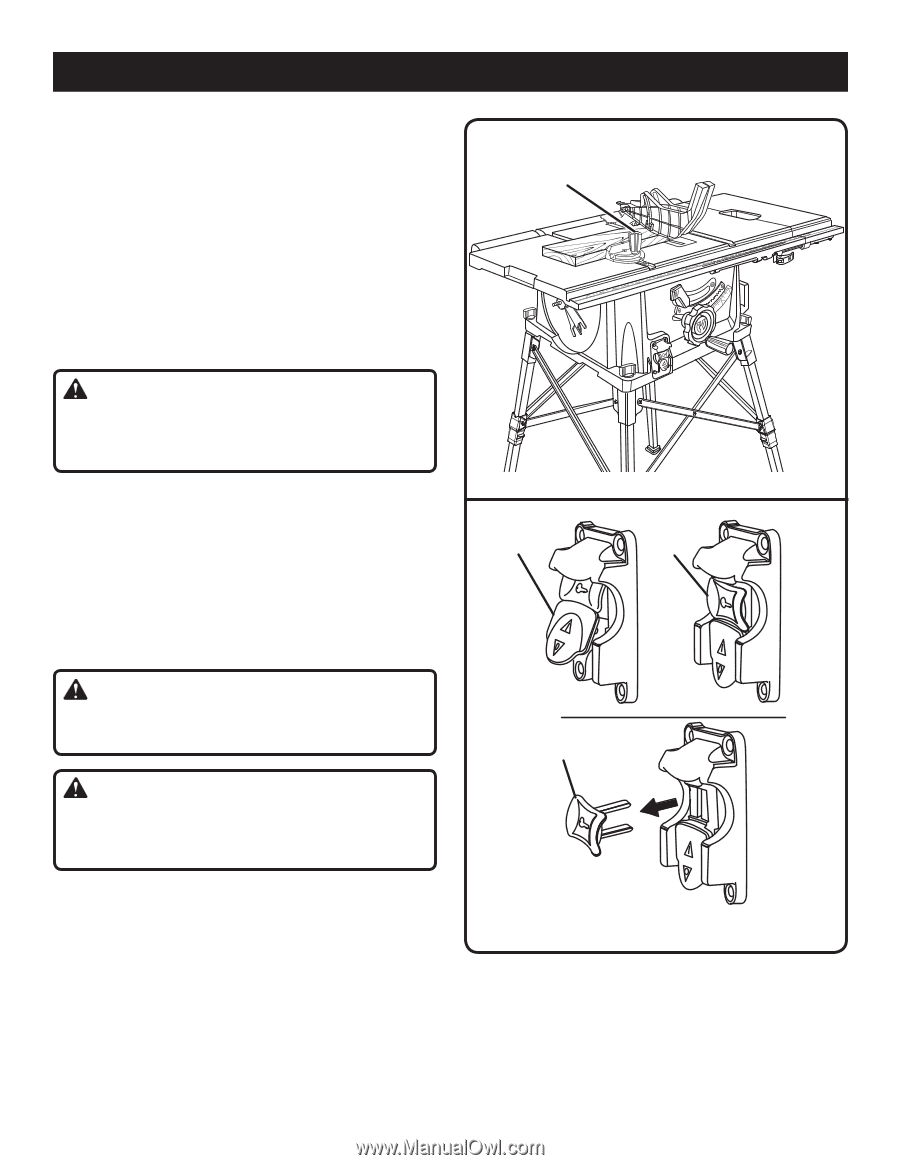
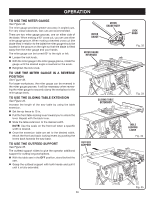
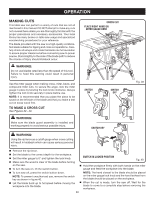
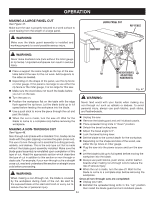
OPERATION MAKING CUTS This table saw can perform a variety of cuts that are not all mentioned in this manual. DO NOT attempt to make any cuts not covered here unless you are thoroughly familiar with the proper procedures and necessary accessories. Your local library has many books on table saw usage and specialized woodworking procedures for your reference. The blade provided with the saw is a high-quality combination blade suitable for ripping and cross cut operations. Carefully check all setups and rotate the blade one full revolution to assure proper clearance before connecting saw to power source. Stand slightly to the side of the blade path to reduce the chance of injury should kickback occur. CROSS CUT PLACE RIGHT HAND ON MITER GAUGE HERE WARNING: Do not use blades rated less than the speed of this tool. Failure to heed this warning could result in personal injury. Use the miter gauge when making cross, miter, bevel, and compound miter cuts. To secure the angle, lock the miter gauge in place by twisting the lock knob clockwise. Always tighten the lock knob securely in place before use. NOTE: It is recommended that you place the piece to be saved on the left side of the blade and that you make a test cut on scrap wood first. TO MAKE A CROSS CUT See Figures 39 - 40. SWITCH ON SWITCH OFF Fig. 39 WARNING: Make sure the blade guard assembly is installed and working properly to avoid serious possible injury. SWITCH KEY WARNING: Using the rip fence as a cutoff gauge when cross cutting will result in kickback which can cause serious personal injury. Remove the rip fence. Set the blade to the correct depth for the workpiece. Set the miter gauge to 0° and tighten the lock knob. Make sure the wood is clear of the blade before turning on the saw. To turn the saw on, lift the switch button. SWITCH IN LOCKED POSITION Fig. 40 Hold the workpiece firmly with both hands on the miter gauge and feed the workpiece into the blade. To turn saw off, press the switch button down. NOTE: To prevent unauthorized use, remove the switch key as shown in figure 40. Let the blade build up to full speed before moving the workpiece into the blade. NOTE: The hand closest to the blade should be placed on the miter gauge lock knob and the hand farthest from the blade should be placed on the workpiece. When the cut is made, turn the saw off. Wait for the blade to come to a complete stop before removing the workpiece. 30
-
 1
1 -
2
-
3
-
4
-
5
-
6
-
7
-
8
-
9
-
10
-
11
-
12
-
13
-
14
-
15
-
16
-
17
-
18
-
19
-
20
-
21
-
22
-
23
-
24
-
 25
25 -
 26
26 -
 27
27 -
 28
28 -
 29
29 -
 30
30 -
 31
31 -
 32
32 -
 33
33 -
 34
34 -
 35
35 -
36
-
37
-
38
-
39
-
40
-
41
-
42
 |
 |