Samsung DVD-C600/XAA User Manual (user Manual) (ver.1.0) (English) - Page 16
CHANGING SETUP MENU, Using the Zoom and 3D Sound, Using the Setup Menu, CHANGING, SETUP MENU
 |
View all Samsung DVD-C600/XAA manuals
Add to My Manuals
Save this manual to your list of manuals |
Page 16 highlights
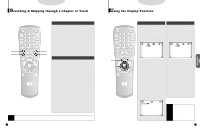
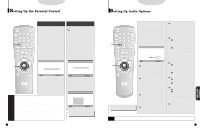
DVD/VCD Using the Zoom and 3D Sound Using the Zoom Function (DVD/VCD) 1 . During playback or pause mode, press the ZOOM button on the remote. The zoom icon will be displayed on screen. 2 . Use the UP/DOWN or LEFT/RIGHT button to select the part of the screen you want to zoom. 3 . Press the ENTER button. - During DVD playback, press ENTER to zoom in 1. A 2X/4X/2X/normal in order. - During VCD playback, press ENTER to zoom in 2X/normal in order. Using the 3D Sound Function 2,3,B The simulated surround effect (SPATIALIZER N-2-2) depends on the disc contents. If you connect the unit to your stereo system, you can enhance sound quality and produce a greater surround effect. This feature is useful when you are using the DVD player with a two channel stereo through the analog outputs. (Discs which are recorded with LPCM or DTS will not work. When the DIGITAL OUTPUT is set to BITSTREAM in the SETUP MENU, the 3D Sound function will not work.) Using the Master Volume Control Function Press the DISPLAY button twice. Use the UP/DOWN button on the remote or on the front of DVD player to select a suitable volume. • Master Volume Control function lets you adjust the volume of the player's output. This is useful for matching the player's output level to other equipment in your system. • Master Volume Control function on CD titles with DTS will not work under VOLUME : 96 level. • When the DIGITAL OUTPUT is set to BITSTREAM in the SETUP MENU, the Volume Control function will not work. A . During playback, press the 3D SOUND button. The 3D SOUND mark will be displayed on screen. (Be sure the DIGITAL OUTPUT is set to PCM.) B. Press the LEFT/RIGHT button to turn the 3D Sound feature on or off. NOTE • 3D Sound is possible only on discs recorded using DOLBY SURROUND or DOLBY DIGITAL. However, some of these discs do not contain rear channel sound signals. • Depending on the disc, the Zoom and 3D Sound function may not work. • Certain audio features of this product manufactured under a license from Desper Products, Inc., Spatializer® and circle-in-square are trademarks owned by Desper Products Inc. 30 DVD Using the Setup Menu The Setup menu lets you customize your DVD player by allowing you to select various language preferences, set up a parental level, even adjust the player to the type of television screen you have (i.e. widescreen). 1 . Press the SETUP button on the remote in the play or stop mode. 1 2,3 NOTE Depending on the disc, some SETUP menu selections may not work. SETUP MENU 1 PLAYER MENU ENGLISH 2 DISC MENU ENGLISH 3 AUDIO ENGLISH 4 SUBTITLE AUTOMATIC 5 PARENTAL UNLOCKED 6 AUDIO OPTIONS 7 DISPLAY OPTIONS PLAYER MENU : Setup of the Display Language (See P32) Use the Player preference menu to select the language for the player's on-screen displays. DISC MENU : Setup of the Menu Language (See P33) Use the Menu preference menu to select the language you want a DVD's disc menu to be displayed in. AUDIO : Setup of the Audio Language (See P33) Use the Audio preference menu to select the soundtrack language. SUBTITLE : Setup of the Subtitle Language (See P33) Use the Subtitle preference menu to select the language the disc's subtitles are to be displayed in. PARENTAL : Setup of the Parental Control (See P34) Allows users to set the level necessary to prevent children from viewing unsuitable movies such as those with violence, X rating, etc. AUDIO OPTIONS : Setup of the Audio Options (See P35) Use to set up the audio options such as speaker setup. DISPLAY OPTIONS : Setup of the Display Options (See P37) Use to select which type of screen you want to watch and several display options. 2 . Use the UP/DOWN button on the remote to access the different features. 3 . Press the ENTER button to access the sub features. To make the setup screen disappear after setting up, press the SETUP button again. 31 CHANGING SETUP MENU
-
 1
1 -
2
-
3
-
4
-
5
-
6
-
7
-
8
-
9
-
10
-
 11
11 -
 12
12 -
 13
13 -
 14
14 -
 15
15 -
 16
16 -
 17
17 -
 18
18 -
 19
19 -
 20
20 -
 21
21 -
22
 |
 |
