Samsung DVD-V4600 User Manual (user Manual) (ver.1.0) (English) - Page 10
DVD Sound Setup, A/V Receiver Connections, Basic Operation, Deck Control Buttons - features
 |
View all Samsung DVD-V4600 manuals
Add to My Manuals
Save this manual to your list of manuals |
Page 10 highlights
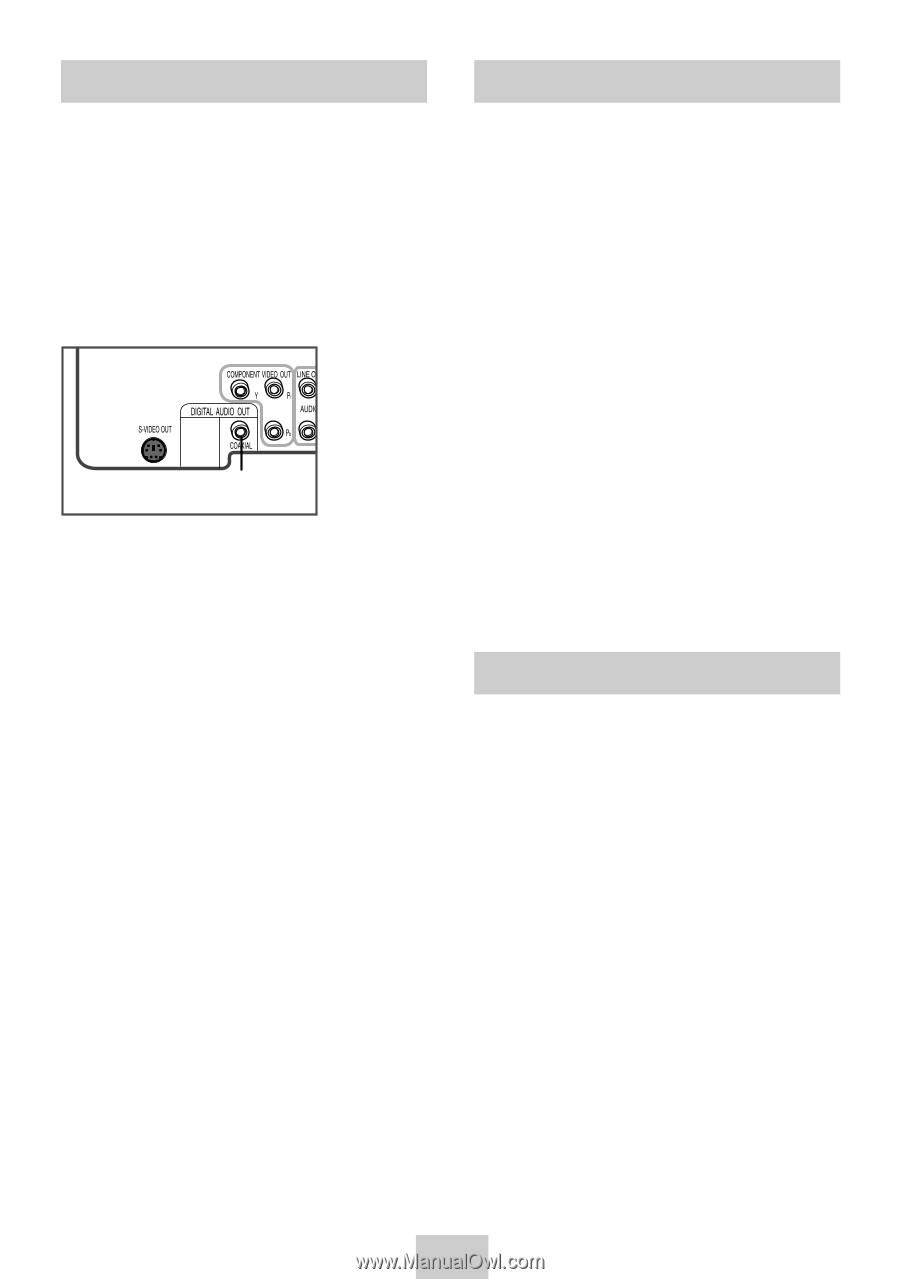
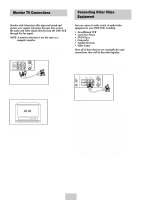
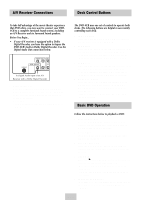
A/V Receiver Connections Deck Control Buttons To take full advantage of the movie theater experience that DVD offers, you may want to connect your DVD VCR to a complete Surround Sound system, including an A/V Receiver and six Surround Sound speakers. Before You Begin... • If your A/V receiver is equipped with a Dolby Digital Decoder, you have the option to bypass the DVD-VCR's built-in Dolby Digital Decoder. Use the Digital Audio Out connection below. To Digital Audio Input of an A/V Receiver with a Dolby Digital Decoder 1 Digital Audio Out Connect a digital coaxial cable from the Digital Audio Out jack on the rear panel of the DVD-VCR to the corresponding Digital Audio Input jack on your A/V Receiver: • Coaxial • Use whichever connection is available on your A/V Receiver. The DVD-VCR uses one set of controls to operate both decks. The following buttons are helpful in successfully controlling each deck. 1 POWER Button Press the POWER button on the remote control or front panel to turn on the DVD-VCR. 2 DVD Button Press the DVD button on the remote control or front panel when you want to control the DVD deck. • The DVD indicator will light on the Front Panel Display to show that the DVD deck is selected. 3 VCR Button Press the VCR button on the remote control or front panel when you want to control the VCR deck. • The VCR indicator will light on the Front Panel Display to show that the VHS deck is selected. 4 INPUT SEL. Button Press the INPUT SEL. button repeatedly to cycle through all of your input sources, including the Tuner(Ch##), Line 1 (rear AV input), and Line 2 (front AV input). • Input selection is only available when the VCR deck is selected. Basic DVD Operation Follow the instructions below to playback a DVD. 1 Open the Disc Tray Press the OPEN/CLOSE button on your remote control or on the front panel of the unit to turn on the power and open the disc tray. 2 Insert a Disc Put a disc in the center of the tray, with the labelprinted side facing up. 3 Close the Disc Tray Press the OPEN/CLOSE button on your remote control or on the front panel of the unit to close the disc tray. 4 Play a DVD Press the ❿ll(PLAY/PAUSE) button on your remote control or on the front panel of the unit. • Most discs will start to playback as soon as the tray closes. • If a DVD has a MENU, the menu may pop up on TV screen. 5 Additional DVD Options • See pages 14 ~ 20 for advanced DVD Setup options. • See pages 21 ~ 27 for special DVD Playback features. ENG-9
-
 1
1 -
2
-
3
-
4
-
 5
5 -
 6
6 -
 7
7 -
 8
8 -
 9
9 -
 10
10 -
 11
11 -
 12
12 -
 13
13 -
 14
14 -
 15
15 -
16
-
17
-
18
-
19
-
20
-
21
-
22
-
23
-
24
-
25
-
26
-
27
-
28
-
29
-
30
-
31
-
32
-
33
-
34
-
35
-
36
 |
 |