Samsung DVD-V4600 User Manual (user Manual) (ver.1.0) (English) - Page 31
VCR Recording, Basic Recording, Special Recording Features, Insert Tape, Select a Channel to Record
 |
View all Samsung DVD-V4600 manuals
Add to My Manuals
Save this manual to your list of manuals |
Page 31 highlights
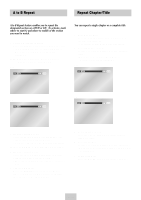
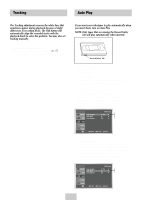
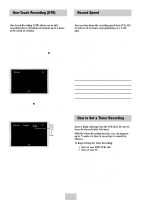
Basic Recording Special Recording Features You can record a TV show in progress by inserting a blank tape and pressing the (REC) button. You can even add time in 30-minute increments up to 4 hours by pressing the (REC)button repeatedly; see page 31. NOTE: Be sure your videotape has a Record Safety Tab. If the tab is missing, you can cover the opening with a small piece of tape. Warning: Do not cover this opening unless you are sure you want to record over the tape. Before You Begin... • Power on the DVD-VCR • Power on the TV 1 Insert Tape Insert a blank VHS tape into the VCR deck. • Make sure the tape is long enough to record the entire program. To change the Recording Speed, see page 31. 2 Select a Channel to Record Use the 0-9 buttons or the Channel UP/DOWN arrow buttons to select the desired channel, or press the INPUT SEL. button to select Line 1 or 2 if recording from an external device connected to the front or rear Line inputs, respectively. 3 Start Recording Press the (REC) button on the remote control or front panel. For options while recording is in progress, see "Special Recording Features". ➢ Recording from the DVD player to the VCR is not possible. While a recording is in progress, you can watch a different channel, watch a DVD, or add recording time in 30-minute increments. 1 Pause/Resume Recording Press the ❿ll(PLAY/PAUSE) button. Press (REC) again to resume. 2 Stop Recording Press the ■ (STOP) button. 3 Watch a Different Channel While a recording is in progress, Change the connection of your TV from Line to Antenna. Using your TV remote control, Change the channel you want to watch. 4 To Watch a DVD Insert a DVD in the DVD deck and press ❿ll (PLAY/PAUSE). The output will automatically change to the DVD. 5 Add Recording Time See One-Touch Recording (OTR) on the following. ENG-30
-
 1
1 -
2
-
3
-
4
-
5
-
6
-
7
-
8
-
9
-
10
-
11
-
12
-
13
-
14
-
15
-
16
-
17
-
18
-
19
-
20
-
21
-
22
-
23
-
24
-
25
-
 26
26 -
 27
27 -
 28
28 -
 29
29 -
 30
30 -
 31
31 -
 32
32 -
 33
33 -
 34
34 -
 35
35 -
 36
36
 |
 |
