Samsung Galaxy J7 User Manual - Page 48
Take Pictures, Shooting Mode, Camera, Sound & shot, Panorama, Continuous shot, Beauty face, Sports - pro
 |
View all Samsung Galaxy J7 manuals
Add to My Manuals
Save this manual to your list of manuals |
Page 48 highlights
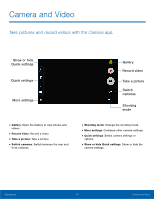
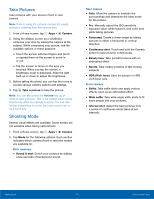
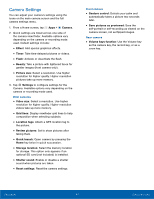
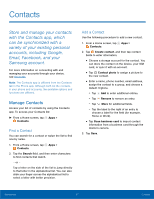
Take Pictures Take pictures with your device's front or rear camera. Note: Prior to using the camera, remove the plastic protective covering from the camera lens. 1. From a Home screen, tap Apps > Camera. 2. Using the display screen as a viewfinder, compose your shot by aiming the camera at the subject. While composing your picture, use the available options or these gestures: • Touch the screen with two fingers and pinch or spread them on the screen to zoom in or out. • Tap the screen to focus on the area you touched. When you tap the screen, a brightness scale is displayed. Slide the light bulb up or down to adjust the brightness. 3. Before taking the photo, you can tap the icons to access various camera options and settings. 4. Tap Take a picture to take the picture. Note: You can also press the Volume key up or down to take a picture. This is the default action of the Volume key while the camera is active. You can also set the Volume key to act as the video record key or as a zoom key. Shooting Mode Several visual effects are available. Some modes are not available when taking self-portraits. 1. From a Home screen, tap Apps > Camera. 2. Tap Mode for the following options. Each section indicates which camera (front or rear) the modes are available for. Both cameras • Sound & shot: Enrich your pictures by adding a few seconds of background sound. Rear camera • Auto: Allow the camera to evaluate the surroundings and determine the ideal mode for the picture. • Pro: Manually adjust the ISO sensitivity, exposure value, white balance, and color tone while taking pictures. • Panorama: Create a linear image by taking pictures in either a horizontal or vertical direction. • Continuous shot: Touch and hold the Camera button to take pictures continuously. • Beauty face: Take portrait pictures with an airbrushed effect. • Sports: Take clearer pictures of fast moving subjects. • HDR (Rich tone): Save the picture in HDR (rich tone) only. Front camera • Selfie: Take selfie shots and apply various effects, such as an airbrushed effect. • Wide selfie: Take wide-angle selfie shots to fit more people into your pictures. • Interval shot: Select the best pictures from a series of continuous shots taken at set intervals. Applications 43 Camera and Video
-
 1
1 -
2
-
3
-
4
-
5
-
6
-
7
-
8
-
9
-
10
-
11
-
12
-
13
-
14
-
15
-
16
-
17
-
18
-
19
-
20
-
21
-
22
-
23
-
24
-
25
-
26
-
27
-
28
-
29
-
30
-
31
-
32
-
33
-
34
-
35
-
36
-
37
-
38
-
39
-
40
-
41
-
42
-
 43
43 -
 44
44 -
 45
45 -
 46
46 -
 47
47 -
 48
48 -
 49
49 -
 50
50 -
 51
51 -
 52
52 -
 53
53 -
54
-
55
-
56
-
57
-
58
-
59
-
60
-
61
-
62
-
63
-
64
-
65
-
66
-
67
-
68
-
69
-
70
-
71
-
72
-
73
-
74
-
75
-
76
-
77
-
78
-
79
-
80
-
81
-
82
-
83
-
84
-
85
-
86
-
87
-
88
-
89
-
90
-
91
-
92
-
93
-
94
-
95
-
96
-
97
-
98
-
99
-
100
-
101
-
102
-
103
-
104
-
105
-
106
-
107
-
108
-
109
-
110
-
111
-
112
-
113
 |
 |