Samsung ML-6512ND User Manual Ver.1.03 (English) - Page 102
Installing a hard disk, Printing with the optional memory or hard disk drive
 |
View all Samsung ML-6512ND manuals
Add to My Manuals
Save this manual to your list of manuals |
Page 102 highlights
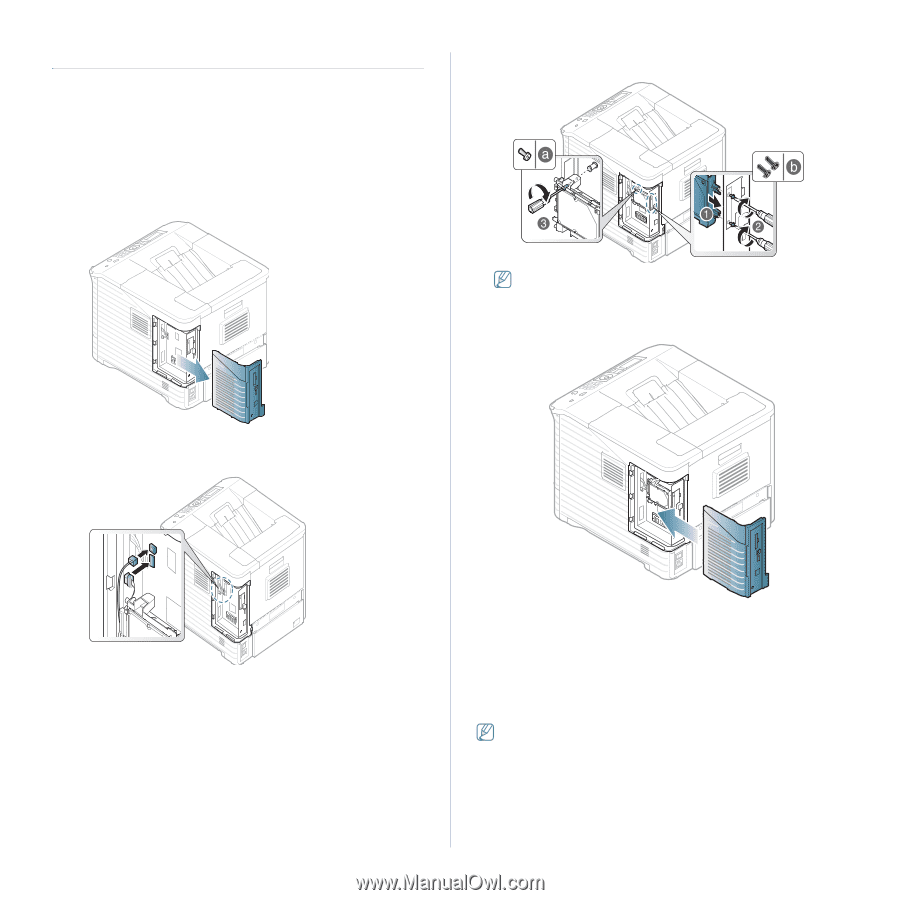
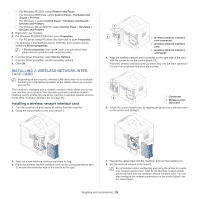
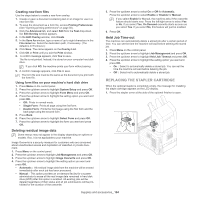
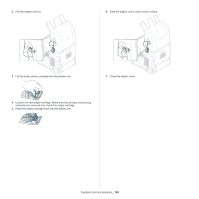
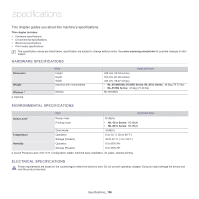
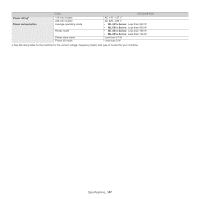
INSTALLING A HARD DISK Installing the hard disk allows the data from your computer to be sent to the print queue of the printer hard disk. This decreases the workload of the computer. You can also use various print features, such as storing a job in the hard disk, proofing a job, and printing private documents. The order information is provided for optional hard disk (See "Available accessories" on page 95). Installing a hard disk 1. Turn the machine off and unplug all cables from the machine. 2. Grasp the control board cover and remove it. 5. Fasten down the hard disk with the screws supplied with your new hard disk. You only need two b-type screws out of three. Keep the extra one in a safe place. 6. Close the control board cover by aligning the groove on it with the notch on the printer and sliding it. 3. Take out a new hard disk from its plastic bag. 4. Align the connector on the hard disk with the connector on the control board. Push the hard disk in until it is latched into place. 7. Plug all the cables back into the machine, and turn the machine on. 8. You must activate the added hard disk in the driver properties (See "Activating the added accessories in printer properties" on page 98). PRINTING WITH THE OPTIONAL MEMORY OR HARD DISK DRIVE • Some menus may not appear in the display depending on options or models. If so, it is not applicable to your machine. • After installing the optional hard disk, you can use advanced printing features, such as storing or spooling a print job to the hard disk, proofing a job, and specifying of printing a private job in the printer properties window. Once you have stored files in the hard disk, you can easily print or delete the stored files using the control panel of your printer. Supplies and accessories_ 102
-
 1
1 -
2
-
3
-
4
-
5
-
6
-
7
-
8
-
9
-
10
-
11
-
12
-
13
-
14
-
15
-
16
-
17
-
18
-
19
-
20
-
21
-
22
-
23
-
24
-
25
-
26
-
27
-
28
-
29
-
30
-
31
-
32
-
33
-
34
-
35
-
36
-
37
-
38
-
39
-
40
-
41
-
42
-
43
-
44
-
45
-
46
-
47
-
48
-
49
-
50
-
51
-
52
-
53
-
54
-
55
-
56
-
57
-
58
-
59
-
60
-
61
-
62
-
63
-
64
-
65
-
66
-
67
-
68
-
69
-
70
-
71
-
72
-
73
-
74
-
75
-
76
-
77
-
78
-
79
-
80
-
81
-
82
-
83
-
84
-
85
-
86
-
87
-
88
-
89
-
90
-
91
-
92
-
93
-
94
-
95
-
96
-
 97
97 -
 98
98 -
 99
99 -
 100
100 -
 101
101 -
 102
102 -
 103
103 -
 104
104 -
 105
105 -
 106
106 -
 107
107 -
108
-
109
-
110
-
111
-
112
-
113
-
114
-
115
-
116
-
117
-
118
-
119
-
120
 |
 |