Samsung ML-6512ND User Manual Ver.1.03 (English) - Page 36
Installing network connected machine’s driver, IPv4 setting using SetIP Program Linux
 |
View all Samsung ML-6512ND manuals
Add to My Manuals
Save this manual to your list of manuals |
Page 36 highlights
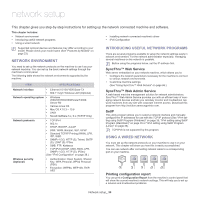
3. Click the Firewall menu. 4. Turn the firewall off. The following instructions may vary for your model. Perform the following to configure the IP address: 1. Connect your machine and the computer using network cable. 2. Insert the Installation CD-ROM, and open the disk window. Open the MAC_Installer > MAC_Printer > SetIP > SetIPApplet.html. 3. Double click the file and Safari will automatically open, then select Trust. The browser will open the SetIPApplet.html page that shows the printer's name and IP address information. 4. Click on the icon (third from left) in the SetIP window to open the TCP/IP configuration window. 5. Enter the printer's new information into the configuration window as follows. In a corporate intranet, you may need to have this information assigned by a network manager before proceeding. • MAC Address: Find the machine's MAC address from the Configuration Report and enter it without the colons. For example, 00:15:99:29:51:A8 becomes 0015992951A8. The MAC address is the hardware serial number of the on-board network interface and can be found on the Configuration Report. • IP Address: Enter a new IP address for your printer. For example, if your computer's IP address is 192.168.1.150, enter 192.168.1.X. (X is number between 1 and 254 other than the computer's address.) • Subnet Mask: Enter a new Subnet Mask for your machine. • Default Gateway: Enter a new Gateway for your machine. 6. Select Apply, then OK, and OK again. The printer will automatically print the configuration report. Confirm that all of the settings are correct. Quit Safari. You may close and eject the installation CD-ROM. If necessary, restart the computer's firewall. You have successfully changed the IP address, subnet mask, and gateway. IPv4 setting using SetIP Program (Linux) The SetIP program should be automatically installed during the printer driver installation. The path and UIs may differ by Linux OS version. Refer to the Linux OS manual to turn firewall off. 1. Print the machine's configuration report to find your machine's MAC address. 2. Open the /opt/Samsung/mfp/share/utils/. 3. Double click the SetIPApplet.html file. 4. Click to open the TCP/IP configuration window. 5. Enter the MAC address, IP address, subnet mask, default gateway, and then click Apply. When you enter the MAC address, enter it without a colon(:). 6. The machine prints the network information. Confirm all of the settings are correct. 7. Close the SetIP program. Network parameter setting You can also set up the various network settings through the network administration programs such as SyncThru™ Web Admin Service and SyncThru™ Web Service. Restoring factory default settings using SyncThru™ Web Service 1. Start a web browser such as Internet Explorer, Safari or Firefox and enter your machine's new IP address in the browser window. 2. Click Go to access the SyncThru™ Web Service. 3. Click Login on the upper right of the SyncThru™ Web Service web- site. A log-in page appears. 4. Type in the ID and Password then click Login. If it's your first time logging into SyncThru™ Web Service, type in the below default ID and password. • ID: admin • Password: sec00000 5. When the SyncThru™ Web Service window opens, click Settings > Network Settings > Restore Default. 6. Click Clear for network. 7. Turn off and restart machine to apply settings. INSTALLING NETWORK CONNECTED MACHINE'S DRIVER Windows This is recommended for most users. All components necessary for machine operations will be installed. Follow the steps below: 1. Make sure that the machine is connected to the network and powered on. 2. Insert the supplied software CD into your CD-ROM drive. 3. Select Install now. 4. Read License Agreement, and select I accept the terms of the License Agreement. Then, click Next. The program searches for the machine. 5. The searched machines will be shown on the screen. Select the one you wish to use and click Next. If the driver searched only one machine, the confirmation window appears. 6. After the installation is finished, a window asking you to print a test page appears. If you want to print a test page, click Print a test page. Otherwise, just click Next and skip to step 8. 7. If the test page prints out correctly, click Yes. If not, click No to reprint it. Network setup_ 36
-
 1
1 -
2
-
3
-
4
-
5
-
6
-
7
-
8
-
9
-
10
-
11
-
12
-
13
-
14
-
15
-
16
-
17
-
18
-
19
-
20
-
21
-
22
-
23
-
24
-
25
-
26
-
27
-
28
-
29
-
30
-
 31
31 -
 32
32 -
 33
33 -
 34
34 -
 35
35 -
 36
36 -
 37
37 -
 38
38 -
 39
39 -
 40
40 -
 41
41 -
42
-
43
-
44
-
45
-
46
-
47
-
48
-
49
-
50
-
51
-
52
-
53
-
54
-
55
-
56
-
57
-
58
-
59
-
60
-
61
-
62
-
63
-
64
-
65
-
66
-
67
-
68
-
69
-
70
-
71
-
72
-
73
-
74
-
75
-
76
-
77
-
78
-
79
-
80
-
81
-
82
-
83
-
84
-
85
-
86
-
87
-
88
-
89
-
90
-
91
-
92
-
93
-
94
-
95
-
96
-
97
-
98
-
99
-
100
-
101
-
102
-
103
-
104
-
105
-
106
-
107
-
108
-
109
-
110
-
111
-
112
-
113
-
114
-
115
-
116
-
117
-
118
-
119
-
120
 |
 |
