Samsung SC-D372 User Manual (ENGLISH) - Page 60
Playback, Reproducción
 |
UPC - 036725301689
View all Samsung SC-D372 manuals
Add to My Manuals
Save this manual to your list of manuals |
Page 60 highlights
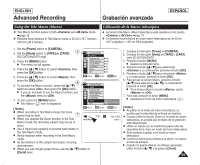
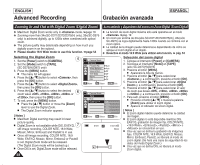
ENGLISH Playback Reproducción ESPAÑOL Playing Back a Tape on the LCD Screen ✤ The Playback function and speaker works only in mode. ➥page 19 ✤ You can monitor the playback picture on the LCD Screen. 1. Set the [Power] switch to [PLAYER]. 2. Set the [Mode] switch to [TAPE]. (SC-D375(H)/D975 only) 3. Insert the tape you wish to view. ➥page 32 5 6 4. Open the LCD Screen. I Adjust the angle of the LCD Screen and set the brightness or color if necessary. 5. Press the [œœ (REW)] button to rewind the tape to the starting point. I To stop rewinding, press the [I (STOP)] button. I The Camcorder stops automatically after rewinding is completed. 6. Press the PLAY/STILL)] button to start playback. I You can view the picture you recorded on the LCD Screen. I To stop the play operation, press the [I (STOP)] button. Adjusting the LCD Bright/LCD Color during Playback ✤ You can adjust the LCD Bright/LCD Color during playback. ✤ The adjustment method is the same procedure as used in mode. ➥page 29 Adjusting the Volume ✤ When you use the LCD Screen for playback, you can √ hear recorded sound from the built-in Speaker. - Take the following steps to lower the volume or mute the sound while playing a tape on the Camcorder. [05] ✤ When sound is heard once the tape is in play, use the [... / †] button to adjust the volume. I A volume level display will appear on the LCD Screen. I Levels may be adjusted from anywhere between to . I If you close the LCD Screen while playing, you will not hear sound from the speaker. ✤ When the Audio/Video cable is connected to the Camcorder, you cannot hear sound from the Built-In Speaker and cannot adjust the volume. 60 Reproducción en la pantalla LCD de una cinta grabada ✤ La función de reproducción sólo está disponible en modo . ➥pág. 19 ✤ Puede supervisar la imagen reproducida en la pantalla LCD. 1. Coloque el interruptor [Power] en [PLAYER]. 2. Coloque el interruptor [Mode] en [TAPE]. (sólo SC-D375(H)/D975) 3. Inserte la cinta que desee ver. ➥pág. 32 4. Abra la pantalla LCD. I Ajuste el ángulo de la pantalla LCD y fije el brillo y color según precise. 5. Presione el botón [œœ (REW)] para rebobinar la cinta al punto inicial. I Para detener el rebobinado, presione el botón [I (STOP)]. I La videocámara se detiene automáticamente tras completar el rebobinado. 6. Presione el botón PLAY/STILL)] para iniciar la grabación. I Puede ver la imagen grabada en la pantalla LCD. I Para detener la reproducción, presione el botón [I (STOP)]. Ajuste del brillo y el color de la pantalla LCD durante la reproducción ✤ Puede ajustar el brillo y el color de la pantalla LCD durante la reproducción. ✤ El método de ajuste es el mismo procedimiento que el utilizado en el modo . ➥pág. 29 SP 0:46:00:11 Ajuste del volumen 60min ✤ Cuando utilice la pantalla LCD para la reproducción, puede escuchar el sonido grabado a través del parlante incorporado. - Siga los pasos que se indican a continuación para disminuir el volumen o eliminar el sonido al reproducir una cinta en la videocámara. ✤ Cuando escuche sonido una vez que la cassette empiece a reproducirse, utilice la palanca para ajustar el volumen. I En la pantalla LCD aparecerá el nivel de volumen. I Los niveles se pueden ajustar entre y . I Si cierra la pantalla LCD mientras reproduce, no escuchará ningún sonido en el parlante. ✤ Cuando se conecte el cable de audio/video a la videocámara, no podrá oír nada en el altavoz incorporado y no podrá ajustar el volumen.
-
 1
1 -
2
-
3
-
4
-
5
-
6
-
7
-
8
-
9
-
10
-
11
-
12
-
13
-
14
-
15
-
16
-
17
-
18
-
19
-
20
-
21
-
22
-
23
-
24
-
25
-
26
-
27
-
28
-
29
-
30
-
31
-
32
-
33
-
34
-
35
-
36
-
37
-
38
-
39
-
40
-
41
-
42
-
43
-
44
-
45
-
46
-
47
-
48
-
49
-
50
-
51
-
52
-
53
-
54
-
 55
55 -
 56
56 -
 57
57 -
 58
58 -
 59
59 -
 60
60 -
 61
61 -
 62
62 -
 63
63 -
 64
64 -
 65
65 -
66
-
67
-
68
-
69
-
70
-
71
-
72
-
73
-
74
-
75
-
76
-
77
-
78
-
79
-
80
-
81
-
82
-
83
-
84
-
85
-
86
-
87
-
88
-
89
-
90
-
91
-
92
-
93
-
94
-
95
-
96
-
97
-
98
-
99
-
100
-
101
-
102
-
103
-
104
-
105
-
106
-
107
-
108
-
109
-
110
 |
 |
