Samsung YXM1Z Quick Guide (easy Manual) (ver.1.0) (English) - Page 13
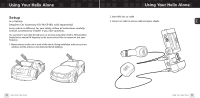
and its cradle. To remove the vent mount, push it into the vent and lift upward slightly
 |
View all Samsung YXM1Z manuals
Add to My Manuals
Save this manual to your list of manuals |
Page 13 highlights
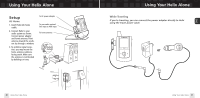
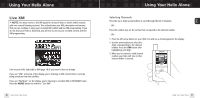
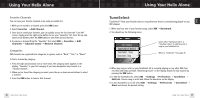
ENG Using Your Helix Alone 4. To install the swivel mount, first find a suitable location. The swivel mount's adhesive is very strong and may be difficult to remove. Do not install this mount on leather surfaces, and make sure the air temperature is at least 60°F (15°C). Clean the mounting surfaces with the surface preparation kit. Peel away the adhesive liner and firmly press the swivel mount to the surface for 30 seconds. Allow 24 hours before using the mount. You can adjust the tension of the mount with a screwdriver. If you need to remove the mount, carefully lift the adhesive pad with your fingers or a spoon. Warming with a hair dryer for several minutes will help soften the adhesive. Using Your Helix Alone 5. To install the vent mount, find a horizontal vent that is strong enough to hold your Helix and its cradle. To remove the vent mount, push it into the vent and lift upward slightly to release the mount's hooks from the vent vane. 6. Find an unused FM frequency on your car stereo. 7. Set your Helix to the same FM frequency. (Refer to the section marked "Settings," "FM Frequency.") 8. Tune Helix to XM channel 1. You should be able to hear XM through your car stereo. 24 Using Your Helix Alone Using Your Helix Alone 25
-
 1
1 -
2
-
3
-
4
-
5
-
6
-
7
-
 8
8 -
 9
9 -
 10
10 -
 11
11 -
 12
12 -
 13
13 -
 14
14 -
 15
15 -
 16
16 -
 17
17 -
 18
18 -
19
-
20
-
21
-
22
-
23
-
24
-
25
-
26
-
27
-
28
-
29
-
30
-
31
-
32
-
33
-
34
-
35
-
36
-
37
-
38
-
39
-
40
-
41
-
42
-
43
-
44
-
45
-
46
-
47
 |
 |
