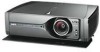
Sanyo PLV Z3 Owners Manual - Page 43
To change the code of the projector, To change the code of the remote control
 |
View all Sanyo PLV Z3 manuals
Add to My Manuals
Save this manual to your list of manuals |
Page 43 highlights
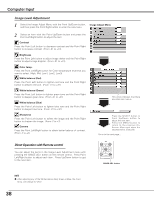
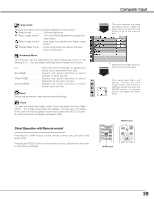
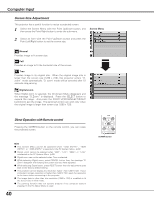
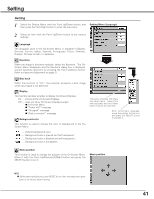
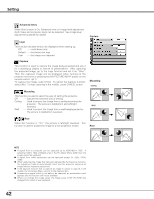
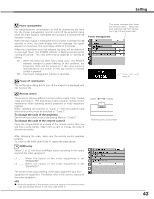
Setting Power management For reducing power consumption as well as maintaining the lamp life, the Power management function turns off the projection lamp when the input signal is interrupted and no button is pressed for 30 seconds or more. When the input signal is interrupted and no button is pressed for 30 seconds or more, the timer display with the message "No signal" appears on the screen. The count-down starts for 5 minutes. When the count-down time has elapsed, the lamp will be turned off to cool itself down. The POWER indicator is flashing red during this cooling-off period. The next performance depends on setting as follows. On ··· When the lamp has been fully cooled down, the POWER indicator changes to green flashing. In this condition, the projection lamp will be turned on if the input signal is reconnected or any button on the top control or remote control is pressed. Off ··· The Power management function is canceled. Power off confirmation The confirmation dialog box to turn off the projector is displayed with this function ON. This arrow indicates that there are previous items. Select this item and press the Point Up button to go to the previous item. Power management Time left until lamp off Remote control This projector has two different remote control codes: Code 1 (initial code) and Code 2. This switching function prevents remote control interference when operating several projectors or video equipment together. When operating the projector in "Code 1", both the projector and the remote control must be switched to "Code 1". To change the code of the projector; Set the remote control code in the Setting Menu to "Code 2". To change the code of the remote control; Open the compartment lid on back of the remote control then you will find a white switch. Slide it left or right to change the code of the remote control. CODE1 CODE2 Remote control Code switch After changing the code, make sure the remote control operates properly. To return to the initial code (Code 1), repeat the steps above. HDMI setup Select L1 or L2 with Point Left/Right button according to the output signal of the video equipment. L1 .........When the output of the video equipment is set "STANDARD". L2 .........When the output of the video equipment is set "ENHANCED". The names of the output setting of the video equipment vary from equipment to equipment. For details, refer to the owner's manual of the video equipment. NOTE ● When the batteries of the remote control are replaced, the remote control code automatically returns to the initial code (Code 1). 43
-
 1
1 -
2
-
3
-
4
-
5
-
6
-
7
-
8
-
9
-
10
-
11
-
12
-
13
-
14
-
15
-
16
-
17
-
18
-
19
-
20
-
21
-
22
-
23
-
24
-
25
-
26
-
27
-
28
-
29
-
30
-
31
-
32
-
33
-
34
-
35
-
36
-
37
-
 38
38 -
 39
39 -
 40
40 -
 41
41 -
 42
42 -
 43
43 -
 44
44 -
 45
45 -
 46
46 -
 47
47 -
 48
48 -
49
-
50
-
51
-
52
-
53
-
54
-
55
-
56
-
57
-
58
-
59
-
60
 |
 |
