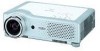
Sanyo XU86 Instruction Manual, PLC-XU86
Sanyo XU86 - PLC XGA LCD Projector Manual
 |
View all Sanyo XU86 manuals
Add to My Manuals
Save this manual to your list of manuals |
Sanyo XU86 manual content summary:
- Sanyo XU86 | Instruction Manual, PLC-XU86 - Page 1
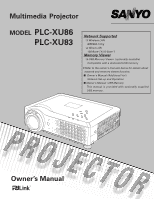
Multimedia Projector MODEL PLC-XU86 PLC-XU83 Network Supported ❏ Wireless LAN IEEE802.11b/g ❏ Wired LAN 100-Base-TX/10-Base-T Memory Viewer ❏ USB Memory Viewer (optionally available) Compatible with a dedicated USB memory ✽Refer to the owner's manuals below for details about network and memory - Sanyo XU86 | Instruction Manual, PLC-XU86 - Page 2
2 - Sanyo XU86 | Instruction Manual, PLC-XU86 - Page 3
Display ◆ LAN Network Function This projector is loaded with Wired and Wireless LAN network function. You can project an image on a computer via the network. You can also operate and manage the projector via the network. For details, refer to the owner's manual (Additional Vol.) "Network Set-up - Sanyo XU86 | Instruction Manual, PLC-XU86 - Page 4
the Projection Lens 57 Cleaning the Projector Cabinet 57 Lamp Replacement 58 Lamp Replacement Counter 59 Appendix 60 Troubleshooting 60 Menu Tree 62 Indicators and Projector Condition 64 Compatible Computer Specifications 65 Technical Specifications 66 Optional Parts 67 PJ Link - Sanyo XU86 | Instruction Manual, PLC-XU86 - Page 5
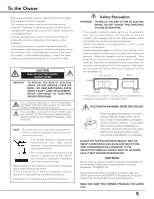
EXCEPT LAMP REPLACEMENT. REFER SERVICING TO QUALIFIED SERVICE PERSONNEL. THIS SYMBOL INDICATES THAT DANGEROUS VOLTAGE CONSTITUTING A RISK OF ELECTRIC SHOCK IS PRESENT WITHIN THIS UNIT. THIS SYMBOL INDICATES THAT THERE ARE IMPORTANT OPERATING AND MAINTENANCE INSTRUCTIONS IN THE OWNER'S MANUAL WITH - Sanyo XU86 | Instruction Manual, PLC-XU86 - Page 6
with the projector. Wall or shelf mounting should follow the manufacturer's instructions, and should use a mounting kit projector exhibits a distinct change in performance-this indicates a need for service. When replacement parts are required, be sure the service technician has used replacement - Sanyo XU86 | Instruction Manual, PLC-XU86 - Page 7
speed is changed according to the temperature inside the projector. Exhaust Vent Installing the Projector in Proper Position Install the projector properly. Improper Installation may reduce the lamp life and cause a fire hazard. 20˚ Do not tilt the projector more than 20 degrees from side to side - Sanyo XU86 | Instruction Manual, PLC-XU86 - Page 8
unless otherwise specified in the instructions. If such changes or modifications should be made, you could be required to stop operation of the equipment. Model Numbers Trade Name Responsible party Address Telephone No. : PLC-XU86, PLC-XU83 : Sanyo : SANYO FISHER COMPANY : 21605 Plummer Street - Sanyo XU86 | Instruction Manual, PLC-XU86 - Page 9
56 for attaching.) u Infrared Remote Receiver i Top Controls and Indicators o Speaker !0 Air Intake Vent !1 Power Cord Connector !2 Terminals and Connectors !3 Lamp Cover !4 Air Intake Vents function. Refer to the Additional Vol. and owner's manual of Memory viewer (optionally available). !7 !6 9 - Sanyo XU86 | Instruction Manual, PLC-XU86 - Page 10
control and use the PAGE ed buttons on the remote control during a presentation, connect the USB port of the computer to the USB terminal with a USB cable. (p12, 18) w SERVICE PORT This jack is used to service the projector. e COMPUTER IN 1 / DVI-I Connect computer output (Digital / Analog DVI - Sanyo XU86 | Instruction Manual, PLC-XU86 - Page 11
detects abnormal condition. This also blinks red when the internal temperature of the projector exceeds the operating range. (p55, 64) u LAMP REPLACE indicator Turn yellow when the life of the projection lamp draws to an end. (p58, 64) i AUTO SETUP button Correct vertical keystone distortion - Sanyo XU86 | Instruction Manual, PLC-XU86 - Page 12
of the projector or a pointer for wireless mouse operation. (p13.14) @3 AUTO SET button Correct vertical keystone distortion and adjust PC display parameters. (p25, 46) @4 NETWORK button Select network input or Memory viewer input. See owner's manual (Additional Vol.) and owner's manual of Memory - Sanyo XU86 | Instruction Manual, PLC-XU86 - Page 13
so that the Pointer function will be available. (The Laser pointer has switched to the Pointer.) 2 Press the LASER button on the remote control toward the projector. Spotlight or Pointer is displayed on the screen with the LASER button lighting green. Then move the Spotlight or Pointer with the - Sanyo XU86 | Instruction Manual, PLC-XU86 - Page 14
Part Names and Functions Wireless Mouse Operation The remote control can be used as a wireless mouse for your computer. Before operating the wireless mouse, connect your computer and the projector with the supplied USB cable. (See page 18 for connection.) When the Pointer function is used, the - Sanyo XU86 | Instruction Manual, PLC-XU86 - Page 15
new batteries. ● Risk of an explosion if battery is replaced by an incorrect type. ● Dispose of used batteries according to the instructions. Operating Range Point the remote control toward the projector (Infrared Remote Receiver) whenever pressing any button. Maximum operating range for the - Sanyo XU86 | Instruction Manual, PLC-XU86 - Page 16
Installation Positioning the Projector For projector positioning, see the figures below. The projector should be set the best image. • The values shown below are approximate and may vary from the actual sizes. PLC-XU86 A:B = 6:1 38.7' (11.8m) 16.4' (5m) 12.5' (3.8m) 200 8.2' (2.5m) - Sanyo XU86 | Instruction Manual, PLC-XU86 - Page 17
plug into any other type of power system. Consult your authorized dealer or service station if you are not sure of the type of power being supplied. Connect the projector with all peripheral equipment before turning the projector on. (See page 18-20 for connection.) CAUTION For safety, unplug the - Sanyo XU86 | Instruction Manual, PLC-XU86 - Page 18
or Monitor output. (See Page 50.) Audio cable ✽ (stereo) RESET USB SERVICE PORT COMPUTER IN 1 DVI-I COMPUTER/ COMPONENT AUDIO IN (VARIABLE) COMPUTER IN the remote control or using the PAGE ed buttons on the remote control. When connecting the cable, the power cords of both the projector and - Sanyo XU86 | Instruction Manual, PLC-XU86 - Page 19
Cable ✽ • Audio Cable ✽ (✽ = Not supplied with this projector.) Installation Installation S-video Output Composite Video and Audio Output (R) (L) audio cable✽ S-VIDEO (R) (L) (Video) AUDIO IN VIDEO RESET USB SERVICE PORT COMPUTER IN 1 DVI-I (VARIABLE) COMPUTER IN 2 / COMPONENT IN - Sanyo XU86 | Instruction Manual, PLC-XU86 - Page 20
output. (See Page 50.) Audio cable ✽ (stereo) RESET USB SERVICE PORT COMPUTER IN 1 DVI-I COMPUTER/ COMPONENT AUDIO IN (VARIABLE) COMPUTER ) ✔Note: • When connecting AUDIO OUT to external audio equipment, the projector's built-in speaker is disconnected. • See p67 for ordering optional parts - Sanyo XU86 | Instruction Manual, PLC-XU86 - Page 21
is a security code using Personal Identification Number that allows the person who knows it to operate the projector. Setting PIN code prevents others except the specific users from operating the projector. A PIN code consists of a four-digit number. Refer to PIN code lock function in Setting on - Sanyo XU86 | Instruction Manual, PLC-XU86 - Page 22
the remote control, and a message "Power off?" will appear on the screen. 2 Press the POWER ON-OFF button again to turn off the projector. The ) •Do not operate the projector continuously without rest. Continuous use may result in shortening the lamp life. Turn off the projector and give it a rest - Sanyo XU86 | Instruction Manual, PLC-XU86 - Page 23
Menu The projector can be to adjust. Top Control ON - OFF POWER MENU WARNING INPUT LAMP REPLA AUTO SET UP SELECT - VOLUME + VOLUME MENU button POINT not active until the SELECT button is pressed. SELECT button Remote Control POINT buttons SELECT button MENU button On-Screen Menu Menu - Sanyo XU86 | Instruction Manual, PLC-XU86 - Page 24
63. For computer source Guide Window PC System Menu Show adjust size Used to set the of image. [Normal / projector's operating True / Wide / Full configurations. screen / adjust Used to adjust computer Used to adjust See owner's manual parameters to match image. the volume or (Additional - Sanyo XU86 | Instruction Manual, PLC-XU86 - Page 25
Keystone distortion according to the projector's tilt and adjust the computer the remote control, correct the image manually as follows: Press the KEYSTONE button on the remote control INPUT LAMP REPLACE AUTO SET UP SELECT - VOLUME + VOLUME AUTO SET UP button POINT ed buttons Remote Control - Sanyo XU86 | Instruction Manual, PLC-XU86 - Page 26
will be cut off. To restore the sound to its previous level, press the Point 7 8 buttons again. Top Control SELECT - VOLUME + VOLUME VOLUME+/buttons Remote Control VOL- button VOL+ button MUTE button Approximate level of the volume. Press the MUTE button to set the Mute function On or Off. The - Sanyo XU86 | Instruction Manual, PLC-XU86 - Page 27
up the On-Screen Menu. COMPUTER / VIDEO / NETWORK button Remote Control Press the COMPUTER, VIDEO, or NETWORK button on the remote control to select the input source. For more detail, see p29, 30, 39, 40. Refer to the owner's manual (Additional Vol.) for details about Network input. AUTO PC - Sanyo XU86 | Instruction Manual, PLC-XU86 - Page 28
Basic Operation NO SHOW button Press the NO SHOW button on the remote control to black out the image. To restore to normal, press the NO SHOW button again or press any other button. When a projected image is captured and set as "User" in the Logo selection (p48), the screen changes each time - Sanyo XU86 | Instruction Manual, PLC-XU86 - Page 29
on the top control or press the COMPUTER button on the remote control. Before using these buttons, correct input source should be RGB signal. •Wired, Wireless, Memory Viewer are for the Network function. See owner's manual (Additional Vol.) and owner's manual of Memory viewer (optionally available - Sanyo XU86 | Instruction Manual, PLC-XU86 - Page 30
or press the COMPUTER button on the remote control. Before using these buttons, correct specification be changed, this projector may not display the digital content protected by HDCP. •Wired, Wireless, Memory Viewer are for the Network function. See owner's manual (Additional Vol.) and owner's manual - Sanyo XU86 | Instruction Manual, PLC-XU86 - Page 31
. ----- There is no signal input from computer. Check the connection between your computer and the projector. (See " Troubleshooting" p60) Mode 1 The preset system is manually adjusted in the PC Adjust Menu. The adjusted data can be stored in Mode 1~5. (p33, 34) SVGA 1 PC Systems provided - Sanyo XU86 | Instruction Manual, PLC-XU86 - Page 32
pressing the AUTO PC button on the remote control. Remote Control AUTO PC button Menu Operation Auto Auto PC Adjustment can be memorized in this projector. Once parameters are memorized, the setting can is not provided properly with this operation, manual adjustments are required. (p33, 34) • - Sanyo XU86 | Instruction Manual, PLC-XU86 - Page 33
enables you to precisely adjust several parameters to match those signal formats. The projector has 5 independent memory areas to memorize those parameters manually adjusted. It allows you to recall the setting for a specific computer. 1 Press the MENU button to display the On-Screen Menu. Press - Sanyo XU86 | Instruction Manual, PLC-XU86 - Page 34
. Press the Point 7 8 buttons to decrease/increase the value. Display area V Adjust the vertical area displayed by this projector. Press the Point 7 8 buttons to decrease/increase the value. Reset To reset the adjusted data, select Reset and press the SELECT button. The confirmation box - Sanyo XU86 | Instruction Manual, PLC-XU86 - Page 35
the remote control. Dynamic Picture level suitable for viewing picture in a bright room. Standard Normal picture level preset on this projector. green colored board, not truly effective on a black colored board. Image 1~4 User preset image in the Image Adjust Menu (p37). Menu Operation 1 Press the - Sanyo XU86 | Instruction Manual, PLC-XU86 - Page 36
Computer Input Image Level Adjustment 1 Press the MENU button to display the On-Screen Menu. Press the Point 7 8 buttons to move the red framed pointer to the Image Adjust Menu icon. 2 Press the Point ed buttons to move the red framed pointer to the item that you want to adjust, and then press the - Sanyo XU86 | Instruction Manual, PLC-XU86 - Page 37
Adjustment Store item Press the SELECT button at this item to store the adjusted data. The confirmation box will appear, then select [Yes]. This projector has the picture screen resize function, which enables you to customize the image size. 1 Press the MENU button to display the On-Screen Menu - Sanyo XU86 | Instruction Manual, PLC-XU86 - Page 38
can work only when the image is larger than the screen size. A projected image can be also expanded by pressing the D.ZOOM ▲ button on the remote control. Digital zoom - When Digital zoom - is selected, the On-Screen Menu will disappear and the message "D. zoom -" will be displayed. Press the SELECT - Sanyo XU86 | Instruction Manual, PLC-XU86 - Page 39
LAMP R AUTO SET SELECT -V + V INPUT button Computer 1 (Analog/Digital) Computer 2 ✳ Video Wired ✳ See Note at the bottom of this page. Remote displayed. •Wired, Wireless, Memory Viewer are for the Network function. See owner's manual (Additional Vol.) and owner's manual of Memory viewer ( - Sanyo XU86 | Instruction Manual, PLC-XU86 - Page 40
control or press the COMPUTER button on the remote control. Before using these buttons, correct button ON - OFF POWER MENU WARNING INPUT LAMP R AUTO SE SELECT -V + V INPUT button Wireless, Memory Viewer are for the Network function. See owner's manual (Additional Vol.) and owner's manual - Sanyo XU86 | Instruction Manual, PLC-XU86 - Page 41
optimize its performance. When Video System is PAL-M or PAL-N, select system manually. PAL / SECAM / NTSC / NTSC4.43 / PAL-M / PAL-N If the projector cannot reproduce proper video image, it is necessary to select a specific broadcast signal format among PAL, SECAM, NTSC, NTSC 4.43, PAL-M, and PALN - Sanyo XU86 | Instruction Manual, PLC-XU86 - Page 42
the remote control. Dynamic Picture level suitable for viewing picture in a bright room. Standard Normal picture level preset on this projector. Cinema green colored board, not truly effective on a black colored board. Image 1~4 User preset image in the Image Adjust Menu (p43, 44). Menu Operation 1 - Sanyo XU86 | Instruction Manual, PLC-XU86 - Page 43
Image Level Adjustment 1 Press the MENU button to display the On-Screen Menu. Press the Point 7 8 buttons to move the red framed pointer to the Image Adjust Menu icon. 2 Press the Point ed buttons to move the red framed pointer to the item that you want to adjust and then press the SELECT button. - Sanyo XU86 | Instruction Manual, PLC-XU86 - Page 44
"L1" for an active picture. L2............Select "L2" for a still picture. Film .........Select "Film" for watching a film. With this function, the projector reproduces pictures faithful to the original film quality. Reset To reset the adjusted data, select Reset and press the SELECT button. The - Sanyo XU86 | Instruction Manual, PLC-XU86 - Page 45
Video Input Screen Size Adjustment This projector has the picture screen resize function, which enables you to customize the image size. 1 Press the MENU button to display the On-Screen Menu. Press - Sanyo XU86 | Instruction Manual, PLC-XU86 - Page 46
Auto PC Adjustment. Auto Keystone Auto . . . . . always works and corrects keystone distortion according to the projector's tilt. Manual . . .works only when pressing the AUTO SET button on the remote control or the AUTO SETUP button on the top control. Off . . . . . .disables Auto Keystone. ✔Note - Sanyo XU86 | Instruction Manual, PLC-XU86 - Page 47
is this mode. Countdown off ......Show the input image instead of the countdown when turning on the projector. Use this function when you want to project the image as early as possible even when the lamp is not bright enough. Off Do not show On-Screen Displays. except; ● On-Screen Menu ● "Power - Sanyo XU86 | Instruction Manual, PLC-XU86 - Page 48
or interval of presentations. After capturing the projected image, go to the Logo select function and set it to "User". Then the captured image will be displayed when turning on the projector next time or pressing the NO SHOW button. (p28) To capture the image, select [Yes]. To cancel the Capture - Sanyo XU86 | Instruction Manual, PLC-XU86 - Page 49
Logo PIN code setting. For details on PIN code setting, refer to relevant instructions of the PIN code lock function on page 52, 53. CAUTION: WHEN YOU KEEP IT SECURELY. SHOULD THE LOGO PIN CODE BE LOST OR FORGOTTEN, THE PROJECTOR CAN NO LONGER BE OPERATED. Logo PIN code lock Dialog Box Pointer Quit - Sanyo XU86 | Instruction Manual, PLC-XU86 - Page 50
image from a ceiling mounting the projector. Rear When this projector via the network. The projector's network function will stop when turning off the projector. Refer to the owner's manual (Additional Vol.). Power management For reducing power consumption as well as maintaining the lamp life - Sanyo XU86 | Instruction Manual, PLC-XU86 - Page 51
Eco ..........lower brightness reduces the lamp power consumption and extends the lamp life. Pointer You can emphasize a and Dot) of Pointer. (See page 13 for operation.) Remote control This projector provides eight different remote control codes (Code 1-Code 8); the factory-set, initial code - Sanyo XU86 | Instruction Manual, PLC-XU86 - Page 52
function allows you to use Key lock and PIN code lock function to set the security for the projector operation. Key lock This function locks operation of the top control or the remote control. It is useful to prevent operation by an unauthorized person. ···· not locked. ···· lock the operation of - Sanyo XU86 | Instruction Manual, PLC-XU86 - Page 53
NEW PIN CODE IN COLUMN OF THE PIN CODE NO. MEMO ON PAGE 70, AND KEEP IT SECURELY. IF YOU FORGET YOUR PIN CODE, THE PROJECTOR CAN NO LONGER BE STARTED. Enter a PIN code Quit Pointer The input numbers change to "✳" for security. When the pointer automatically moves to "Set", press - Sanyo XU86 | Instruction Manual, PLC-XU86 - Page 54
-sound than the normal operation (L1), but it takes longer to cool the projector down. Lamp counter This function is used to reset the lamp replacement counter. When replacing the projection lamp, reset the lamp replacement counter by using this function. See page 59 for operation. Factory default - Sanyo XU86 | Instruction Manual, PLC-XU86 - Page 55
cord and contact the service station for check and repair. CAUTION DO NOT LEAVE THE PROJECTOR WITH THE AC POWER CORD CONNECTED UNDER THE ABNORMAL CONDITION. IT MAY RESULT IN FIRE OR ELECTRIC SHOCK. Top Control WARNING emit a red light ON - OFF POWER MENU WARNING INPUT LAMP REPLACE AUTO SET UP - Sanyo XU86 | Instruction Manual, PLC-XU86 - Page 56
dealer or service station for proper cleaning. Air filters Pull up and remove. ✔Note: When reinserting this air filter, be sure that the slit part is facing the outer side. Attaching the Lens Cover When moving this projector or while not using it over an extended period of time, replace the lens - Sanyo XU86 | Instruction Manual, PLC-XU86 - Page 57
of cleaner. Abrasive cleaners, solvents, or other harsh chemicals might scratch the surface. 3 When the projector is not in use, replace the lens cover. Cleaning the Projector Cabinet Follow these steps to clean the projector cabinet. 1 Disconnect the AC power cord before cleaning. 2 Softly wipe the - Sanyo XU86 | Instruction Manual, PLC-XU86 - Page 58
Handle Screw Screw Lamp ORDER REPLACEMENT LAMP Replacement lamp can be ordered through your dealer. When ordering a projection lamp, give the following information to the dealer. ● Model No. of your projector ● Replacement Lamp Type No. : PLC-XU86/ PLC-XU83 : POA-LMP90 (Service Parts No. 610 - Sanyo XU86 | Instruction Manual, PLC-XU86 - Page 59
should be replaced, i.e., if the LAMP REPLACE indicator lights up, replace the lamp with a new one IMMEDIATELY after the projector has cooled down. ( Follow carefully the instructions in the Lamp Replacement section of this manual. ) Continuous use of the lamp with the LAMP REPLACE indicator lighted - Sanyo XU86 | Instruction Manual, PLC-XU86 - Page 60
Troubleshooting Before calling your dealer or service center for assistance, check the items below once again. -Make sure you have properly connected the projector for monitor output when connecting to a projector. See your computer's instruction manual for the setting. - It takes about 30 seconds - Sanyo XU86 | Instruction Manual, PLC-XU86 - Page 61
not attempt to open the cabinet. If problems still persist after following all operating instructions, contact the dealer where you purchased the projector or the service center. Give the model number and explain about the problem. We will advise you how to obtain service. Appendix The CE Mark is - Sanyo XU86 | Instruction Manual, PLC-XU86 - Page 62
(Analog) Computer 1 (Digital) Computer 2 Video Sound Wired Wireless ✽ Memory Viewer ✽ Sound Volume Mute Quit Computer Input System (1) (3) Go to System (3) See owner's manual (Additional Vol.) See owner's manual (Additional Vol.) See owner's manual of Memory viewer (optionally available) - Sanyo XU86 | Instruction Manual, PLC-XU86 - Page 63
On / Off On / Countdown off / Off Logo Logo select Capture Off Default User Yes / No Logo PIN code lock Logo PIN code entry Off On Logo PIN Lamp control On / Off Normal / Auto / Eco Pointer Spotlight / Pointer Quit Remote control Security Code 1 - Code 8 Key lock Off Projector Remote - Sanyo XU86 | Instruction Manual, PLC-XU86 - Page 64
mode. 64 ✽ Either of the projector network, or memory viewer function is in abnormal condition. • • • green. • • • red • • • off • • • blinks green. • • • blinks red. ✽ When the life of the projection lamp draws to an end, the LAMP REPLACE indicator lights yellow. When this indicator - Sanyo XU86 | Instruction Manual, PLC-XU86 - Page 65
Appendix Appendix Compatible Computer Specifications Basically this projector can accept the signal from all computers with XGA 11 XGA 12 XGA 13 1024 x 768 1024 x 768 1024 x 768 61.00 35.522 46.90 75.70 86.96 (Interlace) 58.20 WXGA 2 WXGA 3 WXGA 4 1360 x 768 1376 x 768 1360 x 768 XGA 14 - Sanyo XU86 | Instruction Manual, PLC-XU86 - Page 66
Projection Image Size (Diagonal) Throw Distance Projection Lens Projection Lamp PLC-XU83 PLC-XU86 Adjustable from 40" to 300" 3.9' - 45.3' (1.2m - 13.8m) 3.3' - 38.7' (1.0m - 11.8m) F 1.65 ~ 1.81 lens with f 22.5 mm ~ 27 mm with manual zoom and focus 200W Interface Video Input Jack S-video - Sanyo XU86 | Instruction Manual, PLC-XU86 - Page 67
Appendix Accessories Owner's Manual and Owner's Manual (Additional Vol.) AC Power Cord Remote Control and Batteries USB Cable DVI-VGA Cable Lens Cover with String PIN Code Label CD-ROM Soft Carrying Case USB Wireless LAN Adapter ● The specifications are subject to change without notice. ● LCD panels - Sanyo XU86 | Instruction Manual, PLC-XU86 - Page 68
1 of JBMIA (Japan Business Machine and Information System Industries Association). This projector supports all commands defined by PJLink Class 1 and is verified conformance with PJLink Standard Class 1. For PJ Link password, see p49 on owner's manual (Additional Vol.) "Network Set-up and Operation - Sanyo XU86 | Instruction Manual, PLC-XU86 - Page 69
+ DATA 4 Ground USB CONNECTOR (Series B) 1 Vcc 2 - Data 3 + Data 4 Ground LAN TERMINAL 1 TX + 5 ----- 2 TX - 6 RX - 3 RX + 7 ----- 4 ----- 8 ----- 87654321 SERVICE PORT CONNECTOR Terminal : Mini DIN 8-PIN 876 5 43 21 1 RXD 2 ----3 ----4 GND 5 RTS / CTS 6 TXD 7 GND 8 GND - Sanyo XU86 | Instruction Manual, PLC-XU86 - Page 70
Code Number Memo Write down the PIN code number in the column below and keep it with this manual securely. If you forgot or lost the number and unable to operate the projector, contact the service station. PIN Code Lock No. Factory default set No: 1 2 3 4* Logo PIN Code Lock No. Factory default set - Sanyo XU86 | Instruction Manual, PLC-XU86 - Page 71
- Sanyo XU86 | Instruction Manual, PLC-XU86 - Page 72
Printed in Japan Part No. 610 325 7877 (1AA6P1P4991-- MY5A) SANYO Electric Co., Ltd.
-
 1
1 -
 2
2 -
 3
3 -
 4
4 -
 5
5 -
 6
6 -
 7
7 -
8
-
9
-
10
-
11
-
12
-
13
-
14
-
15
-
16
-
17
-
18
-
19
-
20
-
21
-
22
-
23
-
24
-
25
-
26
-
27
-
28
-
29
-
30
-
31
-
32
-
33
-
34
-
35
-
36
-
37
-
38
-
39
-
40
-
41
-
42
-
43
-
44
-
45
-
46
-
47
-
48
-
49
-
50
-
51
-
52
-
53
-
54
-
55
-
56
-
57
-
58
-
59
-
60
-
61
-
62
-
63
-
64
-
65
-
66
-
67
-
68
-
69
-
70
-
71
-
72
 |
 |

Multimedia Projector
MODEL
PLC-XU86
PLC-XU83
Owner’s Manual
Netw
or
k Suppor
t
ed
❏
Wireless LAN
IEEE802.11b/g
❏
Wired LAN
100-Base-TX/10-Base-T
Memory V
iew
er
❏
USB Memory Viewer
(optionally available)
Compatible with a dedicated USB memory
✽
Refer to the owner's manuals below for details about
network and memory viewer function.
■
Owner's Manual (Additional Vol.)
Network Set-up and Operation
■
Owner's Manual
USB Memory
This manual is provided with optionally supplied
USB memory.