Sanyo XU86 Instruction Manual, PLC-XU86 Network Set Up
Sanyo XU86 - PLC XGA LCD Projector Manual
 |
View all Sanyo XU86 manuals
Add to My Manuals
Save this manual to your list of manuals |
Sanyo XU86 manual content summary:
- Sanyo XU86 | Instruction Manual, PLC-XU86 Network Set Up - Page 1
-up and Operation Wired and Wireless Setting Projector Controller Network Viewer Moderator Function First, read the owner's manual of the projector to understand the projector's basic operation and the safety instructions. The safety instructions in the owner's manuals should be followed. English - Sanyo XU86 | Instruction Manual, PLC-XU86 Network Set Up - Page 2
the equipment unless otherwise specified in the instructions. If such changes or modifications should be made, you could be required to stop operation of the equipment. Model Number Trade Name Responsible party Address Telephone No. : XG-705A : Sanyo : SANYO FISHER COMPANY : 21605 Plummer Street - Sanyo XU86 | Instruction Manual, PLC-XU86 Network Set Up - Page 3
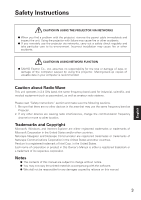
Safety Instructions CAUTION IN USING THE PROJECTOR VIA NETWORKS ● When you find a problem with the projector, remove the power cable immediately and inspect the unit. Using the projector with failure may cause fire or other accidents. ● If you remotely use the projector via networks, carry out a - Sanyo XU86 | Instruction Manual, PLC-XU86 Network Set Up - Page 4
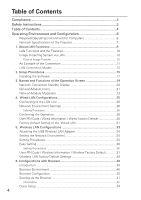
Instructions 3 Table of Contents 4 Operating Environment and Configuration 6 Required Operating Environment for Computers 6 Network Specifications of the Projector 36 Setting Procedures 36 User PIN Code / Wireless Information / Wireless Factory Default 37 Wireless LAN Factory Default Settings - Sanyo XU86 | Instruction Manual, PLC-XU86 Network Set Up - Page 5
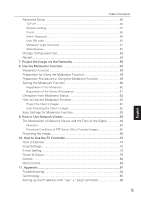
of Contents Advanced Setup 46 TCP / IP...46 Wireless Setting 47 E-mail...48 Admin Password 49 User PIN code ...50 Moderator Login Password 51 Miscellaneous 80 Multi Control 89 11. Appendix 91 Troubleshooting 92 Terminology 95 Setting up the IP address with "arp" + "ping"command 96 5 - Sanyo XU86 | Instruction Manual, PLC-XU86 Network Set Up - Page 6
When operating the projector via the networks, than 2GHz is recommended) 128MB or More 10MB Required to support any of VGA(640X480), SVGA(800X600), XGA(1024X768), The 16.77 million colors). Communication Protocol Network Correspond Wireless LAN Wired LAN Browser Application TCP/IP Correspond - Sanyo XU86 | Instruction Manual, PLC-XU86 Network Set Up - Page 7
Environment and Configuration English Network Specifications of the Projector LAN Terminal Data communication speed Protocol 100Base-TX(100Mbps)/10Base-T(10Mbps) TCP/IP USB Wireless LAN Adapter Interface Communication Mode Data Transfer Speed Wireless Frequency (Channel) Modulation Form - Sanyo XU86 | Instruction Manual, PLC-XU86 Network Set Up - Page 8
8 - Sanyo XU86 | Instruction Manual, PLC-XU86 Network Set Up - Page 9
1 Chapter 1. About LAN Functions This chapter describes the features, the mechanism, and connection procedures of the LAN. 9 English - Sanyo XU86 | Instruction Manual, PLC-XU86 Network Set Up - Page 10
manipulate the projecting image and the projector. This software has functions below and you can use the projector under various network environments to meet the wide-ranging needs of the operation. • Accept both Wired and Wireless LAN environment. When operating via Wireless LAN, there is no need - Sanyo XU86 | Instruction Manual, PLC-XU86 Network Set Up - Page 11
of the projection via the LAN. You can project the image on Computer (1) (Wired LAN connection), or Computer (2) (Wireless LAN connection) through the selected projector . 2.0 2.0 1.5 1.5 1.0 1.0 0.5 0.5 0.0 0.0 2.0 1.5 1.0 0.5 0.0 Computer (1) Access point Computer (2) English 11 - Sanyo XU86 | Instruction Manual, PLC-XU86 Network Set Up - Page 12
Access point Wireless communication mode corresponded computer : Infrastructure ■ Wireless LAN, AdHoc 802.11b Communication Mode Communication mode between Wireless LAN equipment. (Communication mode via SSID/ESSID) Network Projector Wireless communication mode :AdHoc Wireless communication mode - Sanyo XU86 | Instruction Manual, PLC-XU86 Network Set Up - Page 13
computer by the remote control which is provided with the projector. Use the remote control pointing to the projector. You do not need to connect the USB cable to operate the computer mouse. (For details about the remote control operation, refer to the owner's manual of the projector.) English 13 - Sanyo XU86 | Instruction Manual, PLC-XU86 Network Set Up - Page 14
14 - Sanyo XU86 | Instruction Manual, PLC-XU86 Network Set Up - Page 15
2 Chapter 2. Setup Procedures This chapter describes how to install the NetworkModule software and how to set up the networks. 15 English - Sanyo XU86 | Instruction Manual, PLC-XU86 Network Set Up - Page 16
To use the projector via the networks, follow the setup procedures below. STEP 1 Install the software on computers. Install the software recorded in CD-ROM on each computer which will be operated. Read following pages of this chapter to install. Select Wired LAN or Wireless LAN then connect - Sanyo XU86 | Instruction Manual, PLC-XU86 Network Set Up - Page 17
click "AutoRun. exe" in it. 2. Main menu will be displayed on the screen. Three software names will be shown on the left side of the screen. Refer to the instructions below and select the most suitable software for you. ■ When projecting via a selected computer which is connected to the LAN. Install - Sanyo XU86 | Instruction Manual, PLC-XU86 Network Set Up - Page 18
Moderator". ✳ By clicking the "Launch NetworkModule Moderator", you can activate the software directly from the CD-ROM without installing the software into the computer. f Install each software with following the instructions on the installation screen. g After the installation, the start-up menu - Sanyo XU86 | Instruction Manual, PLC-XU86 Network Set Up - Page 19
3 Chapter 3. Names and Functions of the Operation Screen This chapter describes the functions of each part of the operation screen. 19 English - Sanyo XU86 | Instruction Manual, PLC-XU86 Network Set Up - Page 20
. With this screen, you can confirm that the network connection is whether "Wired" or "Wireless", or network environment of the projector when setting the connection. After selecting "Wired" or "Wireless", "Please wait..." message will appear and then change into "Ready for use" message to show - Sanyo XU86 | Instruction Manual, PLC-XU86 Network Set Up - Page 21
the networks. To use the moderator function, install this software into each participant's (except for the moderator) computers. identify each projector. e Network Projector List Display all the projectors connected to the networks. Show unoccupied projector as "Ready" and occupied projector as " - Sanyo XU86 | Instruction Manual, PLC-XU86 Network Set Up - Page 22
Wireless LAN Configurations" ➔ "Easy Setting". (p3637) u Join the moderated session button Enter the moderator's group which is selected in the Network Projector the selected adapter will always be used with the software. After exiting the software, the selected adapter will be cancelled. *The o!1!5 - Sanyo XU86 | Instruction Manual, PLC-XU86 Network Set Up - Page 23
Operation Screen NetworkModule Moderator When using the moderator function, install the software on the moderator's computer. The function is the same as of the participants and send it to the projector. The image will be sent in real time. !8 Stop Remote Capture button Stop capturing the image of - Sanyo XU86 | Instruction Manual, PLC-XU86 Network Set Up - Page 24
24 - Sanyo XU86 | Instruction Manual, PLC-XU86 Network Set Up - Page 25
4 Chapter 4. Wired LAN Configurations This chapter describes the preparation for Wired LAN setting with projectors and how to set the LAN environment. 25 English - Sanyo XU86 | Instruction Manual, PLC-XU86 Network Set Up - Page 26
will start to blink. If the "Wired setting" is "Off", it will not blink. Follow step 2 and 3 to blink the lamp. 2. Select "Wired Setting" in the projector menu, and press the SELECT button. Select similar LAN environment among LAN1, 2 and 3 with the Point 7 8 buttons. (LAN1, 2, and 3 are the factory - Sanyo XU86 | Instruction Manual, PLC-XU86 Network Set Up - Page 27
can confirm the LAN settings you have made from "Wired Information". (p30) As in the case that the LAN cannot be connected, see this screen. User PIN code Wired setting Wired Information Wired Factory Default Wired LAN setting screen (Example) English 27 - Sanyo XU86 | Instruction Manual, PLC-XU86 Network Set Up - Page 28
List button. If error screen appears again, reconfirm the LAN setting. When the projector is set where separated by the router, see next page. When Firewall function (Anti-virus software) is effective, network projector may not be found. In that case, disable the Firewall function and try searching - Sanyo XU86 | Instruction Manual, PLC-XU86 Network Set Up - Page 29
on the Add NetworkModule screen. If you check "Check status", the connected projector will be checked periodically. 3. Click "OK" then the projector will be added on the Network Projector List. Network Projector List Click the Add NetworkModule button English Add NetworkModule screen Enter IP - Sanyo XU86 | Instruction Manual, PLC-XU86 Network Set Up - Page 30
projector. After setting the User PIN code, you need to enter it to operate the projector via the networks. 1. Select User PIN code, and press the SELECT button. The User PIN code screen will appear. 2. Set the User : 172.21.95.1 IP CONFIGURATION : Manual ARP + PING : Enable CONNECTED PC : - Sanyo XU86 | Instruction Manual, PLC-XU86 Network Set Up - Page 31
DNS ADDRESS 255.255.255.255 255.255.255.255 IP CONFIGURATION MANUAL INTERRUPT CONNECTION PERMISSION ENABLE 255.255.255.0 255.255.255.255 255.255.255 255.255.255.255 MANUAL ENABLE IP CONFIGURATION ENABLE with ARP+PING DNS DOMAIN SYSTEM PASSWORD _ BLANK USER PIN CODE 0000(NONE) ENABLE _ BLANK - Sanyo XU86 | Instruction Manual, PLC-XU86 Network Set Up - Page 32
32 - Sanyo XU86 | Instruction Manual, PLC-XU86 Network Set Up - Page 33
has to be equipped with a Wireless LAN card adapter which supports IEEE 802.11b/g. If connecting in Infrastructure mode with an access point, the access point is required to support IEEE 802.11b/g. Caution : Do not use a mobile phones or PHS near (within 20cm / 8inch) the projector. It may cause - Sanyo XU86 | Instruction Manual, PLC-XU86 Network Set Up - Page 34
order not to break the terminal. CAUTION: Use specified USB Wireless LAN Adapter. If you use other product, the projector will not be operated properly. USB USB Terminal USB Lamp After the USB Wireless LAN Adapter becomes ready for use, the lamp will start to blink green when receiving data. USB - Sanyo XU86 | Instruction Manual, PLC-XU86 Network Set Up - Page 35
take a while and after completing the operation the message will disappear. During the switching period, the projector cannot be operated. User PIN code Wireless setting Wireless Information Wireless Factory Default 4. Press the SELECT button. LAN setting screen will appear and the selected LAN - Sanyo XU86 | Instruction Manual, PLC-XU86 Network Set Up - Page 36
used with Windows98SE / Me, Windows2000. Windows XP should be Service Pack 1 or later version. Setting Procedures 1. Turn on the projector and select "Wireless" from the input menu of the projector. 2. Select "Wireless Setting" from the projector menu and press the SELECT button. 3. Select "SIMPLE - Sanyo XU86 | Instruction Manual, PLC-XU86 Network Set Up - Page 37
to enter it to operate the projector via the networks. Select "User PIN code" from the projector menu. Set with the same procedures as setting Wired LAN User PIN code. Refer to "4. Wired LAN Configurations" ➔ "User PIN code". (p30) Wireless Information Display the current LAN connecting environment - Sanyo XU86 | Instruction Manual, PLC-XU86 Network Set Up - Page 38
255 DHCP ENABLE 255.255.255.255 MANUAL ENABLE IP Address Setting ENABLE with ARP+PING ENABLE DISABLE WIRELESS CHANNEL NETWORK TYPE 11 802.11b AdHoc 11 11 INFRASTRUCTURE 802.11b AdHoc WIRELESS SSID/ESSID (SSID/IBSSID) WIRELESS (NARROW CAPS) ANY WIRELESS (NARROW CAPS) WEP (WEP encryption - Sanyo XU86 | Instruction Manual, PLC-XU86 Network Set Up - Page 39
LAN. Complete the connection in advance. The browser can set or operate : • LAN setting Configure Wired/Wireless LAN environment. • E-mail Setting Configure E-mail function to manage the projector remotely. • Operation of Network Viewer Project and operate the image data on the network server. For - Sanyo XU86 | Instruction Manual, PLC-XU86 Network Set Up - Page 40
browser and configure to operate the projector. Browser Environment Browser is required to support the following version. Microsoft : " and "Proxy", and check on "Set proxy manually.". Click the "Display" button and enter the IP address of the projector in the "Proxy server is not used at address - Sanyo XU86 | Instruction Manual, PLC-XU86 Network Set Up - Page 41
Configuration screen. You can also activate the screen directly from the browser screen without using NetworkModule Client (or NetworkModule Moderator). Enter the projector's Network IP address in the URL address bar of the browser. Use this browser screen to configure various settings. The screen - Sanyo XU86 | Instruction Manual, PLC-XU86 Network Set Up - Page 42
6. Configurations with Browser Information Display the current setting environment. The contents differ depending on Wired or Wireless LAN environment. Screen of Wireless LAN Screen of Wired LAN 42 - Sanyo XU86 | Instruction Manual, PLC-XU86 Network Set Up - Page 43
. Data Transfer Rate Show the current Wireless communication speed of the projector. The communication speed is automatically changed by the environment at that time (11/5.5/2/1/54/48/36/24/18/12/9/6 Mbps). The communication speed cannot be fixed. Current User/PC Show the IP address of the - Sanyo XU86 | Instruction Manual, PLC-XU86 Network Set Up - Page 44
"Advanced Setup". (p46-52) If you have set the items from the advanced setup, Quick Setup is not necessary. Setting items differ depending on the Wireless LAN and Wired LAN. To reflect the settings on the projector, click "APPLY". For details about each item/button, see next page. When USB - Sanyo XU86 | Instruction Manual, PLC-XU86 Network Set Up - Page 45
on the Network Projector List in the application operation screen. IP Configured Method A desired IP address setup method is selected from "Manual", "DHCP", used, the gateway address can be remained "255.255.255.255". Wireless Mode Select the Communication mode 802.11b or 802.11b.g Network Type - Sanyo XU86 | Instruction Manual, PLC-XU86 Network Set Up - Page 46
IP Configuration Method ..........A desired IP address setup method is selected from "Manual", "DHCP", and "BOOTP". If "DHCP" or "BOOTP" is from the DHCP server, the computer cannot be connected to the projector. If the projector fails to obtain IP address from BOOTP server, the existing IP - Sanyo XU86 | Instruction Manual, PLC-XU86 Network Set Up - Page 47
the Wireless information is uppercase, it is necessary to distinguish between upper case and lower case characters. Channel If you use the projector in ..........When selecting 802.1 x "LEAP" in WEP security, enter the user name and the password. Enter with ASCII 64-byte capital characters and - Sanyo XU86 | Instruction Manual, PLC-XU86 Network Set Up - Page 48
. (up to ASCII254 characters) Mail Address Enter E-mail addresses of users. (up to ASCII254 characters) Option When the checked item has occurred, the projector sends alert messages. Time Set the time of "Accumulated Lamp-use time reaches in ***hours". Attached Message Attach the message to - Sanyo XU86 | Instruction Manual, PLC-XU86 Network Set Up - Page 49
) APPLY button Click the APPLY button to update. The screen to restart the projector will be displayed. If you set the admin password for the first time, do time, the password will be required to enter. Leave the "User name" field blank and enter the password you set. ✳ The password set here is - Sanyo XU86 | Instruction Manual, PLC-XU86 Network Set Up - Page 50
code With this screen, you can set the User PIN code to transfer the image to the projector and to activate PJ Controller. You can set different PIN code as you set for Admin Password. (p49) When you reset the User PIN code, you do not need to enter the current PIN code - Sanyo XU86 | Instruction Manual, PLC-XU86 Network Set Up - Page 51
6. Configurations with Browser Moderator Login Password To use the Moderator function, you need to set the Moderator Login password here. For operating the Moderator function, a Moderator Login password is required on this screen. When resetting the Moderator Login password, you do not need to enter - Sanyo XU86 | Instruction Manual, PLC-XU86 Network Set Up - Page 52
the Image via the networks" (p56) for further detail.) APPLY button Click the APPLY button to update. The screen to restart the projector will be displayed. REFRESH button Cancel the new settings. RESTORE Factory Default Settings button ..........Restore the settings to the values at the factory - Sanyo XU86 | Instruction Manual, PLC-XU86 Network Set Up - Page 53
. With this screen, you can also confirm some settings ( Projector name, IP Configuration Method, IP Address, Wireless Mode, Network Type, Channel, SSID, WEP Security). Depending on Wireless or Wired input, setting items will be varied. Wireless LAN set menu Wired LAN set menu English Parameter - Sanyo XU86 | Instruction Manual, PLC-XU86 Network Set Up - Page 54
with Browser Restart You can restart the projector on this screen. To enable the new settings, the projector has to be restarted. Click "RESTART". Parameter Description RESTART button Click this button when you restart the projector after completing the settings. CANCEL button Cancel - Sanyo XU86 | Instruction Manual, PLC-XU86 Network Set Up - Page 55
7 Chapter 7. Project the Image via the Networks Project the image on the computer screen by operating the projector which is connected to the networks. 55 English - Sanyo XU86 | Instruction Manual, PLC-XU86 Network Set Up - Page 56
Activate NetworkModule Client (Participants) or NetworkModule Moderator (Moderator). 2. Adjust the projector input to the selected network (Wired or Wireless) with the PJ Controller. When operating multiple projectors, adjust each projector independently. Refer to "10. How to Use the PJ Controller - Sanyo XU86 | Instruction Manual, PLC-XU86 Network Set Up - Page 57
8 Chapter 8. Use the Moderator Function With Moderator function, the moderator can project the participants' computer screen through the projector in meetings or in classes. 57 English - Sanyo XU86 | Instruction Manual, PLC-XU86 Network Set Up - Page 58
the participants' data directly in a short time and in real time without taking time to transfer the data to the computer connected to the projector. The image data will not be limited by the computer's application because the data transfer of each computer adopts the screen capturing system. Names - Sanyo XU86 | Instruction Manual, PLC-XU86 Network Set Up - Page 59
projector to put the projector under moderator's control. (p51) 2, Resister a moderator in the projector the registration, only the moderator can control the projector and clients cannot operate. 3. Each client registers function. Network Projector List Moderator login button Exit moderator - Sanyo XU86 | Instruction Manual, PLC-XU86 Network Set Up - Page 60
with Browser" ➔ "Advanced Setup" ➔ "Moderator Login Password". (p51) 3. Register the moderator to each projector through the moderator screen. Select the projector on the screen (The selected projector will be blue.) and click the Moderator login button. 4. "Set Session Password" screen will appear - Sanyo XU86 | Instruction Manual, PLC-XU86 Network Set Up - Page 61
displayed in the moderator's client list screen. To quit the session, right-click the projector icon on the computer task bar and select "Exit from the moderated session" from for moderator function. Follow the instructions of "How to Use Moderator Function" on the next page for the operation - Sanyo XU86 | Instruction Manual, PLC-XU86 Network Set Up - Page 62
projector in real time. Stop Projecting the Client's Images Select the client to stop being projected the image from the client list, and click the Stop Remote password for every equipment if following the instructions. The password is to control the projector and clients' computers thoroughly. With - Sanyo XU86 | Instruction Manual, PLC-XU86 Network Set Up - Page 63
Viewer Project images on a FTP server, which is on the same LAN with the projector, through the projector by operating a projector or a computer. First, check if the projector and the computer are connected to the networks correctly with Wired or Wireless, to project the image properly. 63 English - Sanyo XU86 | Instruction Manual, PLC-XU86 Network Set Up - Page 64
. The flow of the signal for each communication mode is shown below. ■ Wireless LAN Infrastructure Communication Mode Network Projector Wireless Communication Mode : Infrastructure Server Instruction Computer Server Instruction FTP Server Computer Image Data Access Point Computer Server - Sanyo XU86 | Instruction Manual, PLC-XU86 Network Set Up - Page 65
image data each time to project. The projector can also instruct to project images on FTP server. In this case, operation written in step 1 is required in advance. Functional Conditions of FTP Server Which Provides Images ✳ FTP Service can be available with Windows NT4.0, Windows2000 Professional - Sanyo XU86 | Instruction Manual, PLC-XU86 Network Set Up - Page 66
with the PJ Controller 1. Select the projector input (Wired /Wireless). Select "Wireless" for Wireless LAN and "Wired" for Wired LAN for the input source of the projector. Activate " NetworkModule Client" or "NetworkModule Moderator". Detected projector names and IP addresses will be displayed - Sanyo XU86 | Instruction Manual, PLC-XU86 Network Set Up - Page 67
as /test/data etc. User ID ..........Enter login ID access to the projector . 7. Select Play Mode and display the image Play Mode Auto (Infinite Loop) (Keeps playing images repeatedly) Auto (Plays or pauses all the images according to the Auto Play Setting mode) Manual (Plays images manually - Sanyo XU86 | Instruction Manual, PLC-XU86 Network Set Up - Page 68
9. How to Use Network Viewer 2) Operating with the Browser 1. Select "Wireless" for Wireless LAN and "Wired" for Wired LAN from the input menu of the projector. Activate " NetworkModule Client" or "NetworkModule Moderator". Operating directly from the browser is also possible. In this case, enter - Sanyo XU86 | Instruction Manual, PLC-XU86 Network Set Up - Page 69
the User ID and password are anonymous, enter "anonymous". 5. Click APPLY button Click APPLY button to set up the server information on the specified projector. . Return Return to the previous page manually in Manual mode. Next Go to next page manually in Manual mode. REFRESH Update and show the - Sanyo XU86 | Instruction Manual, PLC-XU86 Network Set Up - Page 70
image data, referring to "Operating with the PJ Controller" or "Operating with the browser". 2. Select "Wireless" for Wireless LAN and "Wired" for Wired LAN for the input source of the projector. 3. Select "Wireless Viewer" when using Wireless LAN or "Wired Viewer" when using Wired LAN from the - Sanyo XU86 | Instruction Manual, PLC-XU86 Network Set Up - Page 71
keep playing images repeatedly. Times Specify the number of repeating times of auto play. (Maximum 255 times) Manual Switch images manually. Press the Point e button on the projector (or the remote control) to show the next image and the Point d button to show the previous image. Connect to - Sanyo XU86 | Instruction Manual, PLC-XU86 Network Set Up - Page 72
72 - Sanyo XU86 | Instruction Manual, PLC-XU86 Network Set Up - Page 73
Chapter 10. How to Use the PJ Controller Control the projector operation on the network. PJ Controller works for; • Operating the projector • Operating the Network viewer • Controlling the projector Monitor the operation status of the projector in real time. Send an e-mail to the administrator about - Sanyo XU86 | Instruction Manual, PLC-XU86 Network Set Up - Page 74
is set correctly on the network and the image in the computer is properly displayed from the projector with "NetworkModule Client" or "NetworkModule Moderator" applications on the computer. Activate the PJ Controller. 1. Activate the "NetworkModule Client" or " NetworkModule Moderator". 2. Select - Sanyo XU86 | Instruction Manual, PLC-XU86 Network Set Up - Page 75
a desired language from the pull-down menu, and click "Set". Temperature Set the unit of temperature displayed on the control screen of the projector. Select "Centigrade" or "Fahrenheit" from the pull-down menu and click "Set". Comment You can store any comments regarding the initial settings. To - Sanyo XU86 | Instruction Manual, PLC-XU86 Network Set Up - Page 76
the E-mail address of administrator and click "Set". Mail Address Enter E-mail addresses of users and click "Set". To delete the E-mail address, click "Delete". Option When the checked item has occurred, the projector sends alert messages. ✳ The SMTP server is a server for sending E-mail. Please - Sanyo XU86 | Instruction Manual, PLC-XU86 Network Set Up - Page 77
outlet and ask servicing to a qualified service personnel * When the life of the lamp has been expired TITLE: Message from projector Projector Model Name: XX100 TCP/IP: 192.168.0.111 Projector Name: It sends you the following message: ✳ The life span of lamp is reached. Lamp replacement is required - Sanyo XU86 | Instruction Manual, PLC-XU86 Network Set Up - Page 78
confirmation message will appear. Click OK to turn off the projector. CAUTION: Projector cannot be turned on for approximately 90 seconds after it this function as Normal, the network part of the projector is constantly provided with power even if the projector is turned off. If you set this as - Sanyo XU86 | Instruction Manual, PLC-XU86 Network Set Up - Page 79
be checked on the Power & Status screen. Parameter Description Accumulated lamp-use time............Display the accumulated time of lamp use in hour increment. Accumulated projector-use time ....Display the accumulated time of projector use in hour increment. Power Status Display the status of - Sanyo XU86 | Instruction Manual, PLC-XU86 Network Set Up - Page 80
this screen are varied depending on the input source or product model of the projector. So the figures shown in this section may be different from the actual screen displayed on your computer. For further details, refer to the owner's manual of your projector. This function is not available if the - Sanyo XU86 | Instruction Manual, PLC-XU86 Network Set Up - Page 81
PC adjustment This feature optimizes the signal from the connected computer to display the screen. ✳ PC adjustment screen is displayed only when Computer1 (Analog) or Computer 2 (RGB) is selected for the input source. 10. How to Use the PJ Controller English Parameter Description Current Mode - Sanyo XU86 | Instruction Manual, PLC-XU86 Network Set Up - Page 82
mode for the video signal. This screen is displayed only when Video (Video/Component) is selected for the input source of the projector. Depending on the signal, the screen is varied as follows. Component Input Parameter Description System Adjustment ..........Select a scan mode of component - Sanyo XU86 | Instruction Manual, PLC-XU86 Network Set Up - Page 83
reset. ✳ Some items may not be adjusted depending on the functions of your projector or input signal. In this case, " ----" will be shown in the - 4", from the pull-down list. Image 1 - 4 can be set by users. Original Mode Displays the original mode. Contrast Click 7 8 to adjust the image contrast - Sanyo XU86 | Instruction Manual, PLC-XU86 Network Set Up - Page 84
screen size. Click "OFF" to cancel this function. * Items only for Wireless, Wired Computer1 (Analog) or Computer2 (RGB) input mode. ✳ If " Sound On this screen, you can adjust the sound volume of the projector. Parameter Description Volume Click 7 8 to adjust the volume. Mute Click "ON" - Sanyo XU86 | Instruction Manual, PLC-XU86 Network Set Up - Page 85
Setting On this screen, you can configure the projector. Refer to the next page for each item and description. The items displayed on this screen are varied according to the functions provided to the projector. 10. How to Use the PJ Controller English 85 - Sanyo XU86 | Instruction Manual, PLC-XU86 Network Set Up - Page 86
To lock the projector, select "Projector Keys" (Locks the top panel operation)or "Remote Control" (Locks the remote control operation). If you do not need to lock, select None. Fan Adjust the rotating speed of the cooling fans. "L1" is normal and "L2" is slower and quieter mode. Lamp Counter You - Sanyo XU86 | Instruction Manual, PLC-XU86 Network Set Up - Page 87
10. How to Use the PJ Controller Service Items on this screen are used for maintenance of the projector. Parameter Description Fan Control Speed Select "Max" or "Normal". Video System* ....Display the current video system. Horizontal* ........Click 7 8 buttons to adjust horizontal screen size. - Sanyo XU86 | Instruction Manual, PLC-XU86 Network Set Up - Page 88
10. How to Use the PJ Controller 2. Select Set Number and name the setting Select the Set Number you wish to store the adjustment from the pull-down menu. Enter the name of the setting in the Memo field. Enter the name of the setting 3. Save the setting (Set) Click Save button to save the adjustment - Sanyo XU86 | Instruction Manual, PLC-XU86 Network Set Up - Page 89
Imager and on the same network. Operation 1. Activate NetworkModule Client (or NetworkModule Moderator), and call up the Advanced Settings screen. 2. Select the projectors to operate by the mouse pointer with pressing the [Ctrl] key or the [Shift] key of the computer. The illustration of PJ - Sanyo XU86 | Instruction Manual, PLC-XU86 Network Set Up - Page 90
off the Freeze function. On Start Select to turn on or off the projector with the projector power source. Lamp Control Select the brightness of the screen. Key Lock Lock or Unlock the key operation of the projector and the remote control. ✳ Items with "SET" button requires to click "SET" to be - Sanyo XU86 | Instruction Manual, PLC-XU86 Network Set Up - Page 91
11 Chapter 11. Appendix - Troubleshooting - Terminology - Setting up IP Address with arp + ping Command 91 English - Sanyo XU86 | Instruction Manual, PLC-XU86 Network Set Up - Page 92
to the network HUB properly? Wireless LAN Is the USB Wireless LAN Adapter attached to the USB terminal of the projector and USB lamp is blinking? If there are not any problems, confirm the LAN setting again. If the computer supports Wireless LAN, activate NetworkModule Client (or NetworkModule - Sanyo XU86 | Instruction Manual, PLC-XU86 Network Set Up - Page 93
point Check the settings for projector Client computer *IP Address No setting is required. Automatically set as HDCP. *Wireless Channel........Should be 11 * refer to the owner's manual for the devices or consult a system administrator of the network. Is the segment where the projector is installed - Sanyo XU86 | Instruction Manual, PLC-XU86 Network Set Up - Page 94
unstable. Change channel to resolve the problem. The channels of the projector and projector Client computer must be the same. Or adjust the Quality selection in the Advanced settings. Refer to "7. Project the Image via the Networks"(p56). ■ Wired / Wireless input cannot be changed. NetworkModule - Sanyo XU86 | Instruction Manual, PLC-XU86 Network Set Up - Page 95
by setting a description code onto them. It is necessary to set the same decryption code for equipment. Wi-Fi (the Standard for Wireless Fidelity) Wi-Fi is short for Wireless fidelity and a marketing brand name for IEEE 802.11b High-Rate. Only the products that have passed an inter-operation test - Sanyo XU86 | Instruction Manual, PLC-XU86 Network Set Up - Page 96
"arp" + "ping"command You can use "arp" and "ping" command from Command Prompt to assign an IP address to your projector. 1. Start up projector and configure the Wired or Wireless LAN to communicate with the computer. 2. From Windows "Start" menu, click "Run". In the field next to "Open:", enter - Sanyo XU86 | Instruction Manual, PLC-XU86 Network Set Up - Page 97
SANYO Electric Co., Ltd
-
 1
1 -
 2
2 -
 3
3 -
 4
4 -
 5
5 -
 6
6 -
 7
7 -
8
-
9
-
10
-
11
-
12
-
13
-
14
-
15
-
16
-
17
-
18
-
19
-
20
-
21
-
22
-
23
-
24
-
25
-
26
-
27
-
28
-
29
-
30
-
31
-
32
-
33
-
34
-
35
-
36
-
37
-
38
-
39
-
40
-
41
-
42
-
43
-
44
-
45
-
46
-
47
-
48
-
49
-
50
-
51
-
52
-
53
-
54
-
55
-
56
-
57
-
58
-
59
-
60
-
61
-
62
-
63
-
64
-
65
-
66
-
67
-
68
-
69
-
70
-
71
-
72
-
73
-
74
-
75
-
76
-
77
-
78
-
79
-
80
-
81
-
82
-
83
-
84
-
85
-
86
-
87
-
88
-
89
-
90
-
91
-
92
-
93
-
94
-
95
-
96
-
97
 |
 |

Network Set-up
and Operation
Wired and Wireless Setting
Projector Controller
Network Viewer
Moderator Function
First, read the owner's manual of the projector to
understand the projector's basic operation and the safety
instructions.
The safety instructions in the owner's manuals should be
followed.
English
Owner's Manual
(Additional
Vol.
)