Sharp 4450 FO-4450 Operation Manual - Page 17
Attaching the ADF exit tray, Attaching the received document tray, Attaching the national character
 |
View all Sharp 4450 manuals
Add to My Manuals
Save this manual to your list of manuals |
Page 17 highlights
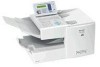
1. Installation Connections Attaching the ADF exit tray Insert the protrusion on the right side of the machine into the hole in the right side of the ADF exit tray ➊, then bend the tray slightly and insert so that the protrusion on the left side of the machine goes into the hole on the left side of the ADF exit tray ➋. Pull out the tray extension ➌. 1 2 3 Attaching the received document tray Slide the received document tray into the machine as shown. When it stops, lift the end slightly and push in so that the tray locks into place. Important! The received document tray must be attached for the fax machine to operate properly. Attaching the national character labels If French will be used for the display language (see LANGUAGE SELECT on page 114) attach the national character labels for French as shown below. During procedures that require the entry of text, the keys below the labels can be pressed to enter the corresponding characters. Flip up the Rapid Key overlay 15
-
 1
1 -
2
-
3
-
4
-
5
-
6
-
7
-
8
-
9
-
10
-
11
-
 12
12 -
 13
13 -
 14
14 -
 15
15 -
 16
16 -
 17
17 -
 18
18 -
 19
19 -
 20
20 -
 21
21 -
 22
22 -
23
-
24
-
25
-
26
-
27
-
28
-
29
-
30
-
31
-
32
-
33
-
34
-
35
-
36
-
37
-
38
-
39
-
40
-
41
-
42
-
43
-
44
-
45
-
46
-
47
-
48
-
49
-
50
-
51
-
52
-
53
-
54
-
55
-
56
-
57
-
58
-
59
-
60
-
61
-
62
-
63
-
64
-
65
-
66
-
67
-
68
-
69
-
70
-
71
-
72
-
73
-
74
-
75
-
76
-
77
-
78
-
79
-
80
-
81
-
82
-
83
-
84
-
85
-
86
-
87
-
88
-
89
-
90
-
91
-
92
-
93
-
94
-
95
-
96
-
97
-
98
-
99
-
100
-
101
-
102
-
103
-
104
-
105
-
106
-
107
-
108
-
109
-
110
-
111
-
112
-
113
-
114
-
115
-
116
-
117
-
118
-
119
-
120
-
121
-
122
-
123
-
124
-
125
-
126
-
127
-
128
-
129
-
130
-
131
-
132
-
133
-
134
-
135
-
136
-
137
-
138
-
139
-
140
-
141
-
142
-
143
-
144
 |
 |
