Sharp AJ-5030 AJ-5030 Operation Manual for Windows®
Sharp AJ-5030 Manual
 |
View all Sharp AJ-5030 manuals
Add to My Manuals
Save this manual to your list of manuals |
Sharp AJ-5030 manual content summary:
- Sharp AJ-5030 | AJ-5030 Operation Manual for Windows® - Page 1
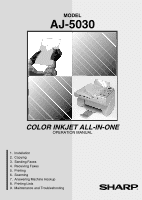
MODEL AJ-5030 COLOR INKJET ALL-IN-ONE OPERATION MANUAL 1. Installation 2. Copying 3. Sending Faxes 4. Receiving Faxes 5. Printing 6. Scanning 7. Answering Machine Hookup 8. Printing Lists 9. Maintenance and Troubleshooting - Sharp AJ-5030 | AJ-5030 Operation Manual for Windows® - Page 2
equipment. Note: This equipment has been tested and found to comply with the instructions in the operation manual." As an ENERGY STAR partner, SHARP has determined that this product meets the ENERGY STAR guidelines for energy efficiency. Declaration of Conformity SHARP COLOR MULTIFUNCTION, AJ-5030 - Sharp AJ-5030 | AJ-5030 Operation Manual for Windows® - Page 3
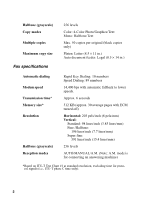
of your Color Inkjet are shown below. Print specifications Printer type Print cartridges Print speed Resolution Print media Copy specifications Color thermal inkjet, dual cartridge Color cartridge: Sharp AJ-C50C Black cartridge: Sharp AJ-C50B Color: 3.5 ppm Black: 7.5 ppm (600 × 300 dpi) Quick - Sharp AJ-5030 | AJ-5030 Operation Manual for Windows® - Page 4
Fine /Halftone: 196 lines/inch (7.7 lines/mm) Super fine: 391 lines/inch (15.4 lines/mm) 256 levels AUTO/MANUAL/A.M. (Note: A.M. mode is for connecting an answering machine) *Based on ITU-T Test Chart #1 at standard resolution, excluding time for protocol signals (i.e., ITU-T phase C time only). 2 - Sharp AJ-5030 | AJ-5030 Operation Manual for Windows® - Page 5
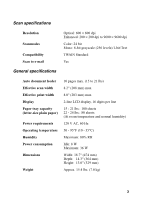
Scan specifications Resolution Scan modes Compatibility Scan to e-mail Optical: 600 × 600 dpi Enhanced: 200 × 200 dpi to 9600 × 9600 dpi Color: 24 bit Mono: 8-bit grayscale (256 levels)/1-bit/Text TWAIN Standard Yes General specifications Auto document feeder Effective scan width Effective print - Sharp AJ-5030 | AJ-5030 Operation Manual for Windows® - Page 6
continuous improvement, SHARP reserves the right to make design and specification changes for product improvement without prior notice. The attempt any procedures not described in this manual. Refer all servicing to qualified service personnel. • Do not install or use the machine near water, or - Sharp AJ-5030 | AJ-5030 Operation Manual for Windows® - Page 7
a gas leak in the vicinity of the leak. • The power outlet must be installed near the equipment and must be easily accessible. Important: • This facsimile machine is special services offered by your telephone company. If you attempt to use the fax machine in conjunction with any of these services, - Sharp AJ-5030 | AJ-5030 Operation Manual for Windows® - Page 8
Table of Contents A Look at the Operation Panel 8 1. Installation 11 Unpacking Checklist 11 Setup 12 Loading Printing Paper 20 Installing the Print Cartridges 23 Installing the Sharp Desktop Software 30 Entering Your Name and Fax Number 32 Setting the Date and Time 36 Setting the - Sharp AJ-5030 | AJ-5030 Operation Manual for Windows® - Page 9
or Cards 90 Sharp AJ-5030 Control Panel 91 6. Scanning 92 Scanning a document 92 Scanning a Document to Your E-mail Program 94 7. Answering Machine Hookup 96 Connecting an Answering Machine 96 Optional A.M. Mode Settings 99 8. Printing Lists 101 9. Maintenance and Troubleshooting 106 - Sharp AJ-5030 | AJ-5030 Operation Manual for Windows® - Page 10
AJ-5030 AUTO MANUAL A.M. ENLARGE REDUCE POWER LIGHT/DARK PAPERTYPE RESOLUTION FUNCTION SPEED DIAL 1 GHI 4 REDIAL PQRS 7 SEARCH ABC 2 JKL 5 TUV 8 0 DEF 3 MNO 6 WXYZ 9 RECEPTION MODE SPEAKER A B C D E F G H I J B/W COPY SCAN/BOOK STOP COLOR COPY START 11 12 copy or faxing. Three - Sharp AJ-5030 | AJ-5030 Operation Manual for Windows® - Page 11
various special functions. 10 RECEPTION MODE key Press this key to select the mode for receiving faxes (and voice calls if a phone is connected to the same line as the Color Inkjet). The selections are AUTO, MANUAL, and A.M. 11 REDIAL key Press this key to automatically redial the last number dialed - Sharp AJ-5030 | AJ-5030 Operation Manual for Windows® - Page 12
12 SEARCH key Press this key to search through your auto-dial fax numbers or e-mail addresses when sending a fax. 13 Rapid Dial Keys Press one of these keys to dial a fax number automatically. 14 B/W COPY key Press this key to make a black and white copy of a document. 15 COLOR COPY key Press this - Sharp AJ-5030 | AJ-5030 Operation Manual for Windows® - Page 13
Installation 1. Installation Unpacking Checklist Before setting up, make sure you have all of the following items. If any are missing, contact your dealer or retailer. Paper tray Output tray Document tray Print cartridges (2) USB cable Telephone line CD-ROM Operation Setup Guide cable manual - Sharp AJ-5030 | AJ-5030 Operation Manual for Windows® - Page 14
Setup Setup Points to keep in mind when setting up Do not place the machine in direct sunlight. Do not place the machine near heaters proper scanning of documents for transmission. To remove the condensation, turn on the power and wait approximately two hours before using the machine. 12 - Sharp AJ-5030 | AJ-5030 Operation Manual for Windows® - Page 15
1. Installation Removing the packing tape and stopper 1 Open the printer cover ➀. Setup 2 Remove the tape ➁. 1 2 3 Push down on the stopper ➂ and then pull it back and out of the machine {. 4 Close the printer cover. 3 4 13 - Sharp AJ-5030 | AJ-5030 Operation Manual for Windows® - Page 16
Color Inkjet is turned OFF before connecting a cable. ♦ Connect only ONE printer cable. Do not connect both the USB cable and a parallel cable. If your computer is running Windows 98 or 2000 and has a USB port, use the provided USB cable. Otherwise, you will need to purchase an IEEE 1284 compliant - Sharp AJ-5030 | AJ-5030 Operation Manual for Windows® - Page 17
1. Installation Setup Connecting a parallel cable Note: Use only an IEEE 1284 compliant parallel cable that is no longer than 6 feet. Fasten the clips onto the cable connector. Releasing the scanner Before turning on the power, push the release down to release the scanner lock. ♦ If you ever need - Sharp AJ-5030 | AJ-5030 Operation Manual for Windows® - Page 18
Setup Connecting the power cord Plug the power cord into a 120 V, 60 Hz, grounded not covered under the warranty. ♦ Make sure you have removed the packing tape and stoppper and released the scanner before plugging in the power cord. Plugging in the power cord without doing so may damage the machine. - Sharp AJ-5030 | AJ-5030 Operation Manual for Windows® - Page 19
1. Installation Setup Connecting the telephone line cord Insert one end of the line cord insert it into the TEL. SET jack. Dial mode: The fax machine is set for tone dialing. If you are on a pulse dial line, you must set the fax machine for pulse dialing. Press the keys on the operation panel - Sharp AJ-5030 | AJ-5030 Operation Manual for Windows® - Page 20
Setup Note: If your area experiences a high incidence of lightning or power surges, we recommend that you install surge protectors for the power and telephone lines. Surge protectors can be purchased at most telephone specialty stores. Attach trays 1 2 3 18 - Sharp AJ-5030 | AJ-5030 Operation Manual for Windows® - Page 21
1. Installation Setup Extension phone (optional) If desired, you can connect an extension phone to the TEL. SET jack on the Color Inkjet. To connect an answering machine - Sharp AJ-5030 | AJ-5030 Operation Manual for Windows® - Page 22
normal temperature and humidity conditions. 1 Insert a stack of paper into the paper tray, print side up. • Align the stack of paper against the right paper guide. Align the top edge of the stack with the appropriate line (LTR or A4). (Take care not to insert the stack too far into the - Sharp AJ-5030 | AJ-5030 Operation Manual for Windows® - Page 23
. Follow the steps below. Note: The following setting is only for faxing and copying. To select the paper size for printing, use the Sharp AJ-5030 Properties on your computer (to open the Properties, select Properties, Setup, or Printer from the Print dialog box of your application). 1 Press the - Sharp AJ-5030 | AJ-5030 Operation Manual for Windows® - Page 24
than plain paper, you will need to change the paper type setting. For copying, see page 48. For printing, select the paper type in the Sharp AJ-5030 Properties on your computer. 22 - Sharp AJ-5030 | AJ-5030 Operation Manual for Windows® - Page 25
a Sharp AJ-C50C color cartridge and an AJ-C50B black cartridge. Caution! Never open the print compartment cover of the Color Inkjet while it is printing. Note: Make sure the power of the Color Inkjet is turned on and paper is loaded before installing or changing print cartridges. 1 Open the printer - Sharp AJ-5030 | AJ-5030 Operation Manual for Windows® - Page 26
2 If you are installing a new cartridge or cartridges, remove only the sticker and the transparent tape from the bottom of the new cartridge. • WARNING! DO NOT touch the gold contact area of the cartridge. 3 Insert the color and black print cartridges into the print cartridge carrier as shown - Sharp AJ-5030 | AJ-5030 Operation Manual for Windows® - Page 27
Close the print compartment cover. 6 Press the right arrow until the display shows the cartridge(s) that you just installed. NEW BOTH CART. PRESS START For example, if you installed both a new color and a new black cartridge, press the right arrow key once so the display shows NEW BOTH CART. NEW - Sharp AJ-5030 | AJ-5030 Operation Manual for Windows® - Page 28
key to print out an alignment page, and then go directly to Step 3 of the following procedure, Aligning the print cartridges. One or both new cartridges: START Aligning the print cartridges If you installed new print cartridges, you will need to align them. You may also need to align the print - Sharp AJ-5030 | AJ-5030 Operation Manual for Windows® - Page 29
1. Installation Installing the Print Cartridges 2 Press the START key. • The Color Inkjet prints an alignment page with four START In this example, 9 comes closest to forming a straight line. 7 8 9 10 A 0 1 2 3 4 5 6 7 8 9 10 11 12 13 14 15 16 17 18 19 20 21 22 23 24 25 26 27 28 29 30 27 - Sharp AJ-5030 | AJ-5030 Operation Manual for Windows® - Page 30
Installing the Print Cartridges 4 Press the number keys to enter the number below the straightest line (if the number is less than 10, enter a 0 before the number). The display - Sharp AJ-5030 | AJ-5030 Operation Manual for Windows® - Page 31
START KEY 8 Press the STOP key to return to the date and time display. 15 (Example) STOP Printing a test page Once you have installed and aligned the print cartridges, you can print a test page to make sure that the Color Inkjet is printing correctly. Follow these steps: 1 Press the FUNCTION key - Sharp AJ-5030 | AJ-5030 Operation Manual for Windows® - Page 32
Installing the Sharp Desktop Software Installing the Sharp Desktop Software To use your Color Inkjet as a printer and scanner for your computer, you must install the Sharp Desktop software. Minimum system requirements Processor: Windows 95/98: Pentium 90 MHz or higher Windows NT 4.0: Pentium 133 - Sharp AJ-5030 | AJ-5030 Operation Manual for Windows® - Page 33
. To open the guide, follow these steps: 1. Insert the Sharp CD into your CD-ROM drive. (If the Selector window appears, click Cancel and then Exit Setup to close the window.) 2. Click the Start button on the Windows taskbar, point to Programs, and then point to Sharp AJ-5030. Click Online Guide. 31 - Sharp AJ-5030 | AJ-5030 Operation Manual for Windows® - Page 34
and set the date and time as explained in the following section to have the fax machine include this information automatically at the top of your fax messages. AJ-5030 AUTO MANUAL A.M. ENLARGE REDUCE POWER LIGHT/DARK PAPERTYPE RESOLUTION FUNCTION SPEED DIAL 1 GHI 4 REDIAL PQRS 7 SEARCH ABC - Sharp AJ-5030 | AJ-5030 Operation Manual for Windows® - Page 35
Entering Your Name and Fax Number 1. Installation 2 Press the 2 key. The display will show: OWN NUMBER SET PRESS START KEY 3 Press the START key. The display will show: ENTER FAX # 2 Note: ) 5 Press the START key to enter the fax number in memory. The display will show: ENTER YOUR NAME START 33 - Sharp AJ-5030 | AJ-5030 Operation Manual for Windows® - Page 36
Entering Your Name and Fax Number 6 Enter your name by pressing number keys for each letter as shown in the chart below. Up to 24 characters can be entered. Example: SHARP = 77777 444 22 7777 77 SPACE = J = A = K = B = L = C = M = D = N = E = O = F = P = G = Q = H = R = I = S - Sharp AJ-5030 | AJ-5030 Operation Manual for Windows® - Page 37
1. Installation Entering Your Name and Fax Number 7 Press the START key. The display will show: 3: DATE & TIME PRESS START KEY 8 Press the STOP key to return to the date and time display. START STOP 35 - Sharp AJ-5030 | AJ-5030 Operation Manual for Windows® - Page 38
time appear in the display and are printed at the top of every page you fax. Set the date and time by pressing the keys on the operation panel as shown below. Left arrow key AJ-5030 AUTO MANUAL A.M. ENLARGE REDUCE POWER LIGHT/DARK PAPERTYPE RESOLUTION FUNCTION SPEED DIAL 1 GHI 4 REDIAL PQRS - Sharp AJ-5030 | AJ-5030 Operation Manual for Windows® - Page 39
and Time 1. Installation 2 Press the two-digit number for the month ("01" for January, "02" for February, "12" for December, etc.). • To correct a mistake, press the SPEED DIAL key two-digit number for the day ("01" to "31"). 05 Example: the 5th 5 Enter the year (four digits). 2001 Example: 2001 6 - Sharp AJ-5030 | AJ-5030 Operation Manual for Windows® - Page 40
Setting the Date and Time 7 Press the * key to select A.M. or the # key to select P.M. A.M. P.M. or 8 Press the START key to start the clock. The display will show: 4: DAY LIGHT SAVE PRESS START KEY START 9 Press the STOP key to return to the date and time display. STOP Daylight Saving Time - Sharp AJ-5030 | AJ-5030 Operation Manual for Windows® - Page 41
voice messages in your answering machine and faxes on your Color Inkjet. ("A.M." is an acronym for "Answering Machine".) Setting the reception mode Press the RECEPTION MODE key until the arrow in the display points to the desired mode. AJ-5030 AUTO MANUAL A.M. ENLARGE REDUCE POWER LIGHT/DARK - Sharp AJ-5030 | AJ-5030 Operation Manual for Windows® - Page 42
Volume Adjustment Volume Adjustment You can adjust the volume of the speaker and ringer using the left and right arrow keys. Speaker 1 Press the SPEAKER key. SPEAKER 2 Press the left or right arrow key. Display: SPEAKER : HIGH or SPEAKER : MIDDLE SPEAKER : LOW 3 When the display shows the - Sharp AJ-5030 | AJ-5030 Operation Manual for Windows® - Page 43
RINGER : MIDDLE RINGER : LOW RINGER : OFF OK ? OK:PRESS START 2 If you selected RINGER OFF : OK?, press the START key. Volume Adjustment or START 41 1. Installation - Sharp AJ-5030 | AJ-5030 Operation Manual for Windows® - Page 44
Volume Adjustment Beep length Your fax machine normally signals the end of transmission, reception, or copying with a 3-second beep. If desired, you can change the duration of the beep to 1 second - Sharp AJ-5030 | AJ-5030 Operation Manual for Windows® - Page 45
Inkjet, and place the original face down on the glass with the top edge against the document guide. ♦ Make sure the center of the original is aligned with the center mark on the document guide, and then close the cover. Note: When making a copy of a large original such as a map or newspaper - Sharp AJ-5030 | AJ-5030 Operation Manual for Windows® - Page 46
Making a copy Using the auto document feeder: Adjust the document guide to the width of your original(s), and then insert the originals (up to 10 pages) face up into the feeder. ♦ For detailed information on using - Sharp AJ-5030 | AJ-5030 Operation Manual for Windows® - Page 47
:25 STD/DRAFT RESOLUTION JAN-05 10:25 FINE/NORMAL JAN-05 10:25 S.F./BEST JAN-05 10:25 H.T./H.T. The resolution for copying appears to the right of the slash. (The resolution for faxing appears to the left.) ♦ If you have selected PLAIN for the paper type (see page 48), BEST will produce the - Sharp AJ-5030 | AJ-5030 Operation Manual for Windows® - Page 48
Copy Settings Enlarge/reduce There are three ways to select an enlarge/reduce setting: 1. Press the ENLARGE/REDUCE key one or more times until the desired percentage appears in the display. The selections are 100%, 129%, 200%, 400%, 25%, 50%, and 78%. When finished, press the START key. ENLARGE - Sharp AJ-5030 | AJ-5030 Operation Manual for Windows® - Page 49
: This setting can only be used for black and white copies. ♦ The maximum number is 50. ♦ To clear a mistake, press the STOP key. 3 (Example) JAN-05 10:25 3 The number of copies per original appears here Contrast Press the LIGHT/DARK key one or more times to select DARK for faint - Sharp AJ-5030 | AJ-5030 Operation Manual for Windows® - Page 50
Copying on Special Types of Paper Copying on Special Types of Paper The Color Inkjet can be used to make copies on coated paper, glossy/ photo paper, and transparency film. You can load up to 10 sheets of coated paper, glossy paper, or transparency film in the paper tray. ♦ Make sure the sheet is - Sharp AJ-5030 | AJ-5030 Operation Manual for Windows® - Page 51
2. Copying Using the Auto Document Feeder Using the Auto Document Feeder Size and weight The size and weight of documents that you can load in the document feeder depend on whether you load one page at a time or multiple pages at once. Loading one page at a time: Minimum size 5.8" (148 mm) 5.5" - Sharp AJ-5030 | AJ-5030 Operation Manual for Windows® - Page 52
16"(4 mm) 0.16"(4 mm) 0.2"(5 mm) Other restrictions ♦ The scanner cannot recognize yellow, greenish yellow, or light blue ink. ♦ Ink, glue, and correcting fluid on documents must be dry before they , easily smudged, or have a slippery coated surface should be faxed from the document glass. 50 - Sharp AJ-5030 | AJ-5030 Operation Manual for Windows® - Page 53
loaded one at a time, insert each page into the feeder as the previous page is being scanned. Insert gently to prevent doublefeeding. 1 Adjust the document guides to the width of your document. 2 Place the document face up and push it gently into the document feeder. The top edge of the document - Sharp AJ-5030 | AJ-5030 Operation Manual for Windows® - Page 54
Using the Auto Document Feeder Copy Cut-off Note: This setting is only for copies made from the auto document feeder. It is not effective when you load the original on the document glass. When making a copy of a document that is longer than the printing paper, use the copy cut-off setting to select - Sharp AJ-5030 | AJ-5030 Operation Manual for Windows® - Page 55
allows you to listen to the line through the speaker to make sure the other fax machine is responding. (Note that the speaker is not a speakerphone; it cannot , you will be able to speak to them through the phone before sending a fax. Note: If you press the SPEAKER key to dial, you will not be - Sharp AJ-5030 | AJ-5030 Operation Manual for Windows® - Page 56
the dial tone. or SPEAKER 3 If you pressed the SPEAKER key, dial the number of the receiving machine by pressing the number keys on the fax machine. If you are using an extension phone, dial using the keypad on the extension phone. 1 GHI 4 PQRS 7 ABC 2 JKL 5 TUV 8 DEF 3 MNO 6 WXYZ 9 0 4 Wait - Sharp AJ-5030 | AJ-5030 Operation Manual for Windows® - Page 57
the desired setting appears in the display. (Select a resolution setting before dialing.) JAN-05 10:25 STD/DRAFT RESOLUTION JAN-05 10:25 FINE/NORMAL JAN-05 10:25 S.F./BEST JAN-05 10:25 H.T./H.T. The resolution for faxing appears to the left of the slash. (The resolution for copying appears to - Sharp AJ-5030 | AJ-5030 Operation Manual for Windows® - Page 58
Normal Dialing Changing the default resolution If desired, you can change the default resolution for faxing documents to FINE. Follow the steps below. 1 Press the following sequence of keys: FUNCTION The display will show: 4 0 1 FINE PRIORITY 1=YES, 2=NO 2 Press 1 (YES) to - Sharp AJ-5030 | AJ-5030 Operation Manual for Windows® - Page 59
number, you must first program the full fax number in the Rapid Key or fax to an e-mail address. To program a Rapid Key or Speed Dial number for e-mail, see Programming Rapid Key and Speed Dial Numbers in Chapter 5??? of your online operation guide. SPEED DIAL key Rapid Keys AJ-5030 AUTO MANUAL - Sharp AJ-5030 | AJ-5030 Operation Manual for Windows® - Page 60
1 A Example: Rapid Key A 0 1 Example: Speed Dial 01 4 Enter the fax or voice number by pressing the number keys. (Note: A space cannot be entered.) If a pause is required between any of the digits to access a special service or an outside line, press the REDIAL key (two seconds per pause). The - Sharp AJ-5030 | AJ-5030 Operation Manual for Windows® - Page 61
Programming Auto-Dial Numbers 3. Sending Faxes 5 Press the START key. 6 Enter = C = M = D = N = E = O = F = P = G = Q = H = R = I = S = START T = U = V = W = X = Y = Z = cursor = cursor = Example: SHARP = 77777 444 22 7777 77 ♦ To clear a mistake, press the SPEED DIAL key. ♦ To - Sharp AJ-5030 | AJ-5030 Operation Manual for Windows® - Page 62
area and access codes below). Press 2 (or START) if the number is a regular fax number. 9 Return to Step 3 to store another number, or press the STOP key to code using a Rapid Key or Speed Dial number set for Chain Dialing, the fax machine will wait for you to dial the remainder of the number (you - Sharp AJ-5030 | AJ-5030 Operation Manual for Windows® - Page 63
Clearing auto-dial numbers 1 Press these keys: The display will show: FAX/TEL # MODE 1=SET,2=CLEAR FUNCTION 3 1 2 Press 2 to START STOP Step 3 or Note: The fax machine uses a lithium battery to keep automatic dialing numbers and other programmed data in memory when the power is turned off. - Sharp AJ-5030 | AJ-5030 Operation Manual for Windows® - Page 64
Dialing Dual Access The fax machine features full dual access, which means that you can load a document and dial by automatic dialing even when the fax machine is occupied with another operation. After you dial, your document will be immediately scanned into memory and then transmitted once - Sharp AJ-5030 | AJ-5030 Operation Manual for Windows® - Page 65
Fax by Automatic Dialing If you do not press the START key or the STOP key within three minutes, the transmission will be canceled and the pages already scanned cleared from memory , see page 71. • Set the resolution and/or contrast if desired. RESOLUTION LIGHT/DARK 3. Sending Faxes 2 Press the - Sharp AJ-5030 | AJ-5030 Operation Manual for Windows® - Page 66
Sending a Fax by Automatic Dialing Speed Dialing If the number you want to dial up in the auto document feeder (max. 10 pages). • To send a document from the document glass, see page 71. • Set the resolution and/or contrast if desired. RESOLUTION LIGHT/DARK 2 Press the SPEED DIAL key and then - Sharp AJ-5030 | AJ-5030 Operation Manual for Windows® - Page 67
You can use this method to dial a full number when you don't need to speak to the other party before faxing. 1 Load the document face up in the from the document glass, see page 71. • Set the resolution and/or contrast if desired. RESOLUTION LIGHT/DARK 3. Sending Faxes 2 Enter the number of the - Sharp AJ-5030 | AJ-5030 Operation Manual for Windows® - Page 68
Rapid Key or Speed Dial number in which you have programmed a particular fax number or e-mail recipient, you can search for the number by following key. SEARCH 3 Press 1 (SEARCH DIAL) to search SEARCH DIAL E-MAIL for a fax number, or 2 to search for an e-mail recipient. 1 or 2 4 If desired - Sharp AJ-5030 | AJ-5030 Operation Manual for Windows® - Page 69
numbers have been stored at all, NO DATA will appear. 3. Sending Faxes 6 Press the START key. The document will be automatically transmitted once the transmission jobs To display information on transmission jobs currently waiting in memory to be sent, follow the steps below. You can also cancel - Sharp AJ-5030 | AJ-5030 Operation Manual for Windows® - Page 70
Sending a Fax by Automatic Dialing 2 Press the left or right arrow key to scroll through the list of jobs. • The display will show the 2-digit memory number assigned to the transmission, the time the transmission was set, and status of the job alternating with the name (or number) of the receiving - Sharp AJ-5030 | AJ-5030 Operation Manual for Windows® - Page 71
the document to be transmitted from memory, follow the steps below: 1 Load the document face up in the auto document feeder (max. 10 pages), or face down on the document glass. • If you use the document glass, only one page can be sent. or 3. Sending Faxes • Set the resolution and/or contrast - Sharp AJ-5030 | AJ-5030 Operation Manual for Windows® - Page 72
receiving machine using one of the following methods: • Press the SPEED DIAL key and enter a 2-digit Speed Dial number. • Press a Rapid Key. • Enter a full fax number and then press the START key. SPEED DIAL 01 (Example) 4 If the document is loaded in the auto document feeder, press the START - Sharp AJ-5030 | AJ-5030 Operation Manual for Windows® - Page 73
the document guide, and then close the cover. • Set the resolution and/or contrast if desired. RESOLUTION LIGHT/DARK 2 Dial using one of the following methods: • Press a Rapid Key. • Press the SPEED DIAL key and enter a 2-digit Speed Dial number. • Press the number keys to enter a full fax number - Sharp AJ-5030 | AJ-5030 Operation Manual for Windows® - Page 74
Sending a Fax From the Document Glass 3 Press the SCAN/BOOK key. • The document on the document glass is scanned. When the Color Inkjet finishes scanning the page, - Sharp AJ-5030 | AJ-5030 Operation Manual for Windows® - Page 75
Keypad Dialing) and the line is busy, the fax machine will automatically redial the number. The fax machine will make up to two redialing attempts at an : FUNCTION The display will show: 4 0 5 RECALL INTERVAL ENTER (01-15) 05 2 Enter a 2-digit number from 01 to 15 for the number of minutes in - Sharp AJ-5030 | AJ-5030 Operation Manual for Windows® - Page 76
Optional Settings for Sending Faxes Recall times for automatic dialing If desired, you can change the maximum number of automatic redialing attempts made when the for the maximum number of redial attempts. 3 Press the STOP key to return to the date and time display. 05 Example: 5 attempts STOP 74 - Sharp AJ-5030 | AJ-5030 Operation Manual for Windows® - Page 77
the STOP key to return to the date and time display. STOP Retransmission times (for memory transmission) If a line error or power failure occurs during transmission from memory, your fax will automatically redial the number and attempt to complete the transmission. Retransmission will begin from - Sharp AJ-5030 | AJ-5030 Operation Manual for Windows® - Page 78
) Your fax has been set at the factory to wait 5 minutes between each memory retransmission attempt. If you wish to change the interval between attempts, follow these steps: 1 Press these keys: FUNCTION The display will show: 4 1 2 RETRANS INTERVAL ENTER (01-15) 05 2 Enter a 2-digit - Sharp AJ-5030 | AJ-5030 Operation Manual for Windows® - Page 79
just one operation. 1 Load the document face up in the auto document feeder (max. 10 pages), or face down on the document glass. or 3. Sending Faxes • Set the resolution and/or contrast if RESOLUTION LIGHT/DARK desired. 2 Press the FUNCTION key and then 6. The display will show: 6: BROADCAST MODE - Sharp AJ-5030 | AJ-5030 Operation Manual for Windows® - Page 80
one or more Rapid Keys. • Enter 2-digit Speed Dial numbers, pressing the SPEED DIAL key before each 2-digit number. • Enter full fax numbers, pressing the START key after each full number. A SPEED DIAL 01 (Example) 4 If the document is loaded in the auto document feeder, press the START key - Sharp AJ-5030 | AJ-5030 Operation Manual for Windows® - Page 81
the arrow in the display points to AUTO. RECEPTION MODE AUTO MANUAL A.M. When the reception mode is set to AUTO, the fax machine will automatically answer all calls on one ring and receive incoming faxes. 1 ring Fax reception 4. Receiving Faxes ♦ If you pick up the handset before the machine - Sharp AJ-5030 | AJ-5030 Operation Manual for Windows® - Page 82
Using AUTO Mode Changing the number of rings If desired, you can change the number of rings on which the fax machine answers incoming calls in AUTO mode. Any number from 0 to 9 can be selected. 1 Press these keys. FUNCTION The display will show: 4 0 2 NUMBER OF RINGS - Sharp AJ-5030 | AJ-5030 Operation Manual for Windows® - Page 83
mode, press the RECEPTION MODE key until the arrow in the display points to MANUAL. 4. Receiving Faxes RECEPTION MODE AUTO MANUAL A.M. When the reception mode is set to MANUAL, you must answer all calls by picking up an extension phone connected to the same line. 1 Answer the extension phone - Sharp AJ-5030 | AJ-5030 Operation Manual for Windows® - Page 84
key on the Color Inkjet to begin reception. Optional Reception Settings Fax Signal Receive Your fax will automatically begin reception if you hear a soft fax tone after answering a call on your fax or an extension phone. If you use a computer fax modem to send documents on the same line, you must - Sharp AJ-5030 | AJ-5030 Operation Manual for Windows® - Page 85
to the date and time display. STOP Reception Ratio The fax has been set at the factory to automatically reduce the not cut off. If desired, you can turn this function off and have received documents printed at full size. ♦ If a document is too long to fit on the printing paper, the remainder will - Sharp AJ-5030 | AJ-5030 Operation Manual for Windows® - Page 86
runs out of paper, the black print cartridge needs replacement, or the paper jams, incoming faxes will be received to memory. When you have received a document in memory, FAX RX IN MEMORY will appear in the display, alternating with OUT OF PAPER, INK EMPTY, or PAPER JAM. When you add paper, replace - Sharp AJ-5030 | AJ-5030 Operation Manual for Windows® - Page 87
second number to your regular single line. The second number rings differently from your normal number. If you subscribe to a distinctive ring service, you can set the fax machine to automatically answer when your second number is called. This allows you to use the second number as an exclusive - Sharp AJ-5030 | AJ-5030 Operation Manual for Windows® - Page 88
Service) 2 Press a number from 1 to 3 to select the ring pattern below that matches your second number's ring pattern. Or, press 4 to have your fax distinctive ring off The display will briefly show your selection, and then: 16: FAX SIGNAL RX PRESS START KEY 4 Press the STOP key to return to the - Sharp AJ-5030 | AJ-5030 Operation Manual for Windows® - Page 89
Distinctive Ring (Requires Subscription to Service) ♦ When using distinctive ring, you must set the reception mode of your fax machine to AUTO. When your designated fax number is dialed, your fax will automatically answer and begin reception after two rings. Note that other devices on the same - Sharp AJ-5030 | AJ-5030 Operation Manual for Windows® - Page 90
settings, select Properties, Setup, or Printer from the Print dialog box (the name of the button varies depending on the application). The Sharp AJ-5030 Properties appear. Adjust the settings as desired, and then click OK. (For information on the settings, refer to your Online Guide or Help.) Note - Sharp AJ-5030 | AJ-5030 Operation Manual for Windows® - Page 91
is facing up). The sheet should be aligned against the right paper guide. ♦ Be sure to select the paper size and paper type in the Sharp AJ-5030 Properties before printing on the paper (select Properties, Setup, or Printer from the Print dialog box). ♦ When printing on transparencies, remove each - Sharp AJ-5030 | AJ-5030 Operation Manual for Windows® - Page 92
at a time in the manual feeder. ♦ Be sure to select the correct envelope or card size and paper type in the Paper tab of the Sharp AJ-5030 Properties before printing. (Select Properties, Setup, or Printer from the Print dialog box to open the Sharp AJ-5030 Properties.) Stamp position for envelopes - Sharp AJ-5030 | AJ-5030 Operation Manual for Windows® - Page 93
lets you change and align print cartridges from your computer instead of using the panel keys on the Color Inkjet unit. To open the Control Panel, click Start on the Windows taskbar, point to Programs and then Sharp AJ-5030, and then click on Sharp AJ5030 Control Panel. ♦ For information on using - Sharp AJ-5030 | AJ-5030 Operation Manual for Windows® - Page 94
Twain-compatible. Scanning a document into the Sharp Desktop 1 Start the Sharp AJ5030 Desktop software in your computer. 2 Load the document you wish to scan in the auto document feeder or on the document glass: • Auto Document Feeder: Adjust the document guides to the width of the document. Insert - Sharp AJ-5030 | AJ-5030 Operation Manual for Windows® - Page 95
toolbar, or by selecting Acquire Image from the File menu of the Sharp Desktop. 4 Adjust any of the scan settings in the Scan dialog box as desired. • For information on adjusting the scan settings, see the Online Guide or Help. 5 When you are ready to begin the scan, click the Scan button - Sharp AJ-5030 | AJ-5030 Operation Manual for Windows® - Page 96
, you must specify the e-mail program to use in the Sharp AJ-5030 Control Program. To open the Control Program, click on the Start button on your Windows taskbar, point to Programs and then Sharp AJ5030, and then click on Sharp AJ-5030 Control Program. In the Control Program, select the E-mail Key - Sharp AJ-5030 | AJ-5030 Operation Manual for Windows® - Page 97
e-mail program 1 Load the document you wish to scan in the auto document feeder or on the document glass: • Auto Document Feeder: Adjust the document guides to the width of the document. Insert the document face up into the feeder. or • Document glass: Place the original face down on the glass - Sharp AJ-5030 | AJ-5030 Operation Manual for Windows® - Page 98
Answering Machine Hookup Connecting an Answering Machine If desired, you can connect an answering machine to your fax machine's TEL. SET jack. This will allow you to receive both voice messages and faxes when you are out. 1 Remove the seal covering the TEL. SET jack. 2 Connect the answering machine - Sharp AJ-5030 | AJ-5030 Operation Manual for Windows® - Page 99
inform callers who want to send a fax to press their Start key. For example press your facsimile Start key to send a fax. Thank you for calling." ♦ Try to too long, you may have difficulty receiving faxes sent by automatic dialing. ♦ If your will give your fax a chance to detect fax tones sent when - Sharp AJ-5030 | AJ-5030 Operation Manual for Windows® - Page 100
a maximum of two rings. If not, you may not be able to receive faxes sent by automatic dialing. • If your answering machine has a toll saver function, leave a message. During this time, your fax will quietly monitor the line. If your fax detects a fax tone or a duration of silence greater than - Sharp AJ-5030 | AJ-5030 Operation Manual for Windows® - Page 101
you do not set Quiet Detect Time under 3 seconds. ♦ If the fax machine is interrupting callers before they can leave a message, try a longer the time. Note, however, that the fax machine may not be able to receive manually-sent faxes from some older fax machines. 1 Press these keys: FUNCTION The - Sharp AJ-5030 | AJ-5030 Operation Manual for Windows® - Page 102
fails to answer before that time. This ensures that you will receive fax messages even if the answering machine's tape fills up or the machine is set to answer on 4 rings or less. If it isn't, the fax will always answer first, preventing callers from leaving voice messages. 1 Press these keys: - Sharp AJ-5030 | AJ-5030 Operation Manual for Windows® - Page 103
You can print lists showing settings and information entered in the fax machine. You can also print out reports on recent activity If automatic print-out is turned off and the report is not printed manually for 30 operations, the information on the oldest operation will be overwritten each time - Sharp AJ-5030 | AJ-5030 Operation Manual for Windows® - Page 104
/reception was successful. P.FAIL - A power failure prevented the transaction. JAM - The printing paper or document jammed, preventing the transaction. BUSY - The fax was not sent because the line was busy. COM.E-0 to COM.E-14 - A telephone line error prevented the transaction. See Line Error on - Sharp AJ-5030 | AJ-5030 Operation Manual for Windows® - Page 105
it off. YES NO 1 or 2 3 Press the STOP key to return to the date and time display. STOP Telephone Number List This list shows the fax numbers that have been programmed into auto dial numbers. 103 - Sharp AJ-5030 | AJ-5030 Operation Manual for Windows® - Page 106
top of every page you transmit (HEADER PRINT). Print Setup List This list shows the current status of the printing Help List This list provides a quick reference guide to the operation of your Color Inkjet. to allow you to check the result. Your fax machine is set at the factory to print out - Sharp AJ-5030 | AJ-5030 Operation Manual for Windows® - Page 107
ONLY 4 NEVER PRINT 5 ERROR ONLY A report will be printed after each transmission, reception, or error. A report will be printed after an error or memory operation. A report will be printed after each transmission. A report will never be printed. A report will be printed only when an error occurs - Sharp AJ-5030 | AJ-5030 Operation Manual for Windows® - Page 108
9. Maintenance and Troubleshooting Cleaning the Scanning Glasses Any dirt, fingerprints, or other small debris on the scanning glasses will degrade the quality of copies and scanned images, and - Sharp AJ-5030 | AJ-5030 Operation Manual for Windows® - Page 109
9. Maintenance Troubleshooting Cleaning the Scanning Glasses 3 Lift the document glass cover and then rotate the black roller unit back until it locks into place. Wipe the document - Sharp AJ-5030 | AJ-5030 Operation Manual for Windows® - Page 110
satisfactory, first try aligning the print cartridges as explained on page 26. If the print quality is still not satisfactory after aligning the print cartridges, clean the cartridges as follows: 1 Press these keys: The display will show: CLEAN NOZZLES - Sharp AJ-5030 | AJ-5030 Operation Manual for Windows® - Page 111
Troubleshooting nozzles. HEAD CLEANING PAGE YOU CAN CHECK THE INK FLOW FOR EACH NOZZLE ON THE INK CARTRIDGES BY CHECKING THE PRINT SAMPLES BELOW. IF THE run the nozzle test again. Run the test a third time if necessary. • If the print quality is satisfactory after running the nozzle test three times, - Sharp AJ-5030 | AJ-5030 Operation Manual for Windows® - Page 112
the Color Inkjet, and remove and reinstall the print cartridge. 6 Repeat the nozzle test. If the lines are still broken, wipe the nozzles wipe the nozzles and the goldcolored area around the nozzles. • To dissolve dried ink, hold the damp cloth against the nozzles for about three seconds. Gently blot - Sharp AJ-5030 | AJ-5030 Operation Manual for Windows® - Page 113
9. Maintenance Troubleshooting Improving Print Quality 3 Dampen another section of clean cloth with water, and gently wipe the contacts and the gold-colored area around the contacts. • When cleaning the color print cartridge, wipe the contacts in one direction. • To dissolve dried ink, hold the - Sharp AJ-5030 | AJ-5030 Operation Manual for Windows® - Page 114
9. Maintenance Troubleshooting Faxing Problems If you have any problems faxing, first refer to the following troubleshooting guide. If you cannot solve the problem, call Sharp's Customer Assistance Center at 1-800-BE SHARP. Line error Problem Solution LINE ERROR appears in the display. A line - Sharp AJ-5030 | AJ-5030 Operation Manual for Windows® - Page 115
9. Maintenance Troubleshooting Faxing Problems Dialing and transmission problems Problem Solution No jack, and not the TEL. SET jack. • If the receiving machine is in manual mode with no attendant, reception will not be possible. • Check the display for error machine may need service. 113 - Sharp AJ-5030 | AJ-5030 Operation Manual for Windows® - Page 116
Faxing Problems Reception and copying problems Problem Solution The machine doesn't receive documents automatically. • Make sure that the reception mode is set to AUTO. If you subscribe to a distinctive ring service, make sure that the Distinctive Ring function is set to the correct ring - Sharp AJ-5030 | AJ-5030 Operation Manual for Windows® - Page 117
9. Maintenance Troubleshooting Faxing Problems Answering machine connection Problem The answering machine connection does not operate properly. Solution • Make sure your machine's reception mode is set to A.M. • Make sure your machine's TEL. LINE jack - Sharp AJ-5030 | AJ-5030 Operation Manual for Windows® - Page 118
Faxing Problems General problems Problem Solution Nothing appears in the display. • Make sure the power cord is properly plugged into a power outlet. Press the POWER key to turn on the - Sharp AJ-5030 | AJ-5030 Operation Manual for Windows® - Page 119
is jammed. See the following section, Clearing Paper Jams. A fax has been received in memory because the black print cartridge is out of ink, you have run out of printing paper, or the paper is jammed. The fax will print out automatically when the problem is fixed. The FUNCTION key has been pressed - Sharp AJ-5030 | AJ-5030 Operation Manual for Windows® - Page 120
PAGE(S) 01 The memory is full. This may occur during fax reception if too much data is received before the pages can be printed out. If faxes have been received to memory because printing is not possible (an additional message will indicate the problem), resolve the problem so that printing can - Sharp AJ-5030 | AJ-5030 Operation Manual for Windows® - Page 121
9. Maintenance Troubleshooting Messages and Signals Audible signals Continuous tone 3 seconds Intermittent tone (3 beeps) 5 seconds (1 second on, 1 second off) Rapid intermittent tone 35 seconds (0.7 seconds on, 0.3 seconds off) - Sharp AJ-5030 | AJ-5030 Operation Manual for Windows® - Page 122
Clearing Paper Jams Clearing Paper Jams Clearing a jammed document If the original document doesn't feed properly during transmission or copying, or DOCUMENT JAMMED appears in the display, first try pressing the START key. If the document doesn't feed out, open the operation panel and remove it. - Sharp AJ-5030 | AJ-5030 Operation Manual for Windows® - Page 123
9. Maintenance Troubleshooting Clearing Paper Jams 3 If the document doesn't protrude from the feeder, open the document glass cover and then rotate the black roller unit back. Gently - Sharp AJ-5030 | AJ-5030 Operation Manual for Windows® - Page 124
Clearing Paper Jams 2 If the jammed paper does not protrude from the paper tray, open the print compartment cover and gently pull the jammed paper out. 3 If you cannot reach the jammed paper, or if it is an envelope or other small paper, pull it out through the hole in the rear of the machine. 122 - Sharp AJ-5030 | AJ-5030 Operation Manual for Windows® - Page 125
below. Operation manual TINSE4181XHTZ Setup Guide TCADZ3109XHZZ Telephone line Sharp Accessories and Supply Center 2130 Townline Road Peoria, IL 61615 Tel: 1-800-638-3328 Fax: 1-800-888-FAXD Tel:1-800-365-8030 Fax: 1-800-999-FAXD Tel: 1-800-321-6993 Fax: 1-800-445-7991 Tel: 1-800-274-4666 Fax - Sharp AJ-5030 | AJ-5030 Operation Manual for Windows® - Page 126
disconnect the equipment until the problem resolved. If you have any questions or problems which cannot be solved by reading this manual, please contact Sharp's Customer Assistance Center. The number is 1800-BE SHARP. This equipment may not be used on coin service provided by the telephone company - Sharp AJ-5030 | AJ-5030 Operation Manual for Windows® - Page 127
Company Identification Product Name : Black Ink-Cartridge AJ-C50B Supplier Identification : Sharp Corporation 22-22 Nagaike-cho, testing of the ink and the characteristics of ink component chemicals. Primary Routes of Entry : Skin contact, ingestion of ink Signs and Symptoms of Exposure : Ink - Sharp AJ-5030 | AJ-5030 Operation Manual for Windows® - Page 128
Contact physician or poison center. Do not induce vomiting unless instructed to do so by a physician or poison center. Section printer. Gloves : None required for intended use in printer. Section 9. Physical and Chemical Properties Description : Printer cartridge with sealed ink reservoirs. Ink - Sharp AJ-5030 | AJ-5030 Operation Manual for Windows® - Page 129
carbon black. Ink is not listed by IARC, NTP, or OSHA. Section 12. Ecological Information Takenaka, and R.Mermelstein(1991) Pulmonary Response to Toner upon Chronic Inhalation Exposure in Rats. Fundamental and is supplied to us by the manufacturer and Sharp offers no warranties as to its accuracy and - Sharp AJ-5030 | AJ-5030 Operation Manual for Windows® - Page 130
1024 Section 1. Product and Company Identification Product Name : Color Ink-Cartridge AJ-C50C Supplier Identification : Sharp Corporation 22-22 Nagaike-cho, Abeno-ku, Osaka, Japan or poison center. Do not induce vomiting unless instructed to do so by a physician or poison center. 128 - Sharp AJ-5030 | AJ-5030 Operation Manual for Windows® - Page 131
of cartridges is cartridge is minimal. Absorb small ink cartridge and accidental contact with ink printer. Gloves : None required for intended use in printer. Section 9. Physical and Chemical Properties Description : Printer cartridge with sealed ink reservoirs. Ink Ink for ink formulations. - Sharp AJ-5030 | AJ-5030 Operation Manual for Windows® - Page 132
Domestic Substances List (DSL/NDSL). One ink component contains low concentrations of isopropyl alcohol under the Toxic Substances Control Act -TSCA 12(b). None of the product ingredients are listed as is supplied to us by the manufacturer and Sharp offers no warranties as to its accuracy and - Sharp AJ-5030 | AJ-5030 Operation Manual for Windows® - Page 133
Installation and setup Quick Reference Guide Entering Your Name and Number 1. Press: FUNCTION 3 2 Display shows: OWN NUMBER SET PRESS START KEY 2. Press: START 3. Enter your fax DATE 01-01-2001 2. Enter two digits for the month (01 to 12). 3. Enter two digits for the day (01 to 31). 4. Enter - Sharp AJ-5030 | AJ-5030 Operation Manual for Windows® - Page 134
the Document Glass 1. Load the document face down on the document glass. Receiving Faxes RECEPTION MODE AUTO MANUAL FEB 01 10:30 A.M. M:00% STAND-BY AUTO MANUAL FEB 01 10:30 A.M. M:00% STAND-BY AUTO MANUAL FEB 01 10:30 A.M. M:00% STAND-BY AUTO mode: The machine automatically answers - Sharp AJ-5030 | AJ-5030 Operation Manual for Windows® - Page 135
Installation and setup DATE 01-01-2001 2. Introduzca dos dígitos para el mes (01 hasta 12). 3. Introduzca dos dígitos para el día (01 hasta 31). 4. está borrando un número, siga con el paso 7.) 4. Enter the fax number. 5. Pulse: START 6. Introduzca el número del puesto mediante pulsación - Sharp AJ-5030 | AJ-5030 Operation Manual for Windows® - Page 136
mero de dos dígitos de marcación abreviada. 3. Pulse: START Sending Faxes from the Document Glass 1. Load the document face down on the document The machine automatically answers on one ring and receives the incoming document. MANUAL mode: Answer the call on extension phone connect to the same line. - Sharp AJ-5030 | AJ-5030 Operation Manual for Windows® - Page 137
Fax reception when TAD fails, 100 Quiet Detect Time, 99 Troubleshooting, 115 Audible signals, 119 Auto document feeder Document guides , 117 Distinctive ring, 85 Document glass, cleaning, 107 Document glass, faxing from, 71 Document transmission, 69 E ECM (Error Correction Mode), 75 E-MAIL key - Sharp AJ-5030 | AJ-5030 Operation Manual for Windows® - Page 138
, loading, 20 Pauses in automatic dialing, 58 Power cord, 16 Print cartridge carrier, wiping, 111 Print cartridges Aligning, 26-29 Installing, 23-26 Print nozzles, cleaning, 108-110 Print nozzles, wiping, 110 Print Setup List, 104 Printer cable, connecting, 14-15 Printing, 88-91 Cards, 90 Control - Sharp AJ-5030 | AJ-5030 Operation Manual for Windows® - Page 139
all liabilities and responsibilities of Sharp to the purchaser with respect to the Product, and shall constitute full satisfaction of all claims, Product which were caused by repairs or attempted repairs performed by anyone other than an authorized servicer. Nor shall Sharp be liable or in any way - Sharp AJ-5030 | AJ-5030 Operation Manual for Windows® - Page 140
DOCUMENT NETWORK SYSTEM OF AMERICA Sharp Plaza, Mahwah, New Jersey 07430-2135 SHARP CORPORATION FOR YOUR RECORDS Please record the model number and serial number below, for easy reference, in case of loss or theft. These numbers are
-
 1
1 -
 2
2 -
 3
3 -
 4
4 -
 5
5 -
 6
6 -
 7
7 -
8
-
9
-
10
-
11
-
12
-
13
-
14
-
15
-
16
-
17
-
18
-
19
-
20
-
21
-
22
-
23
-
24
-
25
-
26
-
27
-
28
-
29
-
30
-
31
-
32
-
33
-
34
-
35
-
36
-
37
-
38
-
39
-
40
-
41
-
42
-
43
-
44
-
45
-
46
-
47
-
48
-
49
-
50
-
51
-
52
-
53
-
54
-
55
-
56
-
57
-
58
-
59
-
60
-
61
-
62
-
63
-
64
-
65
-
66
-
67
-
68
-
69
-
70
-
71
-
72
-
73
-
74
-
75
-
76
-
77
-
78
-
79
-
80
-
81
-
82
-
83
-
84
-
85
-
86
-
87
-
88
-
89
-
90
-
91
-
92
-
93
-
94
-
95
-
96
-
97
-
98
-
99
-
100
-
101
-
102
-
103
-
104
-
105
-
106
-
107
-
108
-
109
-
110
-
111
-
112
-
113
-
114
-
115
-
116
-
117
-
118
-
119
-
120
-
121
-
122
-
123
-
124
-
125
-
126
-
127
-
128
-
129
-
130
-
131
-
132
-
133
-
134
-
135
-
136
-
137
-
138
-
139
-
140
 |
 |
MODEL
AJ-5030
OPERATION MANUAL
COLOR INKJET ALL-IN-ONE
1.
Installation
2.
Copying
3.
Sending Faxes
4.
Receiving Faxes
5.
Printing
6.
Scanning
7.
Answering Machine Hookup
8.
Printing Lists
9.
Maintenance and Troubleshooting