Sony DCR-PC5 Operating Instructions - Page 79
Dubbing with the built-in microphones, Adding an audio sound on a recorded tape, Audio dubbing
 |
View all Sony DCR-PC5 manuals
Add to My Manuals
Save this manual to your list of manuals |
Page 79 highlights
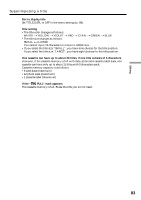
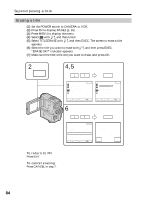
Editing Audio dubbing Dubbing with the built-in microphones No connection is necessary. Notes •When you dub an audio sound with the external microphone, check the recorded picture and sound by connecting the AUDIO/VIDEO jack to a TV. The recorded sound is not output from the speaker. Check the sound by using the TV or headphones. •When you dub an audio sound with the AUDIO/VIDEO jack, check the recorded picture on the LCD screen or in the viewfinder, as well as check the recorded sound by using the speaker or headphones. •When you dub an audio sound with the built-in microphone, check the recorded picture on the LCD screen or in the viewfinder. The recorded picture is not output from the AUDIO/VIDEO jack or the S VIDEO jack. Check the sound by using the headphones. Adding an audio sound on a recorded tape (1) Insert your recorded tape into your camcorder. (2) Set the POWER switch to VCR. (3) Locate the recording start point by pressing N on the Remote Commander. Then press X at the point where you want to start recording to set your camcorder to playback pause mode. (4) Press AUDIO DUB on the Remote Commander. The green X appears on the LCD screen or in the viewfinder. (5) Press on your camcorder or X on the Remote Commander and at the same time start playing back the audio you want to record. The new sound is recorded in stereo 2 (ST2) during playback. During recording new sound, the red appears on the LCD screen or in the viewfinder. (6) Press x on your camcorder or on the Remote Commander at the point where you want to stop recording. AUDIO DUB 79
-
 1
1 -
2
-
3
-
4
-
5
-
6
-
7
-
8
-
9
-
10
-
11
-
12
-
13
-
14
-
15
-
16
-
17
-
18
-
19
-
20
-
21
-
22
-
23
-
24
-
25
-
26
-
27
-
28
-
29
-
30
-
31
-
32
-
33
-
34
-
35
-
36
-
37
-
38
-
39
-
40
-
41
-
42
-
43
-
44
-
45
-
46
-
47
-
48
-
49
-
50
-
51
-
52
-
53
-
54
-
55
-
56
-
57
-
58
-
59
-
60
-
61
-
62
-
63
-
64
-
65
-
66
-
67
-
68
-
69
-
70
-
71
-
72
-
73
-
 74
74 -
 75
75 -
 76
76 -
 77
77 -
 78
78 -
 79
79 -
 80
80 -
 81
81 -
 82
82 -
 83
83 -
 84
84 -
85
-
86
-
87
-
88
-
89
-
90
-
91
-
92
-
93
-
94
-
95
-
96
-
97
-
98
-
99
-
100
-
101
-
102
-
103
-
104
-
105
-
106
-
107
-
108
-
109
-
110
-
111
-
112
-
113
-
114
-
115
-
116
-
117
-
118
-
119
-
120
-
121
-
122
-
123
-
124
-
125
-
126
-
127
-
128
-
129
-
130
-
131
-
132
-
133
-
134
-
135
-
136
-
137
-
138
-
139
-
140
-
141
-
142
-
143
-
144
-
145
-
146
-
147
-
148
-
149
-
150
-
151
-
152
-
153
-
154
-
155
-
156
 |
 |
