Sony DCRHC21 Operating Guide - Page 55
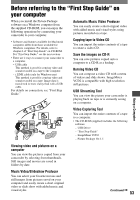
Installing the software and “First Step Guide” on a computer, Installing on a Windows, computer - usb cable
 |
UPC - 027242669819
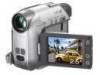
View all Sony DCRHC21 manuals
Add to My Manuals
Save this manual to your list of manuals |
Page 55 highlights
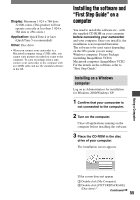
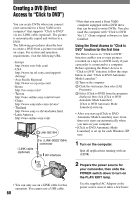
Display: Minimum 1 024 × 768 dots, 32 000 colors (This product will not operate correctly at less than 1 024 × 768 dots or 256 colors.) Application: QuickTime 4 or later (QuickTime 5 recommended) Other: Disc drive • When you connect your camcorder to a Macintosh computer using a USB cable, you cannot copy pictures recorded on a tape to the computer. To copy recordings from a tape, connect your camcorder to the computer with an i.LINK cable and use the standard software in the OS. Installing the software and "First Step Guide" on a computer You need to install the software etc., with the supplied CD-ROM on your computer before connecting your camcorder and your computer. Once you install it, the installation is not required thereafter. The software to be used varies depending on the OS system you are using. Windows computer: Picture Package (including ImageMixer VCD2) Macintosh computer: ImageMixer VCD2 For the details on the software, refer to "First Step Guide." Installing on a Windows computer Log on as Administrators for installation for Windows 2000/Windows XP. 1 Confirm that your camcorder is not connected to the computer. 2 Turn on the computer. Close all applications running on the computer before installing the software. 3 Place the CD-ROM in the disc drive of your computer. The installation screen appears. Using a Computer If the screen does not appear Double-click [My Computer]. Double-click [PICTUREPACKAGE] (Disc drive).* Continued 55
-
 1
1 -
2
-
3
-
4
-
5
-
6
-
7
-
8
-
9
-
10
-
11
-
12
-
13
-
14
-
15
-
16
-
17
-
18
-
19
-
20
-
21
-
22
-
23
-
24
-
25
-
26
-
27
-
28
-
29
-
30
-
31
-
32
-
33
-
34
-
35
-
36
-
37
-
38
-
39
-
40
-
41
-
42
-
43
-
44
-
45
-
46
-
47
-
48
-
49
-
 50
50 -
 51
51 -
 52
52 -
 53
53 -
 54
54 -
 55
55 -
 56
56 -
 57
57 -
 58
58 -
 59
59 -
 60
60 -
61
-
62
-
63
-
64
-
65
-
66
-
67
-
68
-
69
-
70
-
71
-
72
-
73
-
74
-
75
-
76
-
77
-
78
-
79
-
80
-
81
-
82
-
83
-
84
-
85
-
86
-
87
-
88
-
89
-
90
-
91
-
92
 |
 |