Sony DSC-P8 Operating Instructions - Page 24
Shooting close-ups - Macro
 |
View all Sony DSC-P8 manuals
Add to My Manuals
Save this manual to your list of manuals |
Page 24 highlights
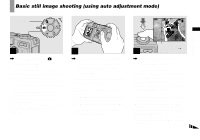
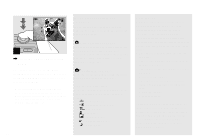
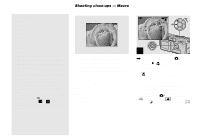
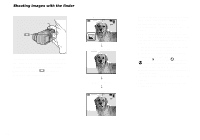
Shooting close-ups - Macro The maximum zoom scale depends on the image size. DSC-P10/P12 [3.1M]: 3.8× [1.2M]: 6.1× [VGA]: 12× DSC-P8 [2.0M]: 3.8× [1.2M]: 4.8× [VGA]: 9.6× When the image size is [5.0M] or [4.5M(3:2)] (DSC-P10/P12)/[3.1M] or [2.8M(3:2)] (DSC-P8), the smart zoom does not work. • You cannot confirm the image with the finder when using the smart zoom function. • When using the smart zoom, the image on the LCD screen may look rough. However, this phenomenon has no effect on the recorded image. • AF range finder is not shown when using the smart zoom. When 9 (Focus) is set to [Multi AF] or [Center AF], or flashes and the centrally-located subject has priority to focus on. 60min VGA 101 96 S AF The macro recording mode is used when zooming up a small subject, such as flowers or insects. You can shoot close-ups of subjects up to the distances specified below. When the zoom is set all the way to the W side: Approx. 10 cm (4 inches) from the lens surface When the zoom is set all the way to the T side: DSC-P10/P12: Approx. 60 cm (23 5/8 inches) from the lens surface DSC-P8: Approx. 50 cm (19 3/4 inches) from the lens surface 1 , Set the mode dial to , and press B ( ) on the control button. The (macro) indicator appears on the LCD screen. • If the menu is currently displayed, press MENU first so that the menu disappears. • You can also carry out this operation when the mode dial is set to or SCN (other than (Fireworks mode), (Landscape mode) or (Twilight mode), page 55) or . 24
-
 1
1 -
2
-
3
-
4
-
5
-
6
-
7
-
8
-
9
-
10
-
11
-
12
-
13
-
14
-
15
-
16
-
17
-
18
-
 19
19 -
 20
20 -
 21
21 -
 22
22 -
 23
23 -
 24
24 -
 25
25 -
 26
26 -
 27
27 -
 28
28 -
 29
29 -
30
-
31
-
32
-
33
-
34
-
35
-
36
-
37
-
38
-
39
-
40
-
41
-
42
-
43
-
44
-
45
-
46
-
47
-
48
-
49
-
50
-
51
-
52
-
53
-
54
-
55
-
56
-
57
-
58
-
59
-
60
-
61
-
62
-
63
-
64
-
65
-
66
-
67
-
68
-
69
-
70
-
71
-
72
-
73
-
74
-
75
-
76
-
77
-
78
-
79
-
80
-
81
-
82
-
83
-
84
-
85
-
86
-
87
-
88
-
89
-
90
-
91
-
92
-
93
-
94
-
95
-
96
-
97
-
98
-
99
-
100
-
101
-
102
-
103
-
104
-
105
-
106
-
107
-
108
-
109
-
110
-
111
-
112
-
113
-
114
-
115
-
116
-
117
-
118
-
119
-
120
 |
 |
