Sony DSLR-A100K User Guide - Page 92
To mark all the images, Date imprint, Index print, Cancel print
 |
View all Sony DSLR-A100K manuals
Add to My Manuals
Save this manual to your list of manuals |
Page 92 highlights
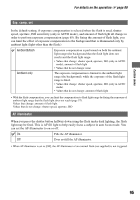
For details on the operation 1 page 80 To mark all the images 1 Select [All on card] in [ DPOF set]. 2 Select the number of sheets with v/V on the controller (increases with v and decreases with V). You cannot separately set the number of images. 3 Press the center of the controller. A (DPOF set) mark appears on all the images, and the screen returns to the menu screen. • When a DPOF-marked image is played back, and its number are inserted onto the image. • If you insert a recording medium that contains DPOF-marked images specified with other cameras into this camera, then specify images to which to attach a DPOF-mark, the DPOF specifications made with other cameras are canceled. Date imprint You can impose the date onto images when printing images. The position of the date (inside or outside the image, character size, etc.) depends on your printer. On Imposes the date. Off Does not impose the date. • Normally, only the date is inserted, however, imposed items may be different depending on the printer. This function may not be provided, depending on the printer. Index print You can create an index print of all the images in the folder (Index print). This camera can specify an index print, as well as frame by frame printing. On Specifies an index print. Off Does not specify an index print. • The number of images to print on a sheet and the format depend on the printer. RAW images do not print in index print. • The images you shot after setting the index print are not included in the index print. It is recommended that you create the index print just before printing it. Cancel print You can clear the (DPOF) marks. When you do so, the index print is also canceled. Since the (DPOF) marks are left on after printing, it is recommended that you just clear the marks. 1 Select [Enter] in [Cancel print]. The message "Cancel all?" appears. 2 Select [Yes] with b on the controller, then press the center of the controller. The (DPOF) marks of all the images are cleared. 92
-
 1
1 -
2
-
3
-
4
-
5
-
6
-
7
-
8
-
9
-
10
-
11
-
12
-
13
-
14
-
15
-
16
-
17
-
18
-
19
-
20
-
21
-
22
-
23
-
24
-
25
-
26
-
27
-
28
-
29
-
30
-
31
-
32
-
33
-
34
-
35
-
36
-
37
-
38
-
39
-
40
-
41
-
42
-
43
-
44
-
45
-
46
-
47
-
48
-
49
-
50
-
51
-
52
-
53
-
54
-
55
-
56
-
57
-
58
-
59
-
60
-
61
-
62
-
63
-
64
-
65
-
66
-
67
-
68
-
69
-
70
-
71
-
72
-
73
-
74
-
75
-
76
-
77
-
78
-
79
-
80
-
81
-
82
-
83
-
84
-
85
-
86
-
 87
87 -
 88
88 -
 89
89 -
 90
90 -
 91
91 -
 92
92 -
 93
93 -
 94
94 -
 95
95 -
 96
96 -
 97
97 -
98
-
99
-
100
-
101
-
102
-
103
-
104
-
105
-
106
-
107
-
108
-
109
-
110
-
111
-
112
-
113
-
114
-
115
-
116
-
117
-
118
-
119
-
120
-
121
-
122
-
123
-
124
-
125
-
126
-
127
-
128
-
129
-
130
-
131
-
132
-
133
-
134
-
135
-
136
-
137
-
138
-
139
-
140
-
141
-
142
-
143
-
144
-
145
-
146
-
147
-
148
-
149
-
150
-
151
-
152
-
153
-
154
-
155
-
156
-
157
-
158
-
159
 |
 |
