Sony LBT-GPX555 Operating Instructions - Page 20
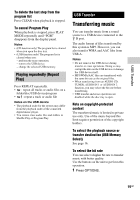
Transferring music from a disc, or USB device, Press REC TO USB B.
 |
View all Sony LBT-GPX555 manuals
Add to My Manuals
Save this manual to your list of manuals |
Page 20 highlights
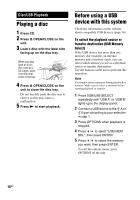
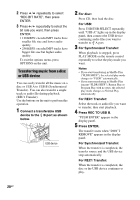
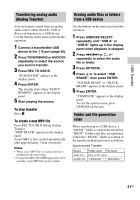
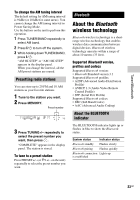
2 Press / repeatedly to select "REC BIT RATE", then press ENTER. 3 Press / repeatedly to select the bit rate you want, then press ENTER. • 128 KBPS: encoded MP3 tracks have smaller file size and lower audio quality. • 256 KBPS: encoded MP3 tracks have bigger file size but higher audio quality. To exit the options menu, press OPTIONS on the unit. Transferring music from a disc or USB device You can easily transfer all the music on a disc or USB A to USB B (Synchronized Transfer). You can also transfer a single track or audio file during playback (REC1 Transfer). Use the buttons on the unit to perform this operation. 1 Connect a transferable USB device to the B port as shown below. USB device 2 For disc: Press CD, then load the disc. For USB: Press USB/USB SELECT repeatedly until "USB A" lights up in the display panel, then connect the USB device containing audio files you want to transfer to A port. 3 For Synchronized Transfer: When playback is stopped, press PLAY MODE on the remote control repeatedly to select the play mode you want. Notes • If you start transferring in Shuffle Play ("FLDR SHUF"), the selected play mode changes to "FLDR" automatically. • If you start transferring in Shuffle Play (except "FLDR SHUF"), Repeat Play or Program Play with no steps, the selected play mode changes to Normal Play automatically. For REC1 Transfer: Select the track or audio file you want to transfer, then start playback. 4 Press REC TO USB B. "PUSH ENTER" appears in the display panel. 5 Press ENTER. The transfer starts when "DON'T REMOVE" appears in the display panel. For Synchronized Transfer: When the transfer is completed, the transfer source and the USB device stop automatically. For REC1 Transfer: When the transfer is completed, the disc or the USB device continues to play. 20GB
-
 1
1 -
2
-
3
-
4
-
5
-
6
-
7
-
8
-
9
-
10
-
11
-
12
-
13
-
14
-
 15
15 -
 16
16 -
 17
17 -
 18
18 -
 19
19 -
 20
20 -
 21
21 -
 22
22 -
 23
23 -
 24
24 -
 25
25 -
26
-
27
-
28
-
29
-
30
-
31
-
32
-
33
-
34
-
35
-
36
-
37
-
38
-
39
-
40
-
41
-
42
-
43
-
44
-
45
-
46
-
47
-
48
 |
 |