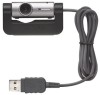
Sony PCGA UVC11A Operating Instructions - Page 19
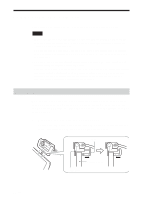
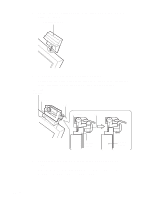
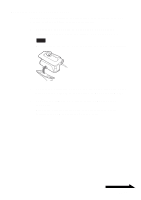
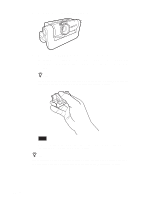
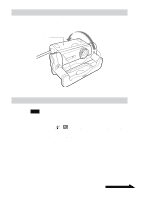
Attaching the camera to a tripod, tripod screw.
 |
UPC - 027242649156
View all Sony PCGA UVC11A manuals
Add to My Manuals
Save this manual to your list of manuals |
Page 19 highlights
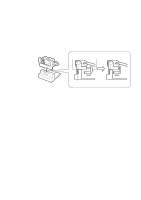
Attaching the camera to a tripod You can attach the camera to a tripod to capture images. Tripod screw Notes • Do not walk around with the camera when it is attached to the tripod. If the camera falls, it could be damaged. • Do not use a tripod with a screw that exceeds 0.28 inches (7 mm) in length. If you use a tripod with a screw longer than 0.28 inches (7 mm) in length, the camera will not be stable when it is attached, and it may be damaged. • When attaching the camera, first make sure that the tripod is stable, then attach the camera so that it is horizontal. If the camera is tilted, it could fall. • When adjusting the position of the camera, protect it from falling by supporting both the tripod handle and the camera with your hands. • When adjusting the camera angle, focus, or positioning of the USB cable, make sure you support the camera with your hand. • When operating the capture button on the camera, make sure you support the camera with your hand. • Make sure you use a tripod that is big enough to support the weight of the camera without tipping. 1 Attach the tripod screw hole on the mounting adapter to the tripod screw. 2 Attach the camera to the mounting adapter. 3 Connect the camera USB cable to the computers USB connector. Refer to the manuals provided with your computer to locate the position of the USB connector on your computer. Continued on next page 19 GB
-
 1
1 -
2
-
3
-
4
-
5
-
6
-
7
-
8
-
9
-
10
-
11
-
12
-
13
-
 14
14 -
 15
15 -
 16
16 -
 17
17 -
 18
18 -
 19
19 -
 20
20 -
 21
21 -
 22
22 -
 23
23 -
 24
24 -
25
-
26
-
27
-
28
-
29
-
30
-
31
-
32
-
33
-
34
-
35
-
36
-
37
-
38
-
39
-
40
-
41
-
42
-
43
-
44
-
45
-
46
-
47
-
48
-
49
-
50
-
51
-
52
-
53
-
54
-
55
-
56
-
57
-
58
-
59
-
60
-
61
-
62
-
63
-
64
-
65
-
66
-
67
-
68
-
69
-
70
-
71
-
72
-
73
-
74
-
75
-
76
-
77
-
78
-
79
-
80
-
81
-
82
-
83
-
84
-
85
-
86
-
87
-
88
-
89
-
90
-
91
-
92
-
93
-
94
-
95
-
96
-
97
-
98
-
99
-
100
-
101
-
102
-
103
-
104
-
105
-
106
-
107
-
108
-
109
-
110
-
111
-
112
-
113
-
114
-
115
-
116
-
117
-
118
-
119
-
120
-
121
-
122
-
123
-
124
-
125
-
126
-
127
-
128
 |
 |
