Sony PCV-R522DS Online Help Center (VAIO User Guide) - Page 127
Configuring Windows® 98
 |
View all Sony PCV-R522DS manuals
Add to My Manuals
Save this manual to your list of manuals |
Page 127 highlights
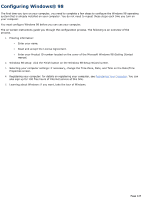
Configuring Windows® 98 The first time you turn on your computer, you need to complete a few steps to configure the Windows 98 operating system that is already installed on your computer. You do not need to repeat these steps each time you turn on your computer. You must configure Windows 98 before you can use your computer. The on-screen instructions guide you through the configuration process. The following is an overview of the process. 1. Entering information: o Enter your name. o Read and accept the License Agreement. o Enter your Product ID number located on the cover of the Microsoft Windows 98 Getting Started manual. 2. Windows 98 setup: click the Finish button on the Windows 98 Setup Wizard screen. 3. Selecting your computer settings: if necessary, change the Time Zone, Date, and Time on the Date/Time Properties screen. 4. Registering your computer: for details on registering your computer, see Registering Your Computer. You can also sign up for 100 free hours of Internet service at this time. 5. Learning about Windows: if you want, take the tour of Windows. Page 127
-
 1
1 -
2
-
3
-
4
-
5
-
6
-
7
-
8
-
9
-
10
-
11
-
12
-
13
-
14
-
15
-
16
-
17
-
18
-
19
-
20
-
21
-
22
-
23
-
24
-
25
-
26
-
27
-
28
-
29
-
30
-
31
-
32
-
33
-
34
-
35
-
36
-
37
-
38
-
39
-
40
-
41
-
42
-
43
-
44
-
45
-
46
-
47
-
48
-
49
-
50
-
51
-
52
-
53
-
54
-
55
-
56
-
57
-
58
-
59
-
60
-
61
-
62
-
63
-
64
-
65
-
66
-
67
-
68
-
69
-
70
-
71
-
72
-
73
-
74
-
75
-
76
-
77
-
78
-
79
-
80
-
81
-
82
-
83
-
84
-
85
-
86
-
87
-
88
-
89
-
90
-
91
-
92
-
93
-
94
-
95
-
96
-
97
-
98
-
99
-
100
-
101
-
102
-
103
-
104
-
105
-
106
-
107
-
108
-
109
-
110
-
111
-
112
-
113
-
114
-
115
-
116
-
117
-
118
-
119
-
120
-
121
-
 122
122 -
 123
123 -
 124
124 -
 125
125 -
 126
126 -
 127
127 -
 128
128 -
 129
129 -
 130
130 -
 131
131 -
 132
132 -
133
-
134
-
135
-
136
-
137
-
138
-
139
-
140
-
141
-
142
-
143
-
144
-
145
-
146
-
147
-
148
-
149
-
150
-
151
-
152
-
153
-
154
-
155
-
156
-
157
-
158
-
159
-
160
-
161
-
162
-
163
-
164
-
165
-
166
-
167
-
168
-
169
-
170
-
171
-
172
-
173
-
174
-
175
-
176
-
177
-
178
-
179
-
180
-
181
-
182
-
183
-
184
-
185
-
186
-
187
-
188
-
189
-
190
-
191
-
192
-
193
-
194
-
195
-
196
-
197
-
198
-
199
-
200
-
201
-
202
-
203
-
204
-
205
-
206
-
207
-
208
-
209
-
210
-
211
-
212
-
213
-
214
-
215
-
216
-
217
-
218
-
219
-
220
-
221
-
222
-
223
-
224
-
225
-
226
-
227
-
228
-
229
-
230
-
231
-
232
-
233
-
234
-
235
-
236
-
237
-
238
-
239
-
240
-
241
-
242
-
243
-
244
-
245
 |
 |