Sony RDR GX257 Operating Instructions - Page 27
Recording a Program to a Disc, connected input L1.
 |
UPC - 027242731318
View all Sony RDR GX257 manuals
Add to My Manuals
Save this manual to your list of manuals |
Page 27 highlights
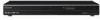
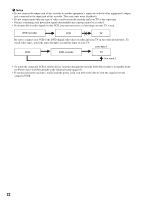
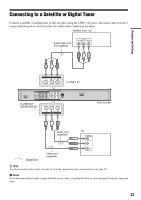
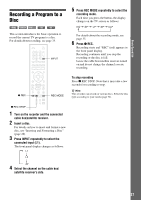
Basic Operation Recording a Program to a Disc +RW -RWVR -RWVideo +R -R This section introduces the basic operation to record the current TV program to a disc. For details about recording, see page 35. 123 456 789 0 INPUT 5 Press REC MODE repeatedly to select the recording mode. Each time you press the button, the display changes on the TV screen as follows: HQ SP LP EP ULP For details about the recording mode, see page 35. 6 Press z REC. Recording starts and "REC" (red) appears in the front panel display. Recording continues until you stop the recording or the disc is full. Leave the cable box/satellite receiver turned on and do not change the channel you are recording. z REC REC MODE To stop recording Press x REC STOP. Note that it may take a few seconds for recording to stop. z Hint This recorder can record on various discs. Select the disc type according to your needs (page 74). x REC STOP 1 Turn on the recorder and the connected cable box/satellite receiver. 2 Insert a disc. For details on how to insert and format a new disc, see "Inserting and Formatting a Disc" (page 26). 3 Press INPUT repeatedly to select the connected input (L1). The front panel display changes as follows: L1 L2 dV 4 Select the channel on the cable box/ satellite receiver's side. 27
-
 1
1 -
2
-
3
-
4
-
5
-
6
-
7
-
8
-
9
-
10
-
11
-
12
-
13
-
14
-
15
-
16
-
17
-
18
-
19
-
20
-
21
-
 22
22 -
 23
23 -
 24
24 -
 25
25 -
 26
26 -
 27
27 -
 28
28 -
 29
29 -
 30
30 -
 31
31 -
 32
32 -
33
-
34
-
35
-
36
-
37
-
38
-
39
-
40
-
41
-
42
-
43
-
44
-
45
-
46
-
47
-
48
-
49
-
50
-
51
-
52
-
53
-
54
-
55
-
56
-
57
-
58
-
59
-
60
-
61
-
62
-
63
-
64
-
65
-
66
-
67
-
68
-
69
-
70
-
71
-
72
-
73
-
74
-
75
-
76
-
77
-
78
-
79
-
80
-
81
-
82
-
83
-
84
 |
 |