Sony RDR GX257 Operating Instructions - Page 32
Labeling and Protecting a Disc, Labeling a disc
 |
UPC - 027242731318
View all Sony RDR GX257 manuals
Add to My Manuals
Save this manual to your list of manuals |
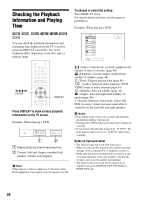
Page 32 highlights
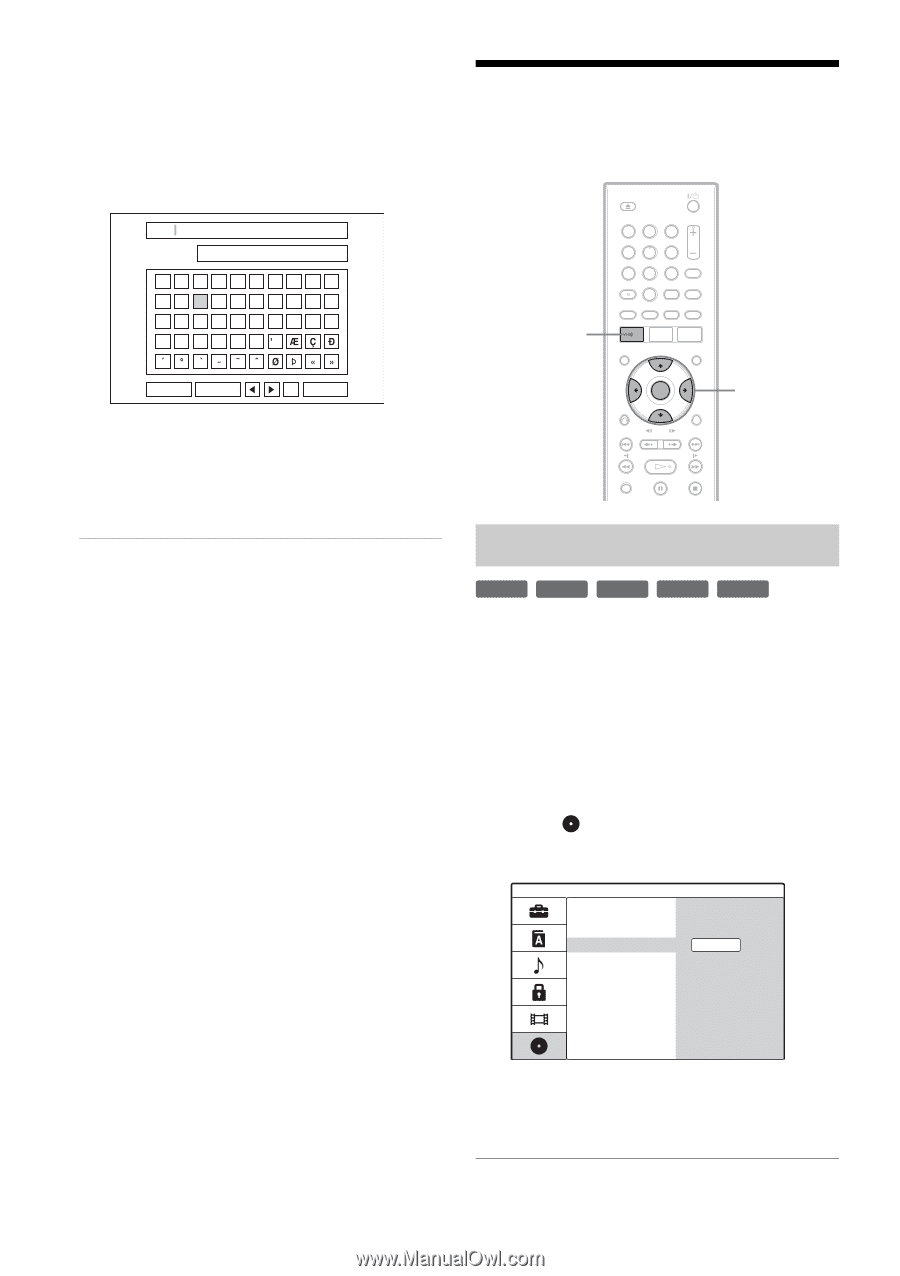
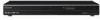
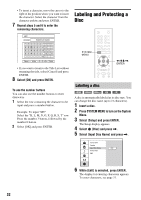
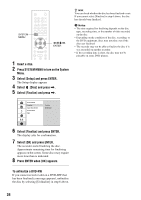
• To insert a character, move the cursor to the right of the position where you want to insert the character. Select the character from the character palette and press ENTER. 7 Repeat steps 5 and 6 to enter the remaining characters. Labeling and Protecting a Disc ABC Language English/Latin Capital 1234567890 ABCDEFGH I J KLMNOPQRS T UVWX Y Z Space Erase OK Cancel • If you want to return to the Title List without renaming the title, select [Cancel] and press ENTER. 8 Select [OK] and press ENTER. To use the number buttons You can also use the number buttons to enter characters. 1 Select the row containing the character to be input and press a number button. Example: To input "MT" Select the "K, L, M, N, O, P, Q, R, S, T" row. Press the number 3 button, followed by the number 0 button. 2 Select [OK] and press ENTER. SYSTEM MENU 123 456 789 0
-
 1
1 -
2
-
3
-
4
-
5
-
6
-
7
-
8
-
9
-
10
-
11
-
12
-
13
-
14
-
15
-
16
-
17
-
18
-
19
-
20
-
21
-
22
-
23
-
24
-
25
-
26
-
 27
27 -
 28
28 -
 29
29 -
 30
30 -
 31
31 -
 32
32 -
 33
33 -
 34
34 -
 35
35 -
 36
36 -
 37
37 -
38
-
39
-
40
-
41
-
42
-
43
-
44
-
45
-
46
-
47
-
48
-
49
-
50
-
51
-
52
-
53
-
54
-
55
-
56
-
57
-
58
-
59
-
60
-
61
-
62
-
63
-
64
-
65
-
66
-
67
-
68
-
69
-
70
-
71
-
72
-
73
-
74
-
75
-
76
-
77
-
78
-
79
-
80
-
81
-
82
-
83
-
84
 |
 |