Sony RDR GX257 Operating Instructions - Page 67
Recording Settings (Video), Area Code], Disc Record Mode], DV Input], Auto
 |
UPC - 027242731318
View all Sony RDR GX257 manuals
Add to My Manuals
Save this manual to your list of manuals |
Page 67 highlights
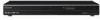
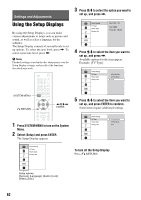
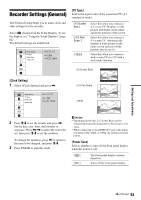
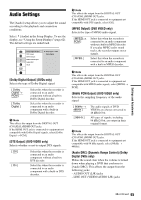
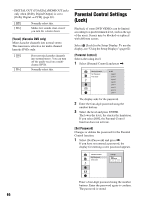
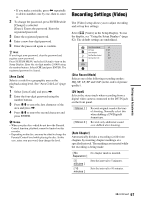
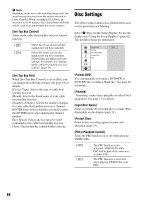
Settings and Adjustments • If you make a mistake, press < repeatedly to delete numbers one by one, then re-enter it. 2 To change the password, press ENTER while [Change] is selected. [Erase]: Erases the password. Enter the registered password. 3 Enter the registered password. 4 Enter a new four-digit password. 5 Enter the password again to confirm. z Hint If you forget your password, clear the password and register a new password. Press SYSTEM MENU and select [Setup] to turn on the Setup Display. Enter the six-digit number 210499 using the number buttons. Select [OK] and press ENTER. The registered password is cleared. [Area Code] Selects a code for a geographic area as the playback rating level. See "Area Code List" (page 78). 1 Select [Area Code] and press ,. 2 Enter the four-digit password using the number buttons. 3 Press M/m to enter the first character of the area and press ,. 4 Press M/m to enter the second character and press ENTER. b Notes • When you play discs which do not have the Parental Control function, playback cannot be limited on this recorder. • Depending on the disc, you may be asked to change the Parental Control level while playing the disc. In this case, enter your password, then change the level. Recording Settings (Video) The [Video] setup allows you to adjust recording and set top box settings. Select [Video] in the Setup Display. To use the display, see "Using the Setup Displays" (page 62). The default settings are underlined. Disc Record Mode DV Input Auto Chapter Set-Top Box Control Set-Top Box Edit HQ SP LP EP ULP [Disc Record Mode] Selects one of the following recording modes: HQ, SP, LP, EP and ULP (in the order of picture quality). [DV Input] Selects the stereo track when recording from a digital video camera connected to the DV IN jack on the front panel. [ Stereo 1 ] [ Stereo 2 ] Records original sound at the time of shooting. Normally select this when dubbing a DV/Digital8 format tape. Records only additional sound over-dubbed after shooting. [Auto Chapter] Automatically divides a recording (a title) into chapters by inserting chapter markings at a specified interval. The markings are inserted while the recording is being made. [ No Separation ] [ 5 minutes ] [ 10 minutes ] No chapter mark is inserted. Sets the interval to 5 minutes. Sets the interval to 10 minutes. ,continued 67
-
 1
1 -
2
-
3
-
4
-
5
-
6
-
7
-
8
-
9
-
10
-
11
-
12
-
13
-
14
-
15
-
16
-
17
-
18
-
19
-
20
-
21
-
22
-
23
-
24
-
25
-
26
-
27
-
28
-
29
-
30
-
31
-
32
-
33
-
34
-
35
-
36
-
37
-
38
-
39
-
40
-
41
-
42
-
43
-
44
-
45
-
46
-
47
-
48
-
49
-
50
-
51
-
52
-
53
-
54
-
55
-
56
-
57
-
58
-
59
-
60
-
61
-
 62
62 -
 63
63 -
 64
64 -
 65
65 -
 66
66 -
 67
67 -
 68
68 -
 69
69 -
 70
70 -
 71
71 -
 72
72 -
73
-
74
-
75
-
76
-
77
-
78
-
79
-
80
-
81
-
82
-
83
-
84
 |
 |
