Sony VGX-XL1A User Guide
Sony VGX-XL1A - Digital Living System Computer Manual
 |
View all Sony VGX-XL1A manuals
Add to My Manuals
Save this manual to your list of manuals |
Sony VGX-XL1A manual content summary:
- Sony VGX-XL1A | User Guide - Page 1
User Guide Digital Living System™ VGX-XL1 - Sony VGX-XL1A | User Guide - Page 2
Media Changer/Recorder includes certain software versions or upgrades, and Internet services or offers that are available to U.S. customers only. Sony, VAIO, the VAIO logo, VAIO Digital Studio, VAIO Media, VAIO Media Music Server, VAIO Media Photo Server, VAIO Media Video Server, VAIO Zone, Click - Sony VGX-XL1A | User Guide - Page 3
Intel and Pentium are trademarks or registered trademarks of the Intel Corporation. Microsoft, Windows, and the Windows logo are trademarks or registered trademarks of the Microsoft Corporation. PS/2 is a registered trademark of the IBM Corporation. All other trademarks are trademarks or registered - Sony VGX-XL1A | User Guide - Page 4
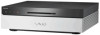
• Appendix C: Hard Disk Drive Recovery • Appendix D: RAID Configuration • Appendix E: Troubleshooting What is the VGX-XL1 Digital Living System? The VGX-XL1 DLS system is both a powerful computer and a state of the art home entertainment system. Let the VGX-XL1 DLS system lead you into the exciting - Sony VGX-XL1A | User Guide - Page 5
experience in digital home entertainment.These products include: XL1A XL1B • Controls the combined products • 200 disc Media Changer/Recorder • Leverages the latest Intel components • Burning of content to optical media • Uses the Microsoft® Windows® XP Media Center operating system • Storage - Sony VGX-XL1A | User Guide - Page 6
Specifications. [Start > All Programs > VAIO Support Central] Note: The VGP-XL1B Media Disc Changer is only supported by Sony when bundled with the VAIO VGX-XL1 Digital Living System™. Operating System Software The operating system for the VGX-XL1 Digital Living System™ is Microsoft® Windows® XP - Sony VGX-XL1A | User Guide - Page 7
-depth information about each feature, go to the specific topic in the VGX-XL1 Digital Living System™ Entertainment Guide included with the packaging materials. Feature My DVDs Online Spotlight My Pictures My TV My Music Create DVD My Changer More Programs Settings Description View all the DVDs in - Sony VGX-XL1A | User Guide - Page 8
• DVgate Plus™- Digital Video • SonicStage® - Digital Music • VAIO Media™ - Network File Sharing • Image Converter - PSP™ (Play Station® Portable) hand held entertainment system Other Software Applications The following Sony original software programs can be accessed by selecting Windows Start > All - Sony VGX-XL1A | User Guide - Page 9
.symantec.com • VAIO® Recovery Wizard • VAIO® Control Center • VAIO® Update Getting to know the VGX-XL1 DLS System Unpacking the VAIO XL1 Personal Computer Make sure you have the following items: VGX-XL1A PC WLAN Antenna HDMI™ Cable Remote Batteries (2) Wireless Keyboard w/Intergrated Pointing - Sony VGX-XL1A | User Guide - Page 10
Wireless Keyboard Setting up the Keyboard Insert the Batteries On the back of the Keyboard, remove the battery compartment cover and insert four (4) Alkaline AA batteries (Supplied) oriented as shown in the battery compartment. Replace the battery compartment cover. VGX-XL1 Digital Living System - Sony VGX-XL1A | User Guide - Page 11
, slide the Point Device button to On. 3 On the back of the keyboard, and the front panel of the XL1A computer, press the connect buttons simultaneously and hold for a few seconds. 4 Test the keyboard and the point device to make sure both are functioning properly. 8 VGX-XL1 Digital Living System - Sony VGX-XL1A | User Guide - Page 12
currently using to control the sound for your TV. 5 Open the following screens RECORDED TV, GUIDE, LIVE TV, DVD MENU. (DVD MENU is available only when Media Center is active.) 6 Use these buttons to change channels and enter text or numbers in a specific location. VGX-XL1 Digital Living System 9 - Sony VGX-XL1A | User Guide - Page 13
may cause leaking. • Replace with new batteries after cleaning the liquid when liquid leaks from the batteries. • Use regular batteries. Re-chargeable batteries are not supported. • Use alkaline batteries for the keyboard. 10 VGX-XL1 Digital Living System - Sony VGX-XL1A | User Guide - Page 14
when the wireless LANa is ready to be used. CD-RW/DVD Combo Drive (Double layer recording capable) b It will read data from DVD-ROM, DVD+R DL, DVD+R, DVD+RW, DVD-R DVD-RW, CD-ROM, CD-R, CD-RW and write data to DVD+R DL, DVD+R DVD+RW, DVD-R, DVD-RW, CD-R, CD-RW. VGX-XL1 Digital Living System 11 - Sony VGX-XL1A | User Guide - Page 15
/Pointing Device Use this button when activating the wireless keyboard/pointing device. a. Requires compatible wireless access point(s). Some features may rely on Internet services which may require a fee. b. DVD Media/Formats are not universally compatible. 12 VGX-XL1 Digital Living System - Sony VGX-XL1A | User Guide - Page 16
Your VAIO® computer is equipped with memory card readers that are compatible with many popular types of memory cards. You can use your computer's memory card readers to transfer data between digital cameras, camcorders, music players, and other audio/video devices. VGX-XL1 Digital Living System 13 - Sony VGX-XL1A | User Guide - Page 17
Supported Memory Card Readers and Compatible Media Smart Media™ xD-Picture Card™ Secure Digital (SD) MultiMediaCard™ Compact Flash® Microdrive™ Memory Stick Duo™ Memory Stick Pro™ Memory Stick® 14 VGX-XL1 Digital Living System - Sony VGX-XL1A | User Guide - Page 18
support Web site at http://www.sony.com/pcsupport regularly for the latest information on Memory Stick® media. Note: Memory Stick media do not support AVI file playback directly from the media. Copy the video file to your hard disk drive and then play back the file. VGX-XL1 Digital Living System - Sony VGX-XL1A | User Guide - Page 19
Memory Card Readers, flip the front cover down. To insert Memory Cards 1 From the front panel, locate the appropriate reader(s) for the memory card(s) you want to use. 2 Insert the memory card Memory Stick® media, when you insert it into the Memory Stick slot again. 16 VGX-XL1 Digital Living System - Sony VGX-XL1A | User Guide - Page 20
details how to format the memory card. 2 If your device does not recognize memory card that has been formatted by your computer, so the following: • Save the card's contents to your hard disk drive. • Reformat the memory card using the device, not your computer. VGX-XL1 Digital Living System 17 - Sony VGX-XL1A | User Guide - Page 21
(L/R) Connection for an external device. HDMI™ Connection for HDMI cable for high definition video and/or sound for TV. Ethernet 10/100/1000baseT Connection for a 10BASE-T/100BASE-TX Ethernet. (The port marked with the Network symbol is for LAN connections only.) 18 VGX-XL1 Digital Living System - Sony VGX-XL1A | User Guide - Page 22
in MCE. Component Video OUT (480i, 480p,720P) Connections for Video Out. Power Cord Connection for supplied power cord. a. i.LINK is a trademark of Sony used only to For information on any Sony device having an i.LINK connection, contact Sony at 1-800-686-7669. VGX-XL1 Digital Living System 19 - Sony VGX-XL1A | User Guide - Page 23
for supplied power cable. Optical Drive Slot See online specifications sheet for optical drive information. Load Button Button to load media into the XL1B Media Changer/Recorder. Eject Button Button to eject or unload media from the XL1B Media Changer/Recorder. 20 VGX-XL1 Digital Living System - Sony VGX-XL1A | User Guide - Page 24
/Recorder Back Panel The XL1B Media Changer/Recorder Back Panel i.LINK®a S400 (x2) Your VAIO® computer is equipped with a 4-pin (front panel) and a 6-pin (back panel) For information on any Sony device having an i.LINK connection, contact Sony at 1-800-686-7669. VGX-XL1 Digital Living System 21 - Sony VGX-XL1A | User Guide - Page 25
back any type of discs.) • Once a new device is plugged into the second i.LINK®1 port of the VGXXL1B, both the changer and the second device are re-enumerated by the operating system, which could interrupt the current process running on the changer. Note: The VGP-XL1B Media Changer/Recorder is - Sony VGX-XL1A | User Guide - Page 26
's system software and operating system updated using VAIO Web Support and Microsoft Update. Note: You must be connected to the Internet to access some of the VAIO Support Central features. Please carefully review all support options in VAIO Support Central. VGX-XL1 Digital Living System 23 - Sony VGX-XL1A | User Guide - Page 27
keyboard w/integrated pointing device, select the Windows Start button. 2 From the Start menu, select All Programs. 3 From the All Programs menu, select VAIO® Support Central. Note: To access the most updated information available for the VGX-XL1 Digital Living System, periodically go to VAIO - Sony VGX-XL1A | User Guide - Page 28
you with an overview of the VGX-XL1 Digital Living System™ including hardware, operating system, and additional value-added VAIO® software. 1. Requires compatible wireless access point(s). Some features may rely on Internet services which may require a fee. VGX-XL1 Digital Living System 25 - Sony VGX-XL1A | User Guide - Page 29
26 VGX-XL1 Digital Living System - Sony VGX-XL1A | User Guide - Page 30
damage to your hard disk. • Do not set up where it is not secure. • Do not place an object over the ventilation holes. • If the XL1A computer and the XL1B Media Changer/Recorder are placed in an enclosed entertainment cabnet, make sure there is sufficient airflow. VGX-XL1 Digital Living System 27 - Sony VGX-XL1A | User Guide - Page 31
component video cable (not supplied) and connect one end to the corresponding video outputs on your TV and on the back panel of the XL1A computer. In this type of connection information on any Sony device having an i.LINK connection, contact Sony at 1-800-686-7669. 28 VGX-XL1 Digital Living System - Sony VGX-XL1A | User Guide - Page 32
with your computer. Connecting to standard cable access (CATV) Option 1 1 Connect one end of the TV coaxial cable (optional) to your cable service access. 2 Connect the other end of the TV coaxial cable to the VHF/UHF port on the back panel of your computer. VGX-XL1 Digital Living System 29 - Sony VGX-XL1A | User Guide - Page 33
Option 2 1 Connect one end of a TV coaxial cable to your cable service access. Connect the other end to the single-connection side of a splitter adapter. 2 Connect a second TV coaxial cable the other end to the VHF/UHF port on the back of your TV monitor or display. 30 VGX-XL1 Digital Living System - Sony VGX-XL1A | User Guide - Page 34
port on the back panel of the XL1A Computer. Option 2 1 Connect both ends of the antenna's twin lead cable to the screw-type grips on the combiner/transformer. 2 Connect an indoor/outdoor antenna system, you may need to re-orient the antenna for better reception. VGX-XL1 Digital Living System 31 - Sony VGX-XL1A | User Guide - Page 35
Box You can connect your computer to cable or satellite service that requires a set-top box. Option 1 1 Connect one end of a TV coaxial cable (optional) to your cable service access. Connect the other end to the In jack on the rear of your TV monitor or display. 32 VGX-XL1 Digital Living System - Sony VGX-XL1A | User Guide - Page 36
one end of the TV coaxial cable (optional) to your cable service access. Connect the other end to the In jack on the back cable into the Audio InputL, Audio Input-R, and Video Input jacks on the back panel of your computer, matching the plug and jack colors. VGX-XL1 Digital Living System 33 - Sony VGX-XL1A | User Guide - Page 37
, do the following: This procedure will demonstrate how to set up 5.1 surround sound speakers. Your selections may differ depending on your type of speakers. 1 From the Media Center Start menu, select Settings > General > Media Center Setup, Set Up Your Speakers. 34 VGX-XL1 Digital Living System - Sony VGX-XL1A | User Guide - Page 38
Type screen displays. 4 Select the appropriate connection type. Your selection depends on the type of cable used to connect your 5.1 surround sound speakers. Select Single RCA (digital) for coaxial S/PDIF or Toslink (digital) for optical S/PDIF and HDMI. 5 Select Next. VGX-XL1 Digital Living System - Sony VGX-XL1A | User Guide - Page 39
6 From the Test Your Speakers screen, select the Test button. The system will test your speakers for sound. Important: Then select I heard sound from displays the Welcome to Audio Settings screen. 9 Select Configuration. The Speaker Configuration screen displays. 36 VGX-XL1 Digital Living System - Sony VGX-XL1A | User Guide - Page 40
Windows Start > Control Panel. 2 From the Category view, select Sounds, Speech, and Audio Devices. 3 From the Sounds, Speech, and Audio Devices screen, select Sound Reality™ Audio from the Pick a Control Panel icon section. The Sound Reality Control panel displays. VGX-XL1 Digital Living System - Sony VGX-XL1A | User Guide - Page 41
an amplifier that supports 5.1 sound, do the following: • check Enable HDMI™ Output • select AC3 for the format • check Enable Digital Output 6 Close the Sound Reality Control Panel and the Windows Control Panel. Your 5.1 Surround Sound Speaker Setup is complete. 38 VGX-XL1 Digital Living System - Sony VGX-XL1A | User Guide - Page 42
through the HDMI connection if your HDMI connections does not support 5.1 channel sound. To enable HDMI sound, uncheck the Enable Dolby Digital Live check box and check/select the Enable HDMI Output check ) to the connector on the back panel of the XL1 computer. VGX-XL1 Digital Living System 39 - Sony VGX-XL1A | User Guide - Page 43
back of the keyboard, slide the Pointing Device button to On. 3 From the back of the keyboard, and the front panel of the DLS computer, press the Connect buttons simultaneously and hold for a few seconds. 4 Test the keyboard to make sure it is functioning properly. 40 VGX-XL1 Digital Living System - Sony VGX-XL1A | User Guide - Page 44
full service/support to the customer who owns the VAIO® product. Turning power on to the Media Changer/Recorder Once you complete Windows Setup and Sony of screens that will guide you through Media Center Setup. Please follow all on-screen instructions. VGX-XL1 Digital Living System 41 - Sony VGX-XL1A | User Guide - Page 45
screen displays. 4 From the Directory list, click nView Display Settings, if necessary. 5 Click the Device Settings button. 6 From the side menu, click TV Format and select the appropriate option for your TV from the list. 7 Continue with Media Center Setup. 42 VGX-XL1 Digital Living System - Sony VGX-XL1A | User Guide - Page 46
features, links directly to Media Center's My DVDs by selecting the viewport window. Data CD/DVD Places the data disc in the drive. To access the disc, go to Windows Explorer or to My Computer. The changer's drive appears as DVD-RAM drive in My Computer. VGX-XL1 Digital Living System 43 - Sony VGX-XL1A | User Guide - Page 47
audio CDs, DVD-Video movie discs (Region 1, U.S. is default.) Unsupported Media All other media types (Do not insert, mini-DVDs, odd-shaped discs, etc.) Note: VGX-XL1 Digital Living System™ does not support DualDisc media. Media Warnings • Do not insert discs backwards into the Media Changer - Sony VGX-XL1A | User Guide - Page 48
features. My Changer Music does not display music discs or files that have been copied to the My Music or Shared Music folders on the hard disk drive. The only Media Changer/Recorder audio CD available in My Music is the current disc in the Media Changer's drive. VGX-XL1 Digital Living System 45 - Sony VGX-XL1A | User Guide - Page 49
select the Eject button for each disc you wish to eject. To eject discs manually • Press the Eject button on the Media Changer/Recorder one time to eject the last inserted disc. or • Press the Eject button two times to eject all discs in the Changer carousel. Disconnecting/Moving the Changer Do not - Sony VGX-XL1A | User Guide - Page 50
than four (4) seconds. WARNING: Any changes that have not been saved will be lost. Power Saving Functions The VGX-XL1A personal computer offers two power-saving function modes, Standby and Hibernation, which are used to reduce power consumption when not in use. VGX-XL1 Digital Living System 47 - Sony VGX-XL1A | User Guide - Page 51
screen, which displays when selecting Start > Turn Off Computer. • Press the Power button on the front of this device. • Press the Power/Standby key on the keyboard. Note: This device will not return to normal operation by remote control when in hibernation. 48 VGX-XL1 Digital Living System - Sony VGX-XL1A | User Guide - Page 52
Summary Chapter 2: Setting Up Your VGX-XL1 Digital Living System™ provided you with step by step instruction about setting up the DLS system including the operating software. VGX-XL1 Digital Living System 49 - Sony VGX-XL1A | User Guide - Page 53
50 VGX-XL1 Digital Living System - Sony VGX-XL1A | User Guide - Page 54
before touching the expansion card. • Don't leave the expansion card on a surface that easily produces static electricity such as carpet. The part of expansion card may be damaged due to the effects of static electricity. • Don't touch the connection pads directly. VGX-XL1 Digital Living System 51 - Sony VGX-XL1A | User Guide - Page 55
the expansion card. • Always follow the user's manual for this device when removing the expansion card. Forcefully removing the expansion card may cause failure of this device. • Don't get the expansion card wet. Warning the rear of the unit and slide the cover off. 52 VGX-XL1 Digital Living System - Sony VGX-XL1A | User Guide - Page 56
3 Remove the inside support panel. Remove the screws from the inside support panel and remove the panel. 4 Remove the clip. Remove the screw and remove the clip by pulling up. VGX-XL1 Digital Living System 53 - Sony VGX-XL1A | User Guide - Page 57
circuit board and cables inside. 6 Install the PCI card in the open slot. Refer to the card's user's manual for details. Warning: Touching other parts when installing the expansion card may cause a failure. 7 Install the clip. Insert the clip and tighten the screw. 54 VGX-XL1 Digital Living System - Sony VGX-XL1A | User Guide - Page 58
8 Install the inside support panel. Insert the inside support panel and tighten the screws. 9 Install the cover and tighten the screws at the back of the unit. 10 Connect the power cord and the peripheral devices that were removed in Step 1 and turn on the power. VGX-XL1 Digital Living System 55 - Sony VGX-XL1A | User Guide - Page 59
upgrading the memory may cause damage. Always remove any foreign objects and replace the cover before turning the power on. • Don't touch the electronic components on the circuit board of this device. They are susceptible to pressure and static, which may cause a failure. 56 VGX-XL1 Digital Living - Sony VGX-XL1A | User Guide - Page 60
Important Note: Always use DDR2 533 SDRAM DIMM VGP-MM512J. Memory Capacity After an Upgrade. Using Standard Memory: DDR2 533(PC2-4200) Capacity Standard (512MB) 1536MB Standard Bank 0 256MB x 2 DDR2 533 256MB x 2 DDR2 533 Upgrade Bank 1 512MB x 2 DDR2 533 VGX-XL1 Digital Living System 57 - Sony VGX-XL1A | User Guide - Page 61
protection bag. Do not take the memory module out from the bag until right before installing. • Do not touch the semiconductor chip or the connectors when you hold the memory module. • Cover the memory module with a static protection bag or aluminum foil to store. 58 VGX-XL1 Digital Living System - Sony VGX-XL1A | User Guide - Page 62
be hot. Wait approximately one hour before proceeding to work. 2 Remove the upper cover. Remove the screws at the rear and slide the cover off. VGX-XL1 Digital Living System 59 - Sony VGX-XL1A | User Guide - Page 63
the memory. • The harness connector may be raised when installing the memory. Check by pressing the harness connector to make sure there is no gap. • Please be careful not to get cut on the parts or the circuit board inside this device when installing the memory. 60 VGX-XL1 Digital Living System - Sony VGX-XL1A | User Guide - Page 64
the memory module. 6 Make sure that the memory module is installed properly. Check the following after installing the memory module: • The clips on both sides are aligned with each other. • The clips on both sides fit into the notches of the memory module properly. VGX-XL1 Digital Living System - Sony VGX-XL1A | User Guide - Page 65
sides must fit into the notches on the memory module. 7 Install the graphics card. Install the graphics card, connect the cable and tighten the screw the Start button and then point to All Programs, VAIO® System Information and then click VAIO® System Information. 62 VGX-XL1 Digital Living System - Sony VGX-XL1A | User Guide - Page 66
install the memory module again. Remove Memory Module Discharge static in your body by touching the metal inside this device, and then press out and down on the clips on both of the memory slots. Carefully lift the memory module out of the slot. Press out and down. VGX-XL1 Digital Living System 63 - Sony VGX-XL1A | User Guide - Page 67
upgrading. • There may be a limit on downloading video from i.LINK®1 support devices depending on the hard disk used to upgrade. 1. i.LINK is a trademark of Sony . For information on any Sony device having an i.LINK connection, contact Sony at 1-800-686-7669. 64 VGX-XL1 Digital Living System - Sony VGX-XL1A | User Guide - Page 68
, please note that the drive number for the upgraded hard disk may change when recovering this device. • Recorded video is saved to the C: drive, by default. To Add / Upgrade a Hard Disk 1 Turn off the power to Remove the screws in the rear and slide the cover off. VGX-XL1 Digital Living System 65 - Sony VGX-XL1A | User Guide - Page 69
cables connected to the hard disk installed at the time of purchase and remove the hard disk drive bay. Note: Touching other parts can cause a failure when installing the hard disk drive bay. Be careful not to drop the screws inside this device when unscrewing. 66 VGX-XL1 Digital Living System - Sony VGX-XL1A | User Guide - Page 70
the cables to both of the hard disks, the one installed at the time of purchasing and the upgraded hard disk. Always install the serial ATA power cable and the serial ATA cable. In the meantime, the hard disk and the corresponding PORT (Serial ATA) connector VGX-XL1 Digital Living System 67 - Sony VGX-XL1A | User Guide - Page 71
, the use of serial ATA cables with a L shaped connector areas is recommended. 7 Install the hard disk drive bay in the original location. Note: Touching other parts when installing the hard disk drive bay can cause damage. 68 VGX-XL1 Digital Living System - Sony VGX-XL1A | User Guide - Page 72
on the back. 10 Connect the power cord and the peripheral devices that were removed in Step 1 and turn on the power to this device. VGX-XL1 Digital Living System 69 - Sony VGX-XL1A | User Guide - Page 73
Type screen displays. 10 Select Extended Partition and click Next. The Specify Partition Size screen is displays. Note: Always select Extended Partition when creating a partition. Failure in the software operation happens if the Primary Partition is selected. 70 VGX-XL1 Digital Living System - Sony VGX-XL1A | User Guide - Page 74
. If it is set to other than "Never", recording using the Do VAIO may fail. When a RAID volume and a drive not configured as a RAID (volume) are mixed in the system, Windows may not run. Refer to "Windows doesn't start" in "Troubleshooting" regarding this case. VGX-XL1 Digital Living System 71 - Sony VGX-XL1A | User Guide - Page 75
• Appendix C: Hard Disk Drive Recovery • Appendix D: RAID Configuration • Appendix E: Troubleshooting Summary Chapter 3: Hardware Upgrades & Maintenance provided you with detailed information on upgrading and maintaining your VGX-XL1 Digital Living System™. 72 VGX-XL1 Digital Living System - Sony VGX-XL1A | User Guide - Page 76
The Wireless LAN removes all of the trouble of cable connections and helps to build XL1A personal computer can act as an access point for a LAN setup. 1. Requires compatible wireless access point(s). Some features may rely on Internet services which may require a fee. VGX-XL1 Digital Living System - Sony VGX-XL1A | User Guide - Page 77
are away. • Ad hoc mode which connects computers directly without an access point. Use the VGX-XL1 as an Access Point • You may need to enter into a contract with a wireless LAN connections service provider to use wireless LAN communications when your are away. 74 VGX-XL1 Digital Living System - Sony VGX-XL1A | User Guide - Page 78
at work via an access point. For details, please refer to the manual included with the access point you use. To connect to an access point Windows Start button. Then select All Programs > Marvell® Wireless SoftAP > Marvell® Wireless Soft_g_SoftAP Configuration Utility. VGX-XL1 Digital Living System - Sony VGX-XL1A | User Guide - Page 79
. 5 From the Wireless network connection screen, select the wireless LAN access point to connect to from the Choose a wireless network list and click Connect. 76 VGX-XL1 Digital Living System - Sony VGX-XL1A | User Guide - Page 80
. Once you input the Network Key and connect, the wireless LAN access point is registered and you can connect without entering the Network Key again. VGX-XL1 Digital Living System 77 - Sony VGX-XL1A | User Guide - Page 81
with wireless LAN while connected. For additional information, please refer to Windows Help 1 Click the Windows Start button and then click Control Panel. 2 From the Control Panel, click 4 Click the Wireless Networks tab. The list of Preferred Networks displays. 78 VGX-XL1 Digital Living System - Sony VGX-XL1A | User Guide - Page 82
point, it automatically switches to the next registered access point in order of priority, choosing from available access points. 1 Click Start from the Windows task bar, and then click Control Panel. 2 From the Control Panel, click the Network Connections icon. VGX-XL1 Digital Living System 79 - Sony VGX-XL1A | User Guide - Page 83
Preferred Networks displays. 6 Select the one you want to change from the Priority Network list and click Move up or Move down. 7 Click OK. 80 VGX-XL1 Digital Living System - Sony VGX-XL1A | User Guide - Page 84
desktop screen. The Select Operation Mode screen displays. 3 Select Station in the Select Operation Mode screen and click OK. 4 Click Windows Start and then click Control Panel. The Control Panel screen displays. 5 Click the Network and Internet Connections icon. VGX-XL1 Digital Living System 81 - Sony VGX-XL1A | User Guide - Page 85
entry. Click OK. Confirm that the Network name (SSID) entered in Step 12 is added to the top of the list of Preferred Networks. 82 VGX-XL1 Digital Living System - Sony VGX-XL1A | User Guide - Page 86
LAN) lamp turns green. Or, If the icon is not displayed in the communication area, click Windows Start, point to All Programs > Marvell® Wireless SoftAP and then click Marvell® Wireless Soft_g_SoftAP Configuration on the desktop or the Wireless Network Off icon. VGX-XL1 Digital Living System 83 - Sony VGX-XL1A | User Guide - Page 87
to set up the second computer. Note: The channel for Ad hoc mode is automatically set for this device. Users cannot change this setting. 84 VGX-XL1 Digital Living System - Sony VGX-XL1A | User Guide - Page 88
with the following procedure and return to Infrastructure Mode. 1 Click Start from the Windows taskbar, and then click Control Panel. 2 From the Control Panel, click the to the manual that came with the access point or check with the access point administrator. VGX-XL1 Digital Living System 85 - Sony VGX-XL1A | User Guide - Page 89
) lamp turns green. Or, If the icon is not displayed in the communication area, click Windows Start, point to All Programs > Marvell® Wireless SoftAP and then click Marvell® Wireless Soft_g_SoftAP Configuration (AP) in the Select Operation Mode screen and click OK. 86 VGX-XL1 Digital Living System - Sony VGX-XL1A | User Guide - Page 90
The Marvell® CB-35P/MB-35P Wireless Client Card Settings Utility screen displays. Note: When you set this as an access point for the first time or . Note: Do not continue displaying the settings because the network key is displayed in the AP Information screen. VGX-XL1 Digital Living System 87 - Sony VGX-XL1A | User Guide - Page 91
VAIO > Network (LAN) in "Internet/Network" > Use Network Bridge. Marvell® CB-35P/MB-35P Wireless Client Card Settings Utility screen This allows you to change various settings to use this device as an access point. AP Settings The AP Settings screen displays below. 88 VGX-XL1 Digital Living System - Sony VGX-XL1A | User Guide - Page 92
support 802.11g are able to connect to this access point. 802.11g/b: Only stations which support 802 manually selected. Security Settings The current access point security settings are displayed. Click Edit Security Settings to display the Security Settings screen. VGX-XL1 Digital Living System - Sony VGX-XL1A | User Guide - Page 93
Wireless LAN function. Switches the wireless LAN on/off. Security Settings screen Set the security for the access point in the Security Settings screen. 90 VGX-XL1 Digital Living System - Sony VGX-XL1A | User Guide - Page 94
The transmitted packets are encrypted using WEP. Select the authentication method in Authentication. Open System: This does not authenticate when connecting to the access point. However, the network When the client is set to WPA, the access point can be connected. VGX-XL1 Digital Living System 91 - Sony VGX-XL1A | User Guide - Page 95
this device automatically from standby or hibernate when access is made to the access point if this device is functioning as an access point. 92 VGX-XL1 Digital Living System - Sony VGX-XL1A | User Guide - Page 96
" driver screen Windows Start point to All Programs, Marvell® Wireless SoftAP, and then click Marvell® Wireless Soft_g_SoftAP Configuration Utility to display the Select Operation Mode screen. Click the check box by Turn Radio Off to make it checked, then click OK. VGX-XL1 Digital Living System - Sony VGX-XL1A | User Guide - Page 97
94 VGX-XL1 Digital Living System - Sony VGX-XL1A | User Guide - Page 98
Set up one or more computers on your network as media servers and install the VAIO Media™ client software on the other computers. The computers with the VAIO Media™ client software installed can access multimedia content stored on the VAIO Media™ server computers. VGX-XL1 Digital Living System 95 - Sony VGX-XL1A | User Guide - Page 99
with Giga Pocket software can stream a live TV signal to other VAIO® computers connected to your network. • Analog stream - VAIO® computers equipped with Media Center can stream an analog signal from a connected analog device, such as a VCR, through the TV server. 96 VGX-XL1 Digital Living System - Sony VGX-XL1A | User Guide - Page 100
computers must be VAIO® computers running Microsoft® Windows® XP Home Edition, Microsoft Windows XP Professional Edition, and Microsoft® Windows® Media Center Edition operating systems. VAIO Media™ software is not supported by other computers or environments. VGX-XL1 Digital Living System 97 - Sony VGX-XL1A | User Guide - Page 101
. To copy and distribute the installer file 1 Click Start on the Windows taskbar, and point to All Programs. 2 Point to VAIO Media, and click Install VAIO Media to other VAIO PCs. The Enjoying Music, Photos, and Video on Other VAIO computers window appears. 98 VGX-XL1 Digital Living System - Sony VGX-XL1A | User Guide - Page 102
4 Click Save. Save the file, VM31Inst.exe, to a blank storage media, such as a CD-R, CDRW or Memory Stick® media, to transfer and set up the installer program on each client computer. Note: The open and install it. Follow the on-screen instructions on each screen. VGX-XL1 Digital Living System 99 - Sony VGX-XL1A | User Guide - Page 103
. On the server computer, follow these steps: 1 From the Start menu, point to All Programs, and then point to VAIO Media™. 2 From the VAIO Media submenu, point to Server Administration, and click to open VAIO Media Console. The VAIO Media Console window appears. 100 VGX-XL1 Digital Living System - Sony VGX-XL1A | User Guide - Page 104
generates a four-digit number for the client. Type this number on the VAIO Media™ server. Preparing Your Multimedia Content You can use pre installed Sony® software programs to prepare your multimedia content for sharing across the network using VAIO Media™ software. VGX-XL1 Digital Living System - Sony VGX-XL1A | User Guide - Page 105
in your network. Note: VAIO Media software does not support live TV viewing across the network on your computer equipped with Media Center,. Only VAIO computers equipped with Giga Pocket software support live TV viewing across the network through the TV server. 102 VGX-XL1 Digital Living System - Sony VGX-XL1A | User Guide - Page 106
folders containing video, music, and still image contents. When a folder is registered with VAIO Media Windows® taskbar, and then point to All Programs, VAIO Media, Server Administration, and click VAIO Media Console. The VAIO Media™ Console software window appears. VGX-XL1 Digital Living System - Sony VGX-XL1A | User Guide - Page 107
VAIO Media™ VAIO Media™ uses your network servers to view images and video or listen to music To use VAIO Media™ 1 Click Start in the Windows® taskbar, and then point to All Programs, VAIO Media, and then click VAIO Media. The VAIO Media™ Main Menu window appears. 104 VGX-XL1 Digital Living System - Sony VGX-XL1A | User Guide - Page 108
, video cabinet or channel you want to access. Accessing VAIO Media™ Help For more information about using the VAIO Media™ software program, follow these steps: • Click Start in the Windows® taskbar, and point to All Programs, VAIO Media, and then click Help. VGX-XL1 Digital Living System 105 - Sony VGX-XL1A | User Guide - Page 109
. 5 Click TV. One of the following windows appears: • If there are other TV servers that can stream analog input on your network, VAIO Media™ software displays them on the server list. Click to select the computer equipped with Media Center from the server list. 106 VGX-XL1 Digital Living System - Sony VGX-XL1A | User Guide - Page 110
input, then playback begins. If the playback window is empty, click Select Channel. VAIO Media™ software assigns a channel to each A/V input jack. You may need to change the channel to view the video. The Channel list window appears. Click to change the channel. VGX-XL1 Digital Living System 107 - Sony VGX-XL1A | User Guide - Page 111
Summary This appendix covered VAIO Media™ software included with your XL1A computer for wireless or wired LAN installations. 108 VGX-XL1 Digital Living System - Sony VGX-XL1A | User Guide - Page 112
computer's performance, it can be very difficult to troubleshoot. You may decide that the best option is to restore your system back to its original factory settings. Note: Turn off screen savers before you begin any of the VAIO® Hard Disk Drive Recovery options. VGX-XL1 Digital Living System 109 - Sony VGX-XL1A | User Guide - Page 113
XL1B Media Chnager/Recorder and the create DVD process in Manage Discs. See the VGX-XL1 Digital Living System™ Entertainment Book, Media Center Features, Manage Discs. Manage CDs and DVDs The following types of media, CD or DVD, are supported to back up your data and/or to create the recovery discs - Sony VGX-XL1A | User Guide - Page 114
click VAIO Recovery. • Click the Windows Start button, and from the menu select Control Panel. From the Classic view, click VAIO Recovery. • Click the Windows Start button, point to All Programs, and click VAIO Recovery. Then from the submenu, click VAIO Recovery. VGX-XL1 Digital Living System 111 - Sony VGX-XL1A | User Guide - Page 115
maintain your Sony VAIO® computer. • Create Recovery Discs • Restore Windows® System • Reinstall Drivers or Applications • Restore C: Drive • Restore Complete System • Reconfigure RAID These tools provide options to restore your computer to the original factory settings, reinstall specific factory - Sony VGX-XL1A | User Guide - Page 116
the name and supported format of each disc required to complete the Media Kit. This is for informational purposes only and requires no action on your part. Tip - Do not close the drive door manually, unless necessary. This could cause problems writing to the disc. VGX-XL1 Digital Living System 113 - Sony VGX-XL1A | User Guide - Page 117
exit VAIO Recovery. This completes the VAIO Recovery option Create Recovery Discs. Create Recovery Media using DVD media Before you begin, make sure both the VGX-XL1A Personal Computer and the VGP-XL1B media changer/recorder are turned on and that all discs have been removed from the VGP-XL1B Media - Sony VGX-XL1A | User Guide - Page 118
Click the Eject button next to the loaded disc icon. A Confirm Eject message displays. 26 Click Yes. Remove the disc from the Media Changer/Recorder and label it VGX-XL1A Recovery DVD 2/2. 27 Close Media Center and store the Recovery DVD Discs in a safe location. VGX-XL1 Digital Living System 115 - Sony VGX-XL1A | User Guide - Page 119
any restore or recovery options, go to the Sony online support Web site at www.esupport.sony.com and review your modelspecific support page. Look for software driver updates, or check for knowledge base solutions that may help solve your computer's problems. Start System Restore The Microsoft - Sony VGX-XL1A | User Guide - Page 120
is Windows based. Before performing any restore or recovery options, go to the Sony online support Web site at www.esupport.sony.com and review your modelspecific support page. Look for software driver updates, or check for knowledge base solutions that may help solve your computer's problems. To - Sony VGX-XL1A | User Guide - Page 121
.sony.com and review your modelspecific support page. Look for software driver updates, or check for knowledge base solutions that may help solve your computer's problems. To access Restore C: Drive 1 Start the VAIO® Recovery program. See Start VAIO Recovery on page 3. 2 From the VAIO® Recovery - Sony VGX-XL1A | User Guide - Page 122
that specific program. Continue until all active program windows are gone. 6 Click Finish to exit VAIO Recovery and restart your computer. When your computer restarts, you are guided through a series of screens for Windows set up. Follow the on-screen instructions. This completes the VAIO Recovery - Sony VGX-XL1A | User Guide - Page 123
or have not purchased a set of recovery discs. Note: A set of recovery discs are required to begin Restore Complete System. Before performing any restore or recovery options, go to the Sony online support Web site at www.esupport.sony.com and review your modelspecific support page. To access Restore - Sony VGX-XL1A | User Guide - Page 124
choice of media. Insert the next disc and click OK to continue. When this part of the recovery process completes, a VAIO® Recovery message may appear asking you to remove the disc and click OK to automatically restart the computer and resume the recovery process. VGX-XL1 Digital Living System 121 - Sony VGX-XL1A | User Guide - Page 125
VAIO Recovery: RAID Options The following VAIO Recovery options are only available if your computer was configured for RAID at the time of assembly (Your computer was purchased "RAID Ready"): • Reconfigure RAID • Intel Matrix Storage Console • Delete a RAID Array 122 VGX-XL1 Digital Living System - Sony VGX-XL1A | User Guide - Page 126
data along with additional redundancy information. Sony recommends using the Intel Matrix Storage Driver/Console to manage your RAID array. to remove the disc. 5 Remove the disc and click OK. The computer restarts and displays a message to insert recovery disc 1. VGX-XL1 Digital Living System 123 - Sony VGX-XL1A | User Guide - Page 127
to delete or need to unlock a RAID array. This process requires that you restart the computer using recovery disc 1. If you do not have a set of recovery discs, click Create Recovery Discs. • Create Recovery Discs - Use this link to create a set of recovery discs. 124 VGX-XL1 Digital Living System - Sony VGX-XL1A | User Guide - Page 128
the VAIO® Recovery menu screen, click Reconfigure RAID. The introductory screen for Reconfigure RAID appears. 3 Click Restart from disc. The optical drive door opens and a message displays asking you to insert recovery disc 1. 4 Insert recovery disc 1 and click OK. VGX-XL1 Digital Living System - Sony VGX-XL1A | User Guide - Page 129
. See Restore Complete System, page 11 for step-by-step instructions to perform this procedure. 10 When complete, start the Intel Matrix Storage Console and configure your RAID array(s), as desired. See Intel Matrix Storage Console, for additional information. 126 VGX-XL1 Digital Living System - Sony VGX-XL1A | User Guide - Page 130
Support Resources Documentation VAIO® Computer User Guide The online User Guide provides information about configuring, maintaining, and upgrading your computer. This resource offers a variety of topics allowing you to quickly view topic-specific information. VAIO® Recovery/ RAID Guide The VAIO - Sony VGX-XL1A | User Guide - Page 131
Summary This chapter explained the features of the VAIO® HDD Recovery program. In addition, detailed information and procedures were provided for how to use the six VAIO® Recovery Tools. 128 VGX-XL1 Digital Living System - Sony VGX-XL1A | User Guide - Page 132
guide include: • Why use RAID? • Benefits of RAID • RAID Levels • Choose a RAID Configuration • Before you begin • RAID Configuration Wizard • VAIO® Recovery Wizard • Intel® Storage Utility • Frequently Asked Questions • Trouble Shooting • RAID Glossary • Support Resources VGX-XL1 Digital Living - Sony VGX-XL1A | User Guide - Page 133
. Fault Tolerance RAID implementations that include redundancy provide you with a more reliable overall storage system than can be achieved by a single disk. This means there is a lower chance of the storage system (as a whole) failing due to hardware failures. 130 VGX-XL1 Digital Living System - Sony VGX-XL1A | User Guide - Page 134
? A RAID array is made up of two or more hard disks working in parallel, which appear and function as a single hard disk to the user. Sony has approved four different RAID levels or types for use in VAIO® computers. VGX-XL1 Digital Living System 131 - Sony VGX-XL1A | User Guide - Page 135
writing identical data to all disks in the array. If either disk fails, the controller uses the data drive or the mirror drive for data recovery and continues to operate. Data can then be copied to the replacement disk. 132 VGX-XL1 Digital Living System - Sony VGX-XL1A | User Guide - Page 136
- Striping and Mirroring RAID 10 combines the features of levels RAID 0 and RAID 1 in a single system. This allows for faster data access (like RAID 0) and single-disk fault tolerance (like RAID 1). RAID of parity. Fifty percent of capacity is lost to redundancy. VGX-XL1 Digital Living System 133 - Sony VGX-XL1A | User Guide - Page 137
systems where only two hard disc drives are required. Good performance for Reads, slower for Writes (requires parity data be updated each time. May provide higher performance if I\O is random and in smaller chunks). Highest performance with data protection. 134 VGX-XL1 Digital Living System - Sony VGX-XL1A | User Guide - Page 138
Video support hot disc = case of disc fail- high efficiency. ure. 10 Excellent fault Limited Database server tolerance; high scalability; high requiring high per- I/O rates; req. overhead; very formance and fault large amounts expensive. tolerance. of storage. VGX-XL1 Digital Living System - Sony VGX-XL1A | User Guide - Page 139
information about creating recovery discs, see the VAIO® Recovery Guide located in VAIO® Support Central. To access the online documentation 1 Using the wireless keyboard, click Start in the Windows® taskbar, then click All Programs > VAIO® Support Central. 2 From the VAIO® Support Central page - Sony VGX-XL1A | User Guide - Page 140
motherboard VAIO® Recovery Guide located in VAIO® Support Central. 2 From the VAIO® Recovery menu screen, click Reconfigure RAID. The introductory screen for Reconfigure RAID appears. 3 Click Go to Intel® Matrix Storage Console. One of the following three events occurs: VGX-XL1 Digital Living System - Sony VGX-XL1A | User Guide - Page 141
starts the installation of the selected applications and drivers. Install windows may appear that require action on your part to complete the installation. Follow the instructions. This completes the download instructions for the Intel® Matrix Storage Console. 138 VGX-XL1 Digital Living System - Sony VGX-XL1A | User Guide - Page 142
. Follow the screen instructions, or review the available help information from the program or from the Intel® Web site. Note: It is recommended to access the Intel® Matrix Storage Console from VAIO® Recovery to take advantage of VAIO® PC's automated features. VGX-XL1 Digital Living System 139 - Sony VGX-XL1A | User Guide - Page 143
insert recovery disc 1. 4 Insert recovery disc 1 and click OK. The computer restarts and displays a page with the following VAIO® Recovery options: • Restore C: Drive • Restore Complete System • WARNING statement. 7 Select the I understand check box and click Next. 140 VGX-XL1 Digital Living System - Sony VGX-XL1A | User Guide - Page 144
VAIO® Recovery program automatically deletes all RAID arrays on the hard disk drive. When complete, a message displays with instructions on completing the process. 8 Leave the disc the original ATA drivers provided with the Microsoft® Windows® operating system. VGX-XL1 Digital Living System 141 - Sony VGX-XL1A | User Guide - Page 145
Provides redundancy by writing identical data to each member disk of the array. Parity A type of data protection where redundant information is calculated from actual data values. Physical Drive The divided into stripes and written across the disks of the array. 142 VGX-XL1 Digital Living System - Sony VGX-XL1A | User Guide - Page 146
Support Resources Documentation VAIO® Computer User Guide The online User Guide provides information about configuring, maintaining, and upgrading your computer. This resource offers a variety of topics allowing you to quickly view topic-specific information. VAIO® Recovery/ RAID Guide The VAIO® - Sony VGX-XL1A | User Guide - Page 147
Summary This guide explained the features of the VAIO® Recovery program. In addition, detailed information and procedures were provided for how to use the six VAIO® Recovery Tools. 144 VGX-XL1 Digital Living System - Sony VGX-XL1A | User Guide - Page 148
the VAIO® VGX-XL1 Digital Living System™. If the answers to your questions are not contained in this appendix, go to VAIO Control Central for additional help. The Troubleshooting appendix is divided into the following sections: Section Title... Power/Start Password Screen/Display Wireless Keyboard - Sony VGX-XL1A | User Guide - Page 149
please contact VAIO Customer Support. Event: button of this device again for at least four seconds, make sure that the power lamp turns off, then remove all cables connected to this device, and re-connect after waiting five minutes and then turn the power on again. 146 VGX-XL1 Digital Living System - Sony VGX-XL1A | User Guide - Page 150
. • When "Saving the settings" or "Shutting down Windows" displays and does not change, follow these steps. - Press Enter. If the power still will not turn off, hold the power button of this device for at least four seconds and make sure the power lamp turns off. VGX-XL1 Digital Living System 147 - Sony VGX-XL1A | User Guide - Page 151
changed. Follow the procedures below. Do not insert the recovery disk into the drive. 1 Click OK after the message displays. The Copy Files screen displays. 2 Enter C:\WINDOWS\I386 in the "Source to copy files from" and click OK. The necessary files are copied. 148 VGX-XL1 Digital Living System - Sony VGX-XL1A | User Guide - Page 152
't start after installing the upgraded drivers. Comment: Run in Safe mode by following the following steps and re-install the driver. 1 Press the power button of this device, and when the VAIO logo is displayed on the screen press the F8 key on the keyboard. 2 When "Windows extended options menu - Sony VGX-XL1A | User Guide - Page 153
LAN) function is enabled, it may return from Standby mode or Hibernation as a result of a wireless packet from the XL1A computer if there is a wireless device near you. Disable the WOW (Wake on Wireless LAN) function or the wireless function of supported device. 150 VGX-XL1 Digital Living System - Sony VGX-XL1A | User Guide - Page 154
Password Event: Unable to log on to Microsoft® Windows® XP operating system. Comment: • The password is case-sensitive. it's in a windowed screen and a balloon pops up in the taskbar. You can close the pop-up balloon in the task bar or maximize the MCE screen. VGX-XL1 Digital Living System 151 - Sony VGX-XL1A | User Guide - Page 155
turns off when the power is off. When the power lamp is on (orange), turn off the power again by holding the power button for at least four seconds. Files you are creating or editing may not be usable using this method to turn off the power to the XL1A computer. 152 VGX-XL1 Digital Living System - Sony VGX-XL1A | User Guide - Page 156
to the TV user manual Event: When playing movies on the TV connected using a D video cable, the following symptoms can occur. • When playing video, the screen is switched to 525p (480p) • DVD/video is played as a output signal format to 525i(480i) or 525p(480p). VGX-XL1 Digital Living System 153 - Sony VGX-XL1A | User Guide - Page 157
Digital video cable, make sure to use an output format that matches the Digital card. Event: Part of the top, bottom, left or right of the screen is not displayed and is black. Comment: Adjust the over scan width using the over scan adjustment on the graphic card. 154 VGX-XL1 Digital Living System - Sony VGX-XL1A | User Guide - Page 158
and that the pointing device switch on the back of the keyboard is on. 2 Re-connect the keyboard/touchpad to the XL1A computer by pressing the Connect buttons (on the back of the keyboard and the front panel of VGXXL1A) at the same time and hold for a few seconds. VGX-XL1 Digital Living System 155 - Sony VGX-XL1A | User Guide - Page 159
how to enter text using the VAIO® Remote Control. Comment: Refer to the VGX-XL1 Digital Living System™ Entertainment Guide. Event: Cannot enter text when I press the keys on the keyboard. Comment: Make sure that the "Num Lock" indicator on the upper right keyboard is not displayed. Event: Cannot use - Sony VGX-XL1A | User Guide - Page 160
keyboard. 3 Perform the Activate Keyboard Communications procedure in Chapter 1, if necesary. Optical Drive Event: Burn DVDs in my XL1A computer's optical drive. Comment: The optical drive in the XL1A computer is only a CD-RW/DVD combo drive. It is NOT a DVD+-RW drive. VGX-XL1 Digital Living System - Sony VGX-XL1A | User Guide - Page 161
VGP-XL1B changer drive letter. Hard Disk Event: An error occurred in the initialization of the hard disk. Comment: • The files on the hard disk cannot be recovered. This device must be recovered by using the recovery function in the hard disk or your own recovery disk. 158 VGX-XL1 Digital Living - Sony VGX-XL1A | User Guide - Page 162
the memory card reader and disconnect all third-party devices such as scanners, printers, floppy drivers, etc. and try again. • If the hard disk does not start-up with above process, you may need to perform hard disk drive recovery. Go to VAIO® Support Central. (Click Start from the Windows® taskbar - Sony VGX-XL1A | User Guide - Page 163
resolution higher than your current resolution setting. Please check back to our support website at http:// www.sony.com/pcsupport/ for software update. Event: Some of my shortcuts in the start menu are not well as other MCE processes that need to load as well. 160 VGX-XL1 Digital Living System - Sony VGX-XL1A | User Guide - Page 164
the headphone jack output) from my XL1A computer. Comment: Microsoft® Windows® Media Center Edition 2005 cannot control the volume level of HDMI, Optical/Coaxial S/PDIF, and Line Out sound. Windows/MCE will only control the volume of the headphone jack output. VGX-XL1 Digital Living System 161 - Sony VGX-XL1A | User Guide - Page 165
guide. Make sure that the Wireless Zero Configuration service is started. Operate according to the following procedure. 1 Click Start on the Windows type of start-up as Automatic and click Apply. 3 Click Start in service condition. 4 Click OK and close the screen. 162 VGX-XL1 Digital Living System - Sony VGX-XL1A | User Guide - Page 166
to the Appendix A: Wireless Local AreaNetwork in this guide. • The communication distance between the devices varies the security key. Follow the procedure. 1 Click Start on the Windows taskbar and then click Control Panel. The Control Panel screen displays. VGX-XL1 Digital Living System 163 - Sony VGX-XL1A | User Guide - Page 167
to limit the access according to the instructions below. 1 Click Start on the Windows taskbar and then click Control Panel. than the Windows firewall is used. Refer to the Help section of the firewall software you use for details. Event: Can't play video or while. 164 VGX-XL1 Digital Living System - Sony VGX-XL1A | User Guide - Page 168
is used with other wireless LAN access points. Refer to the user's manual that came with the wireless LAN access point for detailed settings. • communication settings according to the instructions below. 1 Click Start on the Windows taskbar and then click Control . VGX-XL1 Digital Living System 165 - Sony VGX-XL1A | User Guide - Page 169
of this device. Follow the instructions below. 1 Click Start on the Windows taskbar and then select All Programs guide. Summary This completes the Troubleshooting Appendix. If still have unanswered questions, go to VAIO® Support Centrol and select a support option. 166 VGX-XL1 Digital Living System - Sony VGX-XL1A | User Guide - Page 170
® Album, Premiere®, Reader® • Adobe Systems Inc. For users in USA and Canada: Web Site http://www.adobe.com/support Telephone 800-685-3652 America Online® (Broadband or Dial-Up) • America Online, Inc. For users in USA and Canada Web Site http://www.aol.com VGX-XL1 Digital Living System 167 - Sony VGX-XL1A | User Guide - Page 171
Support Information (page 128). DVgate Plus™ software • Sony Electronics Inc. Connect a compatible digital video camera to your computer's i.LINK® port and capture video clips and still images. Edit clips from your video Solutions Web site http: www.marvell.com 168 VGX-XL1 Digital Living System - Sony VGX-XL1A | User Guide - Page 172
http://support.microsoft. Service • America Online, Inc. For users in USA and Canada: Web Site http://isp.netscape.com/help Telephone 866-541-8233 Norton Internet Security™ • Symantec Corporation For users in USA and Canada: Web Site http://www.symantec.com/techsupp VGX-XL1 Digital Living System - Sony VGX-XL1A | User Guide - Page 173
in USA and Canada: Web Site http://www.intermute.com/support.html VAIO® Action Setup • Sony Electronics Inc. VAIO Action Setup manages the settings for your computer's shortcut keys. For contacts about the software, see Program Support Information (page 128). 170 VGX-XL1 Digital Living System - Sony VGX-XL1A | User Guide - Page 174
• Sony Electronics Inc. The VAIO Wireless Utility walks you through setting up your wireless network connection and offers useful diagnostic tests to help keep your wireless network running smoothly. For contacts about the software, see Program Support Information (page 128). VGX-XL1 Digital Living - Sony VGX-XL1A | User Guide - Page 175
, Inc. For users in USA and Canada: Web site http://www.intervideo.com/jsp/Support.jsp Telephone 510-651-0888 ntel® Summary This completes the Program Support Appendix. If still have unanswered questions, go to VAIO® Support Centrol and select a support option. 172 VGX-XL1 Digital Living System
-
 1
1 -
 2
2 -
 3
3 -
 4
4 -
 5
5 -
 6
6 -
 7
7 -
8
-
9
-
10
-
11
-
12
-
13
-
14
-
15
-
16
-
17
-
18
-
19
-
20
-
21
-
22
-
23
-
24
-
25
-
26
-
27
-
28
-
29
-
30
-
31
-
32
-
33
-
34
-
35
-
36
-
37
-
38
-
39
-
40
-
41
-
42
-
43
-
44
-
45
-
46
-
47
-
48
-
49
-
50
-
51
-
52
-
53
-
54
-
55
-
56
-
57
-
58
-
59
-
60
-
61
-
62
-
63
-
64
-
65
-
66
-
67
-
68
-
69
-
70
-
71
-
72
-
73
-
74
-
75
-
76
-
77
-
78
-
79
-
80
-
81
-
82
-
83
-
84
-
85
-
86
-
87
-
88
-
89
-
90
-
91
-
92
-
93
-
94
-
95
-
96
-
97
-
98
-
99
-
100
-
101
-
102
-
103
-
104
-
105
-
106
-
107
-
108
-
109
-
110
-
111
-
112
-
113
-
114
-
115
-
116
-
117
-
118
-
119
-
120
-
121
-
122
-
123
-
124
-
125
-
126
-
127
-
128
-
129
-
130
-
131
-
132
-
133
-
134
-
135
-
136
-
137
-
138
-
139
-
140
-
141
-
142
-
143
-
144
-
145
-
146
-
147
-
148
-
149
-
150
-
151
-
152
-
153
-
154
-
155
-
156
-
157
-
158
-
159
-
160
-
161
-
162
-
163
-
164
-
165
-
166
-
167
-
168
-
169
-
170
-
171
-
172
-
173
-
174
-
175
 |
 |
User Guide
Digital Living System™
VGX-XL1