Sony VGX-XL1A User Guide - Page 117
Create Recovery Media using DVD media, Create Recovery Discs Step 3 of 3
 |
View all Sony VGX-XL1A manuals
Add to My Manuals
Save this manual to your list of manuals |
Page 117 highlights
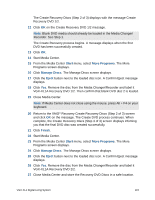
7 Click Next. A time bar displays the progress of the creation of the media disc. The Time Remaining field displays the time left to complete the writing process for all required discs. Once the disc is full, a message appears requesting that you insert the next disc, if necessary. Click OK to continue. Tip: Label each recovery discs to avoid confusion when using the discs for recovery procedures. 8 After the last disc is created, the Create Recovery Discs (Step 3 of 3) screen appears informing you that the creation process is complete. Click Finish to exit VAIO Recovery. This completes the VAIO Recovery option Create Recovery Discs. Create Recovery Media using DVD media Before you begin, make sure both the VGX-XL1A Personal Computer and the VGP-XL1B media changer/recorder are turned on and that all discs have been removed from the VGP-XL1B Media Changer/Recorder. To create recovery discs using DVD media 1 Load two (2) blank DVD discs, either two DVD-R/RW or DVD+R/RW, into the VGP-XL1B Media Changer/Recorder. 2 Start Media Center. 3 From the Media Center Start menu, select More Programs. The More Programs screen displays. 4 Click Manage Discs. The Manage Discs screen displays with the New Discs Found message. 5 Click Yes on the New Discs Found message to perform a disc scan. 6 Click OK when the Disc Scan Complete message displays. 7 Close Media Center. 8 Start VAIO® Recovery. • From the Windows Start menu, point to VAIO Recovery and then click VAIO Recovery. The VAIO Recovery main menu screen displays. 9 Click Create Recovery Discs and carefully read the onscreen information. 10 Click Next. The Create Recovery Discs (Step 1 of 3) screen displays. 11 Select the option Create recovery disc(s) using 2 DVD(s) and click Next. 114 VGX-XL1 Digital Living System
-
 1
1 -
2
-
3
-
4
-
5
-
6
-
7
-
8
-
9
-
10
-
11
-
12
-
13
-
14
-
15
-
16
-
17
-
18
-
19
-
20
-
21
-
22
-
23
-
24
-
25
-
26
-
27
-
28
-
29
-
30
-
31
-
32
-
33
-
34
-
35
-
36
-
37
-
38
-
39
-
40
-
41
-
42
-
43
-
44
-
45
-
46
-
47
-
48
-
49
-
50
-
51
-
52
-
53
-
54
-
55
-
56
-
57
-
58
-
59
-
60
-
61
-
62
-
63
-
64
-
65
-
66
-
67
-
68
-
69
-
70
-
71
-
72
-
73
-
74
-
75
-
76
-
77
-
78
-
79
-
80
-
81
-
82
-
83
-
84
-
85
-
86
-
87
-
88
-
89
-
90
-
91
-
92
-
93
-
94
-
95
-
96
-
97
-
98
-
99
-
100
-
101
-
102
-
103
-
104
-
105
-
106
-
107
-
108
-
109
-
110
-
111
-
 112
112 -
 113
113 -
 114
114 -
 115
115 -
 116
116 -
 117
117 -
 118
118 -
 119
119 -
 120
120 -
 121
121 -
 122
122 -
123
-
124
-
125
-
126
-
127
-
128
-
129
-
130
-
131
-
132
-
133
-
134
-
135
-
136
-
137
-
138
-
139
-
140
-
141
-
142
-
143
-
144
-
145
-
146
-
147
-
148
-
149
-
150
-
151
-
152
-
153
-
154
-
155
-
156
-
157
-
158
-
159
-
160
-
161
-
162
-
163
-
164
-
165
-
166
-
167
-
168
-
169
-
170
-
171
-
172
-
173
-
174
-
175
 |
 |
