Sony VGX-XL1A User Guide - Page 118
Start, More Programs, Manage Discs, Eject, Finish
 |
View all Sony VGX-XL1A manuals
Add to My Manuals
Save this manual to your list of manuals |
Page 118 highlights
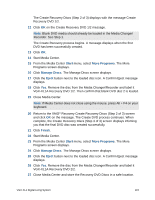
The Create Recovery Discs (Step 2 of 3) displays with the message Create Recovery DVD 1/2. 12 Click OK on the Create Recovery DVD 1/2 message. Note: Blank DVD media should already be loaded in the Media Changer/ Recorder. See Step 1. The Create Recovery process begins. A message displays when the first DVD has been successfully created. 13 Click OK. 14 Start Media Center. 15 From the Media Center Start menu, select More Programs. The More Programs screen displays. 16 Click Manage Discs. The Manage Discs screen displays. 17 Click the Eject button next to the loaded disc icon. A Confirm Eject message displays. 18 Click Yes. Remove the disc from the Media Changer/Recorder and label it VGX-XL1A Recovery DVD 1/2. Then confirm that blank DVD disc 2 is loaded. 19 Close Media Center. Note: If Media Center does not close using the mouse, press Alt + F4 on your keyboard. 20 Return to the VAIO® Recovery Create Recovery Discs (Step 2 of 3) screen and click OK on the message. The Create DVD process continues. When complete, the Create Recovery Discs (Step 3 of 3) screen displays infoming you that the final DVD disc was created successfully. 21 Click Finish. 22 Start Media Center. 23 From the Media Center Start menu, select More Programs. The More Programs screen displays. 24 Click Manage Discs. The Manage Discs screen displays. 25 Click the Eject button next to the loaded disc icon. A Confirm Eject message displays. 26 Click Yes. Remove the disc from the Media Changer/Recorder and label it VGX-XL1A Recovery DVD 2/2. 27 Close Media Center and store the Recovery DVD Discs in a safe location. VGX-XL1 Digital Living System 115
-
 1
1 -
2
-
3
-
4
-
5
-
6
-
7
-
8
-
9
-
10
-
11
-
12
-
13
-
14
-
15
-
16
-
17
-
18
-
19
-
20
-
21
-
22
-
23
-
24
-
25
-
26
-
27
-
28
-
29
-
30
-
31
-
32
-
33
-
34
-
35
-
36
-
37
-
38
-
39
-
40
-
41
-
42
-
43
-
44
-
45
-
46
-
47
-
48
-
49
-
50
-
51
-
52
-
53
-
54
-
55
-
56
-
57
-
58
-
59
-
60
-
61
-
62
-
63
-
64
-
65
-
66
-
67
-
68
-
69
-
70
-
71
-
72
-
73
-
74
-
75
-
76
-
77
-
78
-
79
-
80
-
81
-
82
-
83
-
84
-
85
-
86
-
87
-
88
-
89
-
90
-
91
-
92
-
93
-
94
-
95
-
96
-
97
-
98
-
99
-
100
-
101
-
102
-
103
-
104
-
105
-
106
-
107
-
108
-
109
-
110
-
111
-
112
-
 113
113 -
 114
114 -
 115
115 -
 116
116 -
 117
117 -
 118
118 -
 119
119 -
 120
120 -
 121
121 -
 122
122 -
 123
123 -
124
-
125
-
126
-
127
-
128
-
129
-
130
-
131
-
132
-
133
-
134
-
135
-
136
-
137
-
138
-
139
-
140
-
141
-
142
-
143
-
144
-
145
-
146
-
147
-
148
-
149
-
150
-
151
-
152
-
153
-
154
-
155
-
156
-
157
-
158
-
159
-
160
-
161
-
162
-
163
-
164
-
165
-
166
-
167
-
168
-
169
-
170
-
171
-
172
-
173
-
174
-
175
 |
 |