Sony VPL-VW85 Operating Instructions - Page 51
Wide Mode, Computer signal, Over Scan, Screen Area, V Center, Vertical Size, Adjust Signal
 |
UPC - 027242774346
View all Sony VPL-VW85 manuals
Add to My Manuals
Save this manual to your list of manuals |
Page 51 highlights
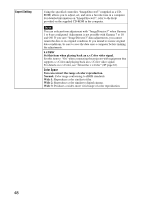
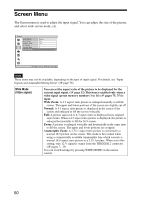
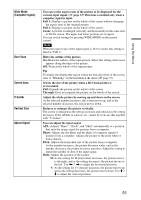
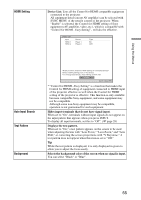
Using the Menus Wide Mode (Computer signal) Over Scan Screen Area V Center Vertical Size Adjust Signal You can set the aspect ratio of the picture to be displayed for the current input signal. (1 page 33) This item is enabled only when a computer signal is input. Full 1: Displays a picture on the whole of the screen without changing the aspect ratio of the original picture. Full 2: Displays a picture on the whole of the screen. Zoom: A picture is enlarged vertically and horizontally in the same ratio to fill the screen. The upper and lower portions are cropped. You can switch settings by pressing WIDE MODE on the remote control. Note When the aspect ratio of the input signal is 16:9 or wider, this setting is fixed at "Full 1". Hides the outline of the picture. On: Hides the outline of the input picture. Select this setting when noise appears along the edge of the picture. Off: Projects the whole of the input picture. Tip To display the displayable region within the four directions of the screen, refer to "Blanking" on the Installation menu (1 page 57). Selects the size of the picture when a Hi-Vision picture is overscanned. Full: Expands the picture on the whole of the screen. Through: Does not expands the picture on the whole of the screen. Adjust the whole picture by moving up and down on the screen. As the selected number increases, the screen moves up, and as the selected number decreases, the screen moves down. Reduces or enlarges the picture vertically. The screen is enlarged as the setting increases and reduced as the setting decreases. If the subtitle of a movie, etc. cannot be seen, use this together with "V Center". You can adjust the input signal. APA: Adjusts "Phase", "Pitch", and "Shift" automatically to a position that suits the image signal for pictures from a computer. Phase: Adjusts the dot phase and the phase of computer signal of pictures from a computer. Adjusts the picture to the point where it looks clearest. Pitch: Adjusts the horizontal size of the picture from a computer. As the number increases, the picture becomes wider, and as the number decreases, the picture becomes narrower. Adjust the setting to match the number of dots of the input signal. Shift: Adjusts the position of the picture. H: As the setting for H (horizontal) increases, the picture moves to the right, and as the setting decreases, the picture moves to the left. Use < / , to adjust the horizontal position. V: As the setting for V (vertical) increases, the picture moves up, and as the setting decreases, the picture moves down. Use M / m to adjust the vertical position. 51
-
 1
1 -
2
-
3
-
4
-
5
-
6
-
7
-
8
-
9
-
10
-
11
-
12
-
13
-
14
-
15
-
16
-
17
-
18
-
19
-
20
-
21
-
22
-
23
-
24
-
25
-
26
-
27
-
28
-
29
-
30
-
31
-
32
-
33
-
34
-
35
-
36
-
37
-
38
-
39
-
40
-
41
-
42
-
43
-
44
-
45
-
 46
46 -
 47
47 -
 48
48 -
 49
49 -
 50
50 -
 51
51 -
 52
52 -
 53
53 -
 54
54 -
 55
55 -
 56
56 -
57
-
58
-
59
-
60
-
61
-
62
-
63
-
64
-
65
-
66
-
67
-
68
-
69
-
70
-
71
-
72
-
73
-
74
-
75
-
76
-
77
-
78
-
79
-
80
-
81
-
82
-
83
-
84
-
85
-
86
 |
 |
