Sony VPL-VW85 Operating Instructions - Page 57
Blanking, Panel Alignment, Pattern Color
 |
UPC - 027242774346
View all Sony VPL-VW85 manuals
Add to My Manuals
Save this manual to your list of manuals |
Page 57 highlights
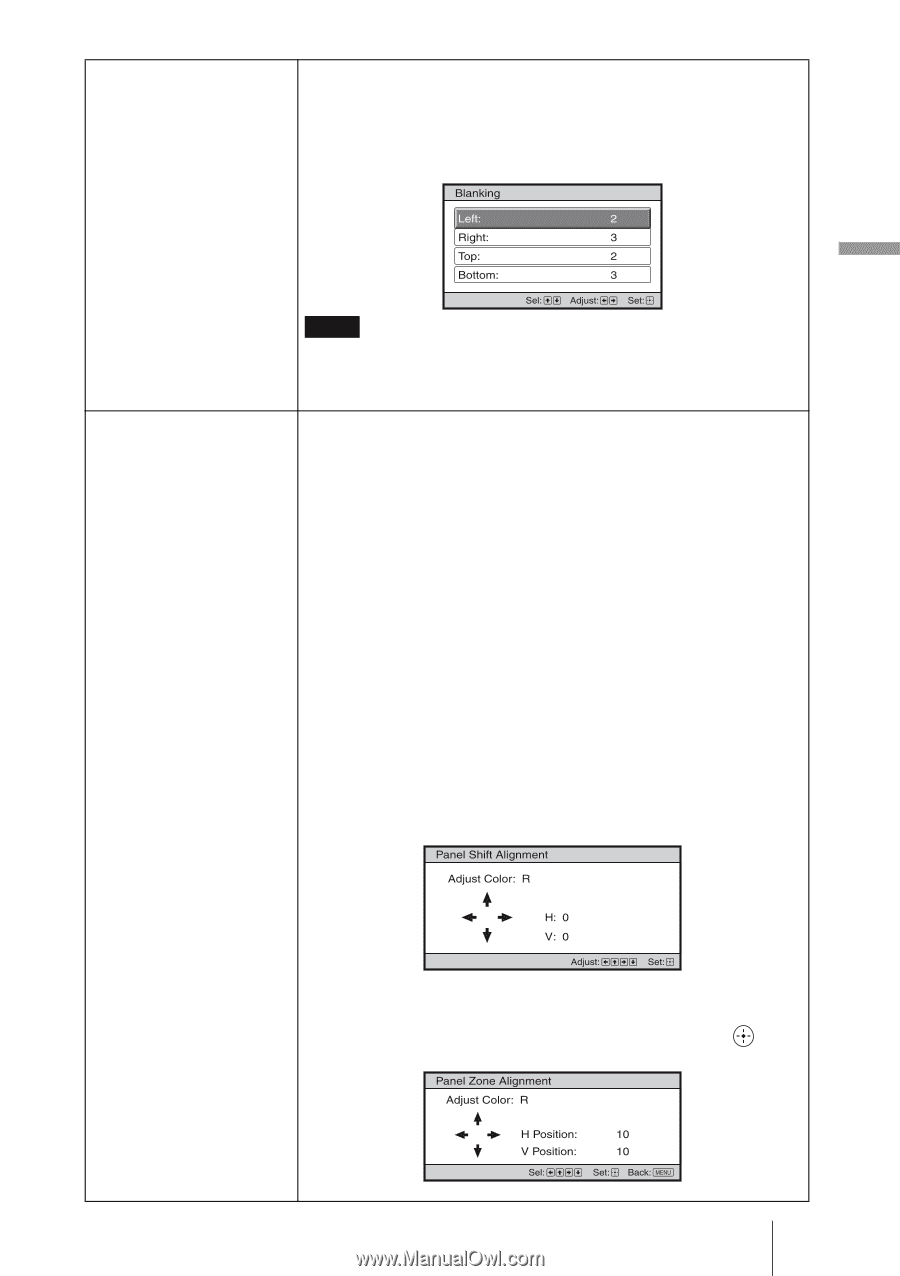
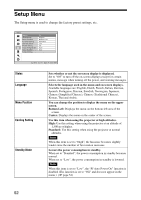
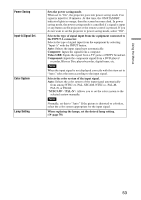
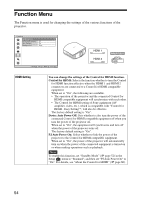
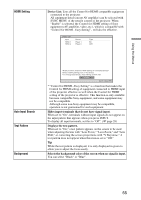
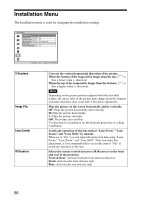
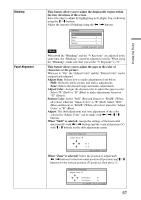
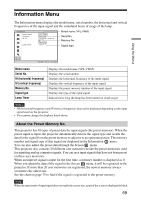
Using the Menus Blanking This feature allows you to adjust the displayable region within the four directions of the screen. Select the edge to adjust by highlighting Left, Right, Top, or Bottom using the M / m buttons. Adjust the amount of blanking using the < / , buttons. Panel Alignment Note When both the "Blanking" and the "V Keystone" are adjusted at the same time, the "Blanking" cannot be adjusted correctly. When using the "Blanking", make sure that you set the "V Keystone" to "0". This feature allows you to adjust the gaps in the color of characters or the picture. When set to "On", the "Adjust Color" and the "Pattern Color" can be assigned and adjusted. Adjust Item: Selects how to make adjustments from below. Shift: Shifts the whole picture and makes adjustments. Zone: Selects the desired range and makes adjustments. Adjust Color: Assigns the desired color to adjust the gaps in color. Select "R" (Red) or "B" (Blue) to make adjustments based on "G" (Green). Pattern Color: Select "R/G" (Red and Green) or "R/G/B" (White, all colors) when the "Adjust Color" is "R" (Red). Select "B/G" (Blue and Green) or "R/G/B" (White, all colors) when the "Adjust Color" is "B" (Blue). Adjust: The shift adjustment and zone adjustment of the color selected in "Adjust Color" can be made with < / ,, M / m buttons. When "Shift" is selected: Assign the settings of the horizontal direction (H) with < / , buttons and the vertical direction (V) with M / m buttons on the shift adjustment screen. When "Zone" is selected: Select the position to adjust with < / , buttons for the horizontal position (H position) and M / m buttons for the vertical position (V position), then press . 57
-
 1
1 -
2
-
3
-
4
-
5
-
6
-
7
-
8
-
9
-
10
-
11
-
12
-
13
-
14
-
15
-
16
-
17
-
18
-
19
-
20
-
21
-
22
-
23
-
24
-
25
-
26
-
27
-
28
-
29
-
30
-
31
-
32
-
33
-
34
-
35
-
36
-
37
-
38
-
39
-
40
-
41
-
42
-
43
-
44
-
45
-
46
-
47
-
48
-
49
-
50
-
51
-
 52
52 -
 53
53 -
 54
54 -
 55
55 -
 56
56 -
 57
57 -
 58
58 -
 59
59 -
 60
60 -
 61
61 -
 62
62 -
63
-
64
-
65
-
66
-
67
-
68
-
69
-
70
-
71
-
72
-
73
-
74
-
75
-
76
-
77
-
78
-
79
-
80
-
81
-
82
-
83
-
84
-
85
-
86
 |
 |