Stihl SR 450 Product Instruction Manual - Page 18
Fueling - pressure pump
 |
View all Stihl SR 450 manuals
Add to My Manuals
Save this manual to your list of manuals |
Page 18 highlights
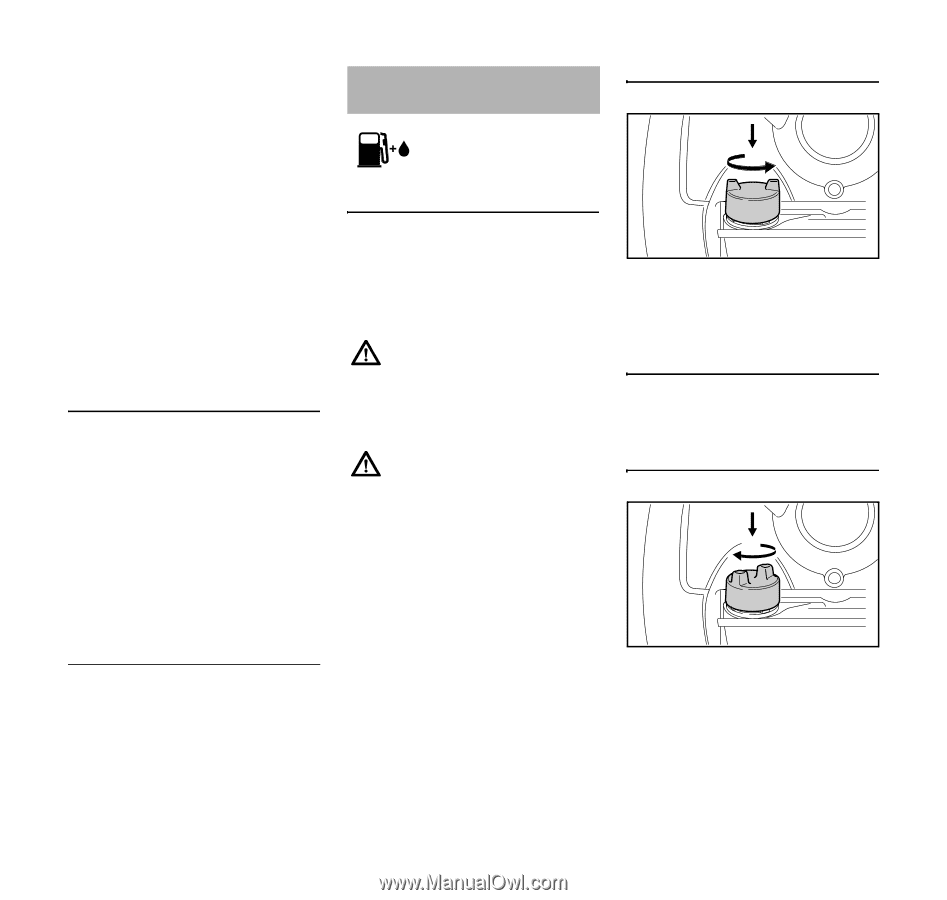
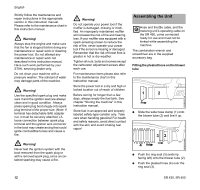
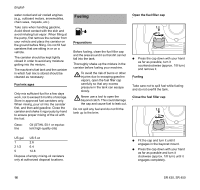
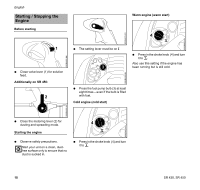
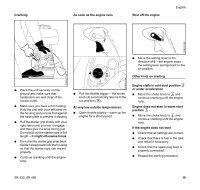
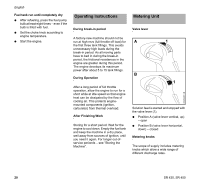
0002BA014 KN English water cooled and air cooled engines (e.g., outboard motors, snowmobiles, chain saws, mopeds, etc.). Take care when handling gasoline. Avoid direct contact with the skin and avoid inhaling fuel vapor. When filling at the pump, first remove the canister from your vehicle and place the canister on the ground before filling. Do not fill fuel canisters that are sitting in or on a vehicle. The canister should be kept tightly closed in order to avoid any moisture getting into the mixture. The machine's fuel tank and the canister in which fuel mix is stored should be cleaned as necessary. Fuel mix ages Only mix sufficient fuel for a few days work, not to exceed 3 months of storage. Store in approved fuel-canisters only. When mixing, pour oil into the canister first, and then add gasoline. Close the canister and shake it vigorously by hand to ensure proper mixing of the oil with the fuel. Gasoline Oil (STIHL 50:1 or equivalent high-quality oils) Fueling Preparations Before fueling, clean the fuel filler cap and the area around it so that dirt cannot fall into the tank. Thoroughly shake up the mixture in the canister before fueling your machine. To avoid the risk of burns or other injuries due to escaping gasoline vapors, open the fuel filler cap carefully so that any excess pressure in the tank can escape slowly. Never use a tool to open the bayonet catch. This could damage the cap and cause fuel to leak out. Do not spill any fuel and do not fill the tank up to the brim. Open the fuel filler cap 1. 2. N Press the cap down with your hand as far as possible, turn it counterclockwise (approx. 1/8 turn) and remove it. Fueling Take care not to spill fuel while fueling and do not overfill the tank. Close the fuel filler cap 1. 2. US gal. 1 2 1/2 5 US fl.oz 2.6 6.4 12.8 Dispose of empty mixing-oil canisters only at authorized disposal locations. N Fit the cap and turn it until it engages in the bayonet mount. N Press the cap down with your hand as far as possible and turn it clockwise (approx. 1/8 turn) until it engages completely. 0002BA015 KN 16 SR 430, SR 450
-
 1
1 -
2
-
3
-
4
-
5
-
6
-
7
-
8
-
9
-
10
-
11
-
12
-
 13
13 -
 14
14 -
 15
15 -
 16
16 -
 17
17 -
 18
18 -
 19
19 -
 20
20 -
 21
21 -
 22
22 -
 23
23 -
24
-
25
-
26
-
27
-
28
-
29
-
30
-
31
-
32
-
33
-
34
-
35
-
36
-
37
-
38
-
39
-
40
-
41
-
42
-
43
-
44
-
45
-
46
-
47
-
48
-
49
-
50
-
51
-
52
-
53
-
54
-
55
-
56
-
57
-
58
-
59
-
60
-
61
-
62
-
63
-
64
-
65
-
66
-
67
-
68
-
69
-
70
-
71
-
72
-
73
-
74
-
75
-
76
-
77
-
78
-
79
-
80
-
81
-
82
-
83
-
84
-
85
-
86
-
87
-
88
-
89
-
90
-
91
-
92
-
93
-
94
-
95
-
96
-
97
-
98
-
99
-
100
 |
 |